PC Games 1 Terabyte SATA Hard Drive (3.5) Desktop HDD
PC Games 1 Terabyte SATA Hard Drive (3.5) Desktop HDD
What is a High Capacity Storage Drive?
A high capacity storage drive is a device designed to store large amounts of data efficiently and reliably. In the context of PC gaming, a high capacity storage drive allows gamers to install multiple games and store game files, textures, and other assets without worrying about running out of space. One popular choice among gamers is the 1 Terabyte SATA hard drive, which offers ample storage for a wide range of games and applications.
Understanding SATA Interface Hard Drive
SATA, or Serial Advanced Technology Attachment, is a standard interface used to connect storage devices like hard drives and solid-state drives (SSDs) to a computer's motherboard. A SATA interface hard drive, such as the 1 Terabyte SATA hard drive, connects to the motherboard via a SATA data cable and a power cable. This connection allows the computer to read and write data to the hard drive, enabling users to store and access their files, games, and applications.
Choosing the Right 3.5 inch Hard Drive
When selecting a 3.5 inch hard drive, consider the following factors:
- Storage Capacity: Ensure the hard drive has enough capacity to store all your games and applications. For gaming purposes, a 1 Terabyte SATA hard drive is a good starting point.
- Performance: Look for a hard drive with a fast data transfer rate and low seek time to minimize loading times and improve game performance.
- Reliability: Choose a hard drive with a good reputation for reliability and durability. Look for hard drives with low error rates and long warranty periods.
How to Select a Desktop HDD for PC Games
Selecting the right desktop HDD for PC games involves identifying your storage needs, comparing different models, and evaluating their performance and reliability.
Identifying Your Storage Needs
Determine how much storage space you need by considering the size of the games you plan to install and any other applications or files you want to store on the hard drive. A 1 Terabyte SATA hard drive is a good starting point for most gamers, but if you have a large library of games or plan to store other media, you may need more storage capacity.
Comparing Different Models
Compare different models of 1 Terabyte SATA hard drives based on their features, performance, and price. Look for hard drives with fast data transfer rates, low seek times, and reliable performance. Consider the warranty period and customer support offered by the manufacturer.
Evaluating Performance and Reliability
Evaluate the performance and reliability of different models of 1 Terabyte SATA hard drives by reading reviews and comparing benchmarks. Look for hard drives with low error rates and long warranty periods. Consider the manufacturer's reputation for reliability and customer support.
How to Install a 1 Terabyte SATA Hard Drive
Installing a 1 Terabyte SATA hard drive involves gathering the necessary tools and equipment, following a step-by-step installation process, and troubleshooting common issues.
Tools and Equipment Needed
To install a 1 Terabyte SATA hard drive, you will need the following tools and equipment:
- SATA data cable: Connects the hard drive to the motherboard.
- Power cable: Provides power to the hard drive.
- Screwdriver: Used to secure the hard drive to the computer case.
- Anti-static wrist strap: Protects the hard drive from static electricity.
Step-by-Step Installation Process
Follow these steps to install a 1 Terabyte SATA hard drive:
- Prepare the computer: Turn off the computer and unplug it from the power source.
- Open the computer case: Remove the side panel of the computer case.
- Install the hard drive: Secure the hard drive to the computer case using screws and the mounting bracket.
- Connect the data cable: Connect one end of the SATA data cable to the hard drive and the other end to an available SATA port on the motherboard.
- Connect the power cable: Connect one end of the power cable to the hard drive and the other end to a power supply connector.
- Close the computer case: Replace the side panel of the computer case.
- Power on the computer: Plug the computer back into the power source and turn it on.
- Initialize the hard drive: Follow the instructions in the operating system to initialize the hard drive and partition it as needed.
Troubleshooting Common Issues
If you encounter issues during installation, try the following troubleshooting steps:
- Check connections: Ensure all cables are securely connected to the hard drive and the motherboard.
- Check power supply: Ensure the power supply is providing sufficient power to the hard drive.
- Check BIOS settings: Ensure the hard drive is recognized in the BIOS settings.
Maximizing the Potential of Your New Storage Solution
Maximizing the potential of your new storage solution involves organizing your files, enhancing game performance, and maintaining optimal storage health.
Organizing Your Files
Organize your files by creating separate folders for games, applications, and other files. This will help you easily locate and manage your files.
Enhancing Game Performance
Enhance game performance by installing games on the hard drive instead of the operating system drive. This will reduce loading times and improve overall game performance.
Maintaining Optimal Storage Health
Maintain optimal storage health by regularly checking the hard drive for errors and performing disk maintenance tasks. This will help ensure the hard drive remains reliable and performs well over time.

Ezgameshub

Review
You May Also Like
Win7 XP System Driver-Free Wireless Network Card Connect to Mobile Phone Hotspot Network Desktop Computer Wi-Fi Receiver
Bykski CPU Water Block Use for INTEL LGA1150 1151 1155 1156 1200 1700 2011 2066 X99 I7 Cooler Radiator RGB SYNC /CPU-XPR-A-MC-V3

Samsung SSD 870 EVO: 500GB & 1TB Internal SATA3 2.5 Inch SSD

Samsung Seagate Momentus ST500LM012 2.5" 500GB 5400 RPM HDD Hard Disk

NAS DS1621xs 2419 RAM 16G DDR4 2RX8 2666 ECC SODIMM 16GB Storage Memory For Synology

Modern Quilted Laptop Sleeve 13 14 Inch with Smooth Zippered Computer Storage Case for Business and Student Use

MEAN WELL LED Waterproof Power Supply: LPV-20 Series

15.6" 144Hz Laptop LCD Screen B156HAN08.0 08.2 NV156FHM-NY6 N156HMA-EA1 LP156WFG-SPB1/B2/B3/B5 Display Matrix Panel eDP 40 Pins
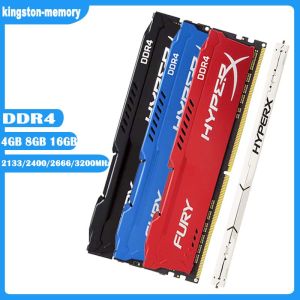
HyperX FURY 16GB 8GB 4GB DDR4 3200MHz 2666MHz 2400MHz 2133MHz Desktop RAM Memory 1.2V DIMM 288-pin Desktop Inter&AMD Memory\\n\\nIn this comprehensive guide, we will explore the world of HyperX FURY DDR4 RAM, including its specifications, benefits, compatibility, installation, optimization, and troubleshooting. We will cover various aspects of the HyperX FURY RAM, including its 3200MHz & 2666MHz speeds, 288-pin DIMM desktop design, and 1.2V low voltage operation. This guide aims to help you make an informed decision about which HyperX FURY RAM configuration best suits your needs.\\n\\n Understanding HyperX FURY RAM Specifications\\n\\n What is 3200MHz & 2666MHz RAM?\\n\\nHyperX FURY DDR4 RAM is available in various speeds, including 3200MHz and 2666MHz. These speeds refer to the clock frequency of the RAM, which determines how quickly it can transfer data to and from the system. Higher clock frequencies generally result in faster performance. However, it's important to note that the actual performance improvement depends on other factors, such as the CPU, motherboard, and storage devices used in the system.\\n\\n How Does 288-pin DIMM Desktop RAM Work?\\n\\nHyperX FURY DDR4 RAM is designed as a 288-pin DIMM module, which is a standard form factor for desktop computers. This type of RAM is installed in the memory slots on the motherboard and communicates with the CPU via the memory controller. The 288-pin design allows for a high-speed data transfer rate, ensuring that the RAM can keep up with the demands of modern applications and games.\\n\\n What Are the Benefits of 1.2V Low Voltage RAM?\\n\\nHyperX FURY DDR4 RAM operates at a low voltage of 1.2V, which offers several benefits. Lower voltage requirements result in reduced power consumption, leading to lower operating temperatures and improved energy efficiency. Additionally, low voltage RAM can help extend the lifespan of the memory module by reducing the stress on its components.\\n\\n Choosing the Right HyperX FURY RAM\\n\\n How to Select Between 16GB, 8GB, & 4GB RAM?\\n\\nHyperX FURY DDR4 RAM is available in various capacities, including 16GB, 8GB, and 4GB. When choosing the right configuration, consider the demands of your applications and games. More RAM allows for better multitasking and improved performance in memory-intensive tasks. However, it's essential to balance capacity with cost and system requirements.\\n\\n How Does HyperX FURY RAM Compare to Other Brands?\\n\\nHyperX FURY DDR4 RAM competes with other popular brands like Corsair, G.Skill, and Crucial. While all these brands offer high-quality RAM, HyperX FURY stands out due to its low voltage operation, compatibility with both Intel and AMD platforms, and excellent performance at various clock speeds.\\n\\n What Are the Compatibility Requirements for Inter&AMD Memory?\\n\\nHyperX FURY DDR4 RAM is designed to work with both Intel and AMD platforms, ensuring broad compatibility. However, it's important to check the specifications of your motherboard and CPU to ensure they support the desired RAM configuration. Additionally, some systems may require specific BIOS updates or settings adjustments to achieve optimal performance.\\n\\n Installing & Optimizing HyperX FURY RAM\\n\\n How to Install 1x RAM Memory Module?\\n\\nInstalling HyperX FURY DDR4 RAM is relatively straightforward. First, power off your computer and unplug all cables. Next, open the case and locate the memory slots on the motherboard. Insert the RAM module at a 45-degree angle, then press down until it clicks into place. Finally, close the case, reconnect the cables, and power on the system.\\n\\n How to Optimize Performance with HyperX FURY RAM?\\n\\nTo optimize performance with HyperX FURY DDR4 RAM, consider the following tips:\\n\\n- Ensure that your motherboard and CPU support the desired RAM configuration.\\n- Install the RAM modules in pairs for dual-channel operation, if possible.\\n- Adjust the BIOS settings to enable XMP (Extreme Memory Profile) or manually configure the RAM timings and voltage.\\n- Keep the system clean and well-ventilated to maintain optimal operating temperatures.\\n\\n Troubleshooting Common Issues with HyperX FURY RAM\\n\\nIf you encounter issues with HyperX FURY DDR4 RAM, consider the following troubleshooting steps:\\n\\n- Verify that the RAM is properly seated in the memory slots.\\n- Check the system BIOS for any updates or settings adjustments.\\n- Ensure that the RAM configuration is supported by the motherboard and CPU.\\n- Try installing the RAM in a different slot or removing other RAM modules to isolate the issue.\\n\\nBy following this comprehensive guide, you'll be well-equipped to choose, install, optimize, and troubleshoot HyperX FURY DDR4 RAM for your desktop computer. Remember to consider your system requirements, compatibility, and performance goals when making your decision.\n}

Upgrade TPM 2.0 Security Module Chip SPI LPC Supports Multi-brand Motherboards 12 14 18 20 Pins Stable Performance Easy
XUANFENG Quiet CPU Cooler for PC 2/4/6 Heat Pipe Processor Air-cooled PWM/Fan Compatible LGA2011 x79 x99 AMD 115x 1200 1700 18xx