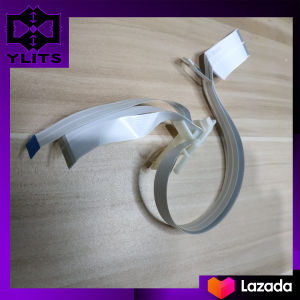
Head Carrier Flex for Epson L Series Printers
Head Carrier Flex for Epson L Series Printers
Introduction to Head Carrier Flex
Head carrier flex, also known as print head cable and carriage sensor cable, is a crucial component in Epson L series printers. This article focuses on the Epson L110, L111, L120, L130, L132, L210, L211, L220, L222, L300, and L301 models, providing detailed information about head carrier flex maintenance, replacement, troubleshooting, and compatible accessories.
Understanding Head Carrier Flex Components
The head carrier flex consists of two main parts: the print head cable and the carriage sensor cable. The print head cable connects the printer's print head to the main board, allowing data transmission and controlling the print head's movement. The carriage sensor cable connects the printer's carriage to the main board, enabling communication between the carriage and the print head.
Importance of Head Carrier Flex in Printer Maintenance
Regular maintenance of the head carrier flex is essential to ensure optimal printer performance. A malfunctioning head carrier flex can lead to issues such as print quality degradation, skipped lines, and print head alignment problems. By understanding the importance of head carrier flex maintenance, users can extend the life of their Epson L series printers and maintain high-quality prints.
How to Replace Head Carrier Flex
Replacing the head carrier flex is a straightforward process that requires minimal tools and materials. Follow this step-by-step guide to successfully replace the head carrier flex in your Epson L series printer.
Tools & Materials Needed for Replacement
- Screwdriver (Philips #1)
- New head carrier flex (compatible with your printer model)
Step-by-Step Guide to Replacing Head Carrier Flex
- Turn off the printer and unplug it from the power source.
- Remove the ink cartridges and set them aside.
- Open the printer's top cover and locate the head carrier flex.
- Disconnect the old head carrier flex from the print head and carriage.
- Carefully remove the old head carrier flex from the printer.
- Install the new head carrier flex by connecting it to the print head and carriage.
- Close the printer's top cover and reinsert the ink cartridges.
- Power on the printer and run a print head alignment test to ensure proper installation.
Troubleshooting Common Issues
Despite regular maintenance and proper replacement, some issues may still arise with the head carrier flex. Identifying and addressing these problems promptly can help maintain optimal printer performance.
Identifying Head Carrier Flex Problems
Common signs of head carrier flex issues include:
- Print quality degradation
- Skipped lines
- Print head alignment problems
Solutions for Common Head Carrier Flex Issues
To resolve these issues, try the following solutions:
- Clean the print head and carriage sensor using the printer's built-in cleaning function.
- Perform a print head alignment test to ensure proper alignment.
- Replace the head carrier flex if the problem persists.
Compatible Models & Accessories
The head carrier flex is compatible with various Epson L series printers, including the L110, L111, L120, L130, L132, L210, L211, L220, L222, L300, and L301 models. Additionally, consider purchasing the following Epson printer accessories to enhance your printing experience:
- Ink cartridges
- Printer maintenance kit
- Cleaning solution
- Print head cleaning kit
By following this guide, users can maintain their Epson L series printers effectively and enjoy high-quality prints for years to come.

ylits parts
You May Also Like
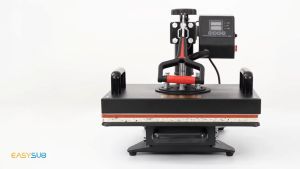
BLOOM 6 in1 Multifunction Heat Press Machine mini printer for T-Shirt / Mug / Plate / Capprinter for small business
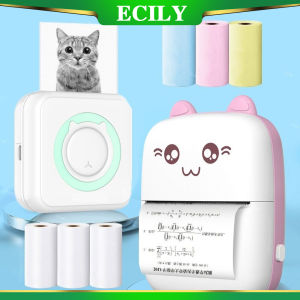
ECILY Mini Thermal Label Printer: A Smart & Portable Solution for Your Phone

CoLiDo 3.0 3D Printer: A Comprehensive Guide
Rubber Roller Rubber Number Letter Scrapbooking Rotating Business for Office School
ORIGINAL Sony Ultrasound Thermal Paper Type 5 UPP-110HG High Gloss (1 roll)
New 4 Rolls Colors Thermal Paper for Color Printing Paper for Instant Printing Camera Kids Color Papers No Ink Print
PP Supplies - QUAFF Dye Ink 100ML (CMYK ) for All Inkjet Printers
TN2380 TN660 + DR2355 Toner Cartridge For Use and Compatible to Brother with Big Magnetic Roller Installed
GZQIANJI Omnidirectional Hands-Free Platform 1D 2D Desktop Barcode Scanner with Automatic Sensing Screen Scanning QR Bar Code Scan Reader for POS PC Supermarket Bookstore Retail Mall
GTCODESTAR X-9701B Inventory Wireless 1D 2D Barcode Scanner Qr Code Codigo De Barras Scanners
Eyoyo Portable Mini Finger Reader: A Comprehensive Guide