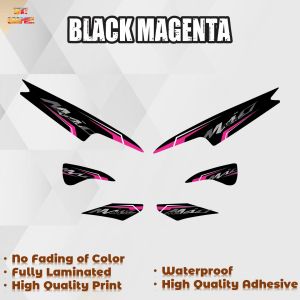
YAMAHA MIO SPORTY SMILE INDO DESIGN 9 DECALS (WATERPROOF LAMINATED FADE PROOF)\\n\\n What Are Fade Proof Motorcycle Stickers?\\n\\nFade proof motorcycle stickers are specially designed adhesive decals that are made to withstand harsh weather conditions and resist fading over time. These custom design decals for vehicles can enhance the appearance of your ride while expressing your personal style.\\n\\n Custom Design Decals for Vehicles: An Overview\\n\\nCustom design decals offer a wide range of options for vehicle customization. From simple designs to intricate patterns, these decals can be tailored to fit your preferences and style. They come in various materials and finishes, including waterproof laminated decals, which provide durability and longevity.\\n\\n YAMAHA MIO Sporty Design Decals: A Closer Look\\n\\nThe YAMAHA MIO Sporty Smile INDO Design Decals are a set of 9 fade proof motorcycle stickers specifically designed for the Yamaha MIO scooter. These waterproof laminated decals feature a sporty smile design that adds a touch of personality to your ride.\\n\\n 9 Decals for MIO: The Complete Set\\n\\nThe complete set includes 9 decals that can be applied to various parts of your Yamaha MIO scooter. Each decal is carefully crafted to ensure a perfect fit and a seamless look.\\n\\n Waterproof Laminated Decals: Key Features\\n\\nWaterproof laminated decals offer several benefits, including durability, easy installation, and maintenance.\\n\\n Durable Construction: Withstand Harsh Weather Conditions\\n\\nThese decals are made from high-quality materials that can withstand harsh weather conditions, such as rain, snow, and extreme temperatures. They are designed to resist fading, peeling, and cracking over time.\\n\\n Easy Installation: A Step-by-Step Guide\\n\\nInstalling these decals is simple and straightforward. Follow these steps:\\n\\n1. Clean the surface of your Yamaha MIO scooter where you want to apply the decal.\\n2. Peel off the backing paper from the decal.\\n3. Position the decal on the desired location.\\n4. Press down firmly to ensure a secure bond.\\n5. Trim any excess material around the edges.\\n\\n Maintenance Tips: Keeping Your Decals Looking Great\\n\\nTo keep your waterproof laminated decals looking great, follow these tips:\\n\\n* Avoid using abrasive cleaners or scrubbing tools.\\n* Clean the decals regularly with mild soap and water.\\n* Dry the decals thoroughly after cleaning.\\n\\n How to Choose the Right Decals for Your YAMAHA MIO\\n\\nWhen selecting decals for your Yamaha MIO scooter, consider the following factors:\\n\\n Assessing Your Style Preferences\\n\\nChoose decals that reflect your personal style and preferences. Consider the color scheme, design, and overall appearance of the decals.\\n\\n Considering Vehicle Compatibility\\n\\nMake sure the decals are compatible with your Yamaha MIO scooter. Check the size and shape of the decals to ensure they fit properly.\\n\\n Evaluating Quality & Durability\\n\\nLook for decals that are made from high-quality materials and have a reputation for durability. Check customer reviews and ratings to get an idea of the product's performance.\\n\\n Showcasing Your YAMAHA MIO with Sporty Smile INDO Design Decals\\n\\nEnhance the appearance of your Yamaha MIO scooter with the Sporty Smile INDO Design Decals. These waterproof laminated decals not only add a touch of personality to your ride but also help you stand out in a crowd.\\n\\n Enhancing Your Ride's Appearance\\n\\nThe Sporty Smile INDO Design Decals can transform the look of your Yamaha MIO scooter. They add a sporty and stylish touch that complements the vehicle's design.\\n\\n Expressing Your Personal Style\\n\\nThese decals allow you to express your personal style and showcase your unique personality. Whether you prefer bold designs or subtle accents, there's a decal option for everyone.\\n\\n Building a Stronger Community Connection\\n\\nBy customizing your Yamaha MIO scooter with these decals, you can connect with other riders who share similar interests and styles. Join online communities and forums to meet like-minded individuals and share your experiences.\"
YAMAHA MIO SPORTY SMILE INDO DESIGN 9 DECALS (WATERPROOF LAMINATED FADE PROOF)\
\
What Are Fade Proof Motorcycle Stickers?\
Fade proof motorcycle stickers are specially designed adhesive decals that are made to withstand harsh weather conditions and resist fading over time. These custom design decals for vehicles can enhance the appearance of your ride while expressing your personal style.
\
Custom Design Decals for Vehicles: An Overview\
Custom design decals offer a wide range of options for vehicle customization. From simple designs to intricate patterns, these decals can be tailored to fit your preferences and style. They come in various materials and finishes, including waterproof laminated decals, which provide durability and longevity.
\
YAMAHA MIO Sporty Design Decals: A Closer Look\
The YAMAHA MIO Sporty Smile INDO Design Decals are a set of 9 fade proof motorcycle stickers specifically designed for the Yamaha MIO scooter. These waterproof laminated decals feature a sporty smile design that adds a touch of personality to your ride.
\
9 Decals for MIO: The Complete Set\
The complete set includes 9 decals that can be applied to various parts of your Yamaha MIO scooter. Each decal is carefully crafted to ensure a perfect fit and a seamless look.
\
Waterproof Laminated Decals: Key Features\
Waterproof laminated decals offer several benefits, including durability, easy installation, and maintenance.
\
Durable Construction: Withstand Harsh Weather Conditions\
These decals are made from high-quality materials that can withstand harsh weather conditions, such as rain, snow, and extreme temperatures. They are designed to resist fading, peeling, and cracking over time.
\
Easy Installation: A Step-by-Step Guide\
Installing these decals is simple and straightforward. Follow these steps:
\
- Clean the surface of your Yamaha MIO scooter where you want to apply the decal.\
- Peel off the backing paper from the decal.\
- Position the decal on the desired location.\
- Press down firmly to ensure a secure bond.\
- Trim any excess material around the edges.
\
Maintenance Tips: Keeping Your Decals Looking Great\
To keep your waterproof laminated decals looking great, follow these tips:
\
- Avoid using abrasive cleaners or scrubbing tools.\
- Clean the decals regularly with mild soap and water.\
- Dry the decals thoroughly after cleaning.
\
How to Choose the Right Decals for Your YAMAHA MIO\
When selecting decals for your Yamaha MIO scooter, consider the following factors:
\
Assessing Your Style Preferences\
Choose decals that reflect your personal style and preferences. Consider the color scheme, design, and overall appearance of the decals.
\
Considering Vehicle Compatibility\
Make sure the decals are compatible with your Yamaha MIO scooter. Check the size and shape of the decals to ensure they fit properly.
\
Evaluating Quality & Durability\
Look for decals that are made from high-quality materials and have a reputation for durability. Check customer reviews and ratings to get an idea of the product's performance.
\
Showcasing Your YAMAHA MIO with Sporty Smile INDO Design Decals\
Enhance the appearance of your Yamaha MIO scooter with the Sporty Smile INDO Design Decals. These waterproof laminated decals not only add a touch of personality to your ride but also help you stand out in a crowd.
\
Enhancing Your Ride's Appearance\
The Sporty Smile INDO Design Decals can transform the look of your Yamaha MIO scooter. They add a sporty and stylish touch that complements the vehicle's design.
\
Expressing Your Personal Style\
These decals allow you to express your personal style and showcase your unique personality. Whether you prefer bold designs or subtle accents, there's a decal option for everyone.
\
Building a Stronger Community Connection\
By customizing your Yamaha MIO scooter with these decals, you can connect with other riders who share similar interests and styles. Join online communities and forums to meet like-minded individuals and share your experiences."

WKT Graphix
Review
You May Also Like
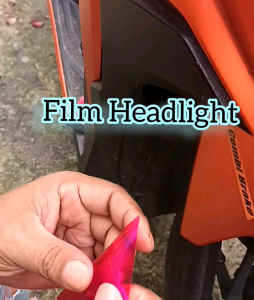
HEADLIGHT + KILAY TINT CLICK V2&V3\\n\\n What is Kilay Tint Click V2 & V3?\\n\\nKilay Tint Click V2 & V3 is a high-quality headlight tint designed specifically for vehicles with V2 and V3 headlight systems. These tint films are designed to enhance the appearance of your headlights while providing various benefits such as scratch resistance, waterproofing, and sunproofing. The product comes with a 3M adhesive backing, making it easy to install without the need for any special tools or expertise.\\n\\n Key Features\\n\\n- **Anti-scratch:** Kilay Tint Click V2 & V3 is designed to resist scratches, ensuring that your headlights remain protected against damage caused by environmental factors or accidental impacts.\\n- **Waterproof & Sunproof:** The tint film is 100% waterproof and sunproof, making it ideal for protecting your headlights from harsh weather conditions and UV rays.\\n- **High-Quality Material:** The tint film is made from high-quality materials, providing a durable and long-lasting solution for your vehicle's headlight protection needs.\\n- **Easy Installation:** With its 3M adhesive backing, Kilay Tint Click V2 & V3 is easy to install, even for those who lack experience in tinting.\\n\\n Application Areas\\n\\nKilay Tint Click V2 & V3 is designed specifically for vehicles with V2 and V3 headlight systems. This includes a wide range of popular car models, making it a versatile solution for enhancing the appearance and performance of your headlights.\\n\\n How to Install Kilay Tint Click V2 & V3\\n\\nInstalling Kilay Tint Click V2 & V3 is a straightforward process that can be completed in just a few simple steps.\\n\\n Preparation Steps\\n\\nBefore installing Kilay Tint Click V2 & V3, make sure to clean your headlights thoroughly using a lint-free cloth and a mild cleaning solution. This will help ensure that the tint film adheres properly to the surface of your headlights.\\n\\n Installation Process\\n\\nTo install Kilay Tint Click V2 & V3, follow these steps:\\n\\n1. Peel off the backing paper from the edge of the tint film.\\n2. Align the tint film with the headlight, making sure it is centered and straight.\\n3. Slowly peel off the backing paper while pressing the tint film onto the headlight.\\n4. Push out any air bubbles that may have formed during installation.\\n5. Smooth out the edges of the tint film to ensure a secure fit.\\n\\n Troubleshooting Common Issues\\n\\nIf you encounter any issues during installation, such as air bubbles or uneven application, don't worry! Here are some tips to help you troubleshoot common problems:\\n\\n- **Air Bubbles:** Use a credit card or similar tool to push out any air bubbles that may have formed during installation.\\n- **Uneven Application:** If the tint film is not adhering evenly to the surface of your headlights, try reapplying it or using a hair dryer to heat the film slightly.\\n\\n Benefits of Using Kilay Tint Click V2 & V3\\n\\nUsing Kilay Tint Click V2 & V3 offers several benefits that can enhance the performance and appearance of your headlights.\\n\\n Enhancing Headlight Performance\\n\\nKilay Tint Click V2 & V3 is designed to enhance the performance of your headlights by reducing glare and improving visibility. This can help you see better on the road, especially during nighttime or inclement weather conditions.\\n\\n Durability & Weather Resistance\\n\\nThe high-quality materials used in Kilay Tint Click V2 & V3 provide excellent durability and weather resistance, making it ideal for protecting your headlights from harsh environmental conditions.\\n\\n Easy Maintenance & Removal\\n\\nKilay Tint Click V2 & V3 is easy to maintain and remove, making it a convenient solution for those who want to change the appearance of their headlights without the hassle of permanent modifications.\\n\\nThank you for considering Kilay Tint Click V2 & V3 for your vehicle's headlight protection needs. Remember to always drive safely and enjoy the benefits of enhanced headlight performance and protection!\n}

A401 Multi-function HUD Head-Up Display OBD+GPS Dual System Smart Gauge Driving Stopwatch Speedometer Odometer Digital Meter Alarm System RPM Turbo Oil Pressure Water Temp
2pcs P21/5W 1157 BAY15D LED Bulbs Car Turn Signal Light 7440 7443 Canbus 12V Red Parking Light MOTOR Brake lights DRL 12-80V
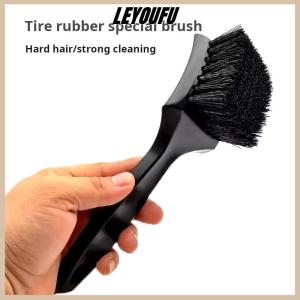
Christmas gift LEYOUFU Car Tire Wheel Rim Cleaning Brush Detailing Brushes Wash Towel Universal Wheel Tire Cleaning Tools Auto Accessories
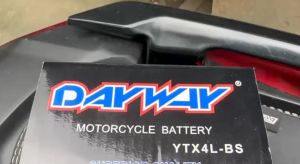
DAYWAY MOTORCYCLE BATTERY FOR HONDA CLICK 150i | YTX4L-BS MOTOR BATTERY | MAINTENANCE-FREE BATTERY
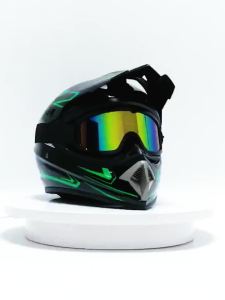
Full Protection Bluetooth Motorcycle Helmet for Kids: Unisex Off-Road Cycling Gear
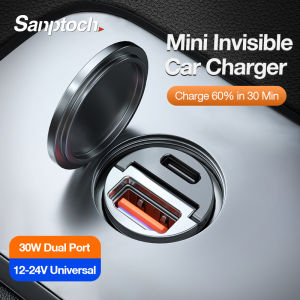
Sanptoch Mini Invisible Car Charger Adapter 60W Fast Charging USB Type C PD30W + QC3.0 Dual Port Metal Quick Charge Compatible with iPhone 16 15 14 13 12 11 Pro Max iPad Samsung Huawei Xiaomi
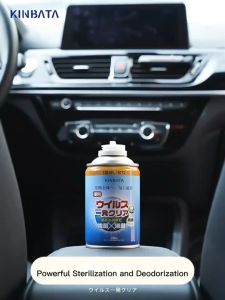
Anti Bacterial Spray for Car Deodorizer and Sterilizer Antibacterial Deodorant for Car Air Freshener for Car Spray
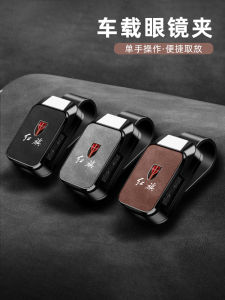
Car Mounted Eyeglass Clip for Hongqi H5 H6 H7 H9 National Brilliance HS3 HS5 EQM5 Yailis Brand Automotive Special Storage
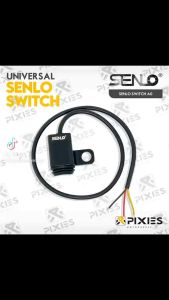
Senlo Mini Driving Light Switch A1 A3 Left Right Hand Side Mirror Bracket - Alloy
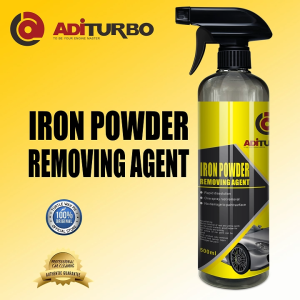
Iron Powder & Wheel Rust Remover: A Comprehensive Guide