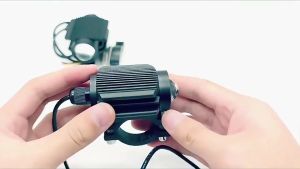



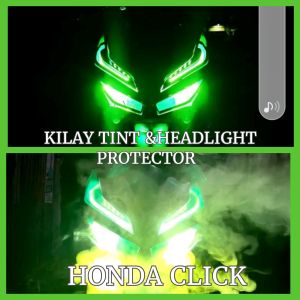
HEADLIGHT + KILAY TINT CLICK V2&V3\\n\\n What is Kilay Tint Click V2 & V3?\\n\\nKilay Tint Click V2 & V3 is a high-quality headlight tint designed specifically for vehicles with V2 and V3 headlight systems. These tint films are designed to enhance the appearance of your headlights while providing various benefits such as scratch resistance, waterproofing, and sunproofing. The product comes with a 3M adhesive backing, making it easy to install without the need for any special tools or expertise.\\n\\n Key Features\\n\\n- **Anti-scratch:** Kilay Tint Click V2 & V3 is designed to resist scratches, ensuring that your headlights remain protected against damage caused by environmental factors or accidental impacts.\\n- **Waterproof & Sunproof:** The tint film is 100% waterproof and sunproof, making it ideal for protecting your headlights from harsh weather conditions and UV rays.\\n- **High-Quality Material:** The tint film is made from high-quality materials, providing a durable and long-lasting solution for your vehicle's headlight protection needs.\\n- **Easy Installation:** With its 3M adhesive backing, Kilay Tint Click V2 & V3 is easy to install, even for those who lack experience in tinting.\\n\\n Application Areas\\n\\nKilay Tint Click V2 & V3 is designed specifically for vehicles with V2 and V3 headlight systems. This includes a wide range of popular car models, making it a versatile solution for enhancing the appearance and performance of your headlights.\\n\\n How to Install Kilay Tint Click V2 & V3\\n\\nInstalling Kilay Tint Click V2 & V3 is a straightforward process that can be completed in just a few simple steps.\\n\\n Preparation Steps\\n\\nBefore installing Kilay Tint Click V2 & V3, make sure to clean your headlights thoroughly using a lint-free cloth and a mild cleaning solution. This will help ensure that the tint film adheres properly to the surface of your headlights.\\n\\n Installation Process\\n\\nTo install Kilay Tint Click V2 & V3, follow these steps:\\n\\n1. Peel off the backing paper from the edge of the tint film.\\n2. Align the tint film with the headlight, making sure it is centered and straight.\\n3. Slowly peel off the backing paper while pressing the tint film onto the headlight.\\n4. Push out any air bubbles that may have formed during installation.\\n5. Smooth out the edges of the tint film to ensure a secure fit.\\n\\n Troubleshooting Common Issues\\n\\nIf you encounter any issues during installation, such as air bubbles or uneven application, don't worry! Here are some tips to help you troubleshoot common problems:\\n\\n- **Air Bubbles:** Use a credit card or similar tool to push out any air bubbles that may have formed during installation.\\n- **Uneven Application:** If the tint film is not adhering evenly to the surface of your headlights, try reapplying it or using a hair dryer to heat the film slightly.\\n\\n Benefits of Using Kilay Tint Click V2 & V3\\n\\nUsing Kilay Tint Click V2 & V3 offers several benefits that can enhance the performance and appearance of your headlights.\\n\\n Enhancing Headlight Performance\\n\\nKilay Tint Click V2 & V3 is designed to enhance the performance of your headlights by reducing glare and improving visibility. This can help you see better on the road, especially during nighttime or inclement weather conditions.\\n\\n Durability & Weather Resistance\\n\\nThe high-quality materials used in Kilay Tint Click V2 & V3 provide excellent durability and weather resistance, making it ideal for protecting your headlights from harsh environmental conditions.\\n\\n Easy Maintenance & Removal\\n\\nKilay Tint Click V2 & V3 is easy to maintain and remove, making it a convenient solution for those who want to change the appearance of their headlights without the hassle of permanent modifications.\\n\\nThank you for considering Kilay Tint Click V2 & V3 for your vehicle's headlight protection needs. Remember to always drive safely and enjoy the benefits of enhanced headlight performance and protection!\n}
HEADLIGHT + KILAY TINT CLICK V2&V3\
\
What is Kilay Tint Click V2 & V3?\
Kilay Tint Click V2 & V3 is a high-quality headlight tint designed specifically for vehicles with V2 and V3 headlight systems. These tint films are designed to enhance the appearance of your headlights while providing various benefits such as scratch resistance, waterproofing, and sunproofing. The product comes with a 3M adhesive backing, making it easy to install without the need for any special tools or expertise.
\
Key Features\
\
- Anti-scratch: Kilay Tint Click V2 & V3 is designed to resist scratches, ensuring that your headlights remain protected against damage caused by environmental factors or accidental impacts.\
- Waterproof & Sunproof: The tint film is 100% waterproof and sunproof, making it ideal for protecting your headlights from harsh weather conditions and UV rays.\
- High-Quality Material: The tint film is made from high-quality materials, providing a durable and long-lasting solution for your vehicle's headlight protection needs.\
- Easy Installation: With its 3M adhesive backing, Kilay Tint Click V2 & V3 is easy to install, even for those who lack experience in tinting.
\
Application Areas\
Kilay Tint Click V2 & V3 is designed specifically for vehicles with V2 and V3 headlight systems. This includes a wide range of popular car models, making it a versatile solution for enhancing the appearance and performance of your headlights.
\
How to Install Kilay Tint Click V2 & V3\
Installing Kilay Tint Click V2 & V3 is a straightforward process that can be completed in just a few simple steps.
\
Preparation Steps\
Before installing Kilay Tint Click V2 & V3, make sure to clean your headlights thoroughly using a lint-free cloth and a mild cleaning solution. This will help ensure that the tint film adheres properly to the surface of your headlights.
\
Installation Process\
To install Kilay Tint Click V2 & V3, follow these steps:
\
- Peel off the backing paper from the edge of the tint film.\
- Align the tint film with the headlight, making sure it is centered and straight.\
- Slowly peel off the backing paper while pressing the tint film onto the headlight.\
- Push out any air bubbles that may have formed during installation.\
- Smooth out the edges of the tint film to ensure a secure fit.
\
Troubleshooting Common Issues\
If you encounter any issues during installation, such as air bubbles or uneven application, don't worry! Here are some tips to help you troubleshoot common problems:
\
- Air Bubbles: Use a credit card or similar tool to push out any air bubbles that may have formed during installation.\
- Uneven Application: If the tint film is not adhering evenly to the surface of your headlights, try reapplying it or using a hair dryer to heat the film slightly.
\
Benefits of Using Kilay Tint Click V2 & V3\
Using Kilay Tint Click V2 & V3 offers several benefits that can enhance the performance and appearance of your headlights.
\
Enhancing Headlight Performance\
Kilay Tint Click V2 & V3 is designed to enhance the performance of your headlights by reducing glare and improving visibility. This can help you see better on the road, especially during nighttime or inclement weather conditions.
\
Durability & Weather Resistance\
The high-quality materials used in Kilay Tint Click V2 & V3 provide excellent durability and weather resistance, making it ideal for protecting your headlights from harsh environmental conditions.
\
Easy Maintenance & Removal\
Kilay Tint Click V2 & V3 is easy to maintain and remove, making it a convenient solution for those who want to change the appearance of their headlights without the hassle of permanent modifications.
Thank you for considering Kilay Tint Click V2 & V3 for your vehicle's headlight protection needs. Remember to always drive safely and enjoy the benefits of enhanced headlight performance and protection!
}

PRINCE DESIGN
Review
You May Also Like

QUEEN BEE Isuzu 4HF1 / Fuso 4M40 EXHAUST BRAKE CHAMBER ASSEMBLY 8-97108616 ME-410219
Motorbike Fairing Crash Pads For Yamaha YZF R3 R25 2019 2020 2021 2022 2023 Engine Frame Sliders Guard Cover Falling Protector
Young0 LED Daytime Running Light Fog Lamp for Toyota Yaris Cross 2023-2024
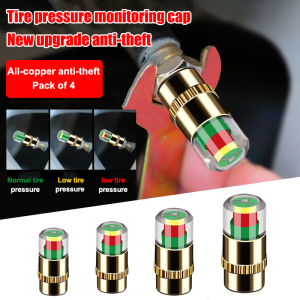
Tire Air Pressure Monitor Cap AntiSkid Wheel Teeth AntiTheft Car Sensitive Detection Sensor Indicator Alert Tyre Air Gauge Warning Device
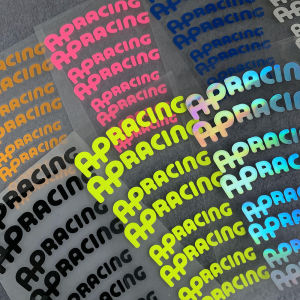
AP Racing Universal Caliper Stickers: Enhance Your Ride with Reflective & Waterproof Decals
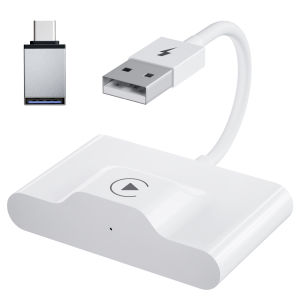
Wireless CarPlay Adapter IOS or Android Auto Wireless 5G WiFi Type-C USB Plug Play CarPlay Wireless
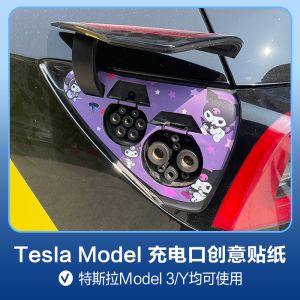
Creative Decoration Sticker Protection Film for Tesla Model 3 Charging Port Revitalizing Adhesive Decal Car Accessories\\n\\n Introduction to Sticker Protection for Charging Ports\\n\\n What is Sticker Protection for Charging Ports?\\n\\nSticker protection for charging ports is a specialized adhesive film designed to protect the charging port of electric vehicles like the Tesla Model 3. This film serves multiple purposes, including shielding the port from dust, dirt, and moisture while also enhancing the overall appearance of the vehicle.\\n\\n Benefits of Using Sticker Protection for Charging Ports\\n\\nUsing sticker protection for charging ports offers numerous benefits, such as:\\n\\n- **Protection:** Shielding the charging port from contaminants helps maintain its functionality and prolongs its lifespan.\\n- **Aesthetic Appeal:** Decorative sticker films can transform the look of your Tesla Model 3, making it stand out from other electric vehicles.\\n- **Ease of Application:** Sticker protection films are simple to install, requiring minimal tools and effort.\\n\\n Choosing the Right Sticker Protection for Charging Ports\\n\\nWhen selecting a sticker protection film for your Tesla Model 3 charging port, consider factors such as:\\n\\n- **Material Quality:** Opt for films made from high-quality materials that offer superior durability and resistance to wear and tear.\\n- **Design Options:** Choose from a wide range of designs to match your personal style and preferences.\\n- **Compatibility:** Ensure the chosen film is compatible with your Tesla Model 3 charging port.\\n\\n How to Install Adhesive Decal Car Accessories\\n\\n Tools & Materials Needed for Installation\\n\\nTo install adhesive decal car accessories, gather the following tools and materials:\\n\\n- Adhesive decal film\\n- Cleaning solution\\n- Microfiber cloth\\n- Scissors\\n- Squeegee\\n\\n Step-by-Step Guide to Installing Adhesive Decal Car Accessories\\n\\nFollow these steps to install adhesive decal car accessories on your Tesla Model 3 charging port:\\n\\n1. Clean the charging port surface using a cleaning solution and microfiber cloth.\\n2. Carefully peel off the backing paper from the adhesive decal film.\\n3. Position the film over the charging port, aligning it with the edges.\\n4. Use a squeegee to remove any air bubbles and ensure proper adhesion.\\n\\n Tips for a Smooth Installation Process\\n\\nTo achieve a flawless installation, keep these tips in mind:\\n\\n- Work in a clean, dust-free environment to prevent contamination.\\n- Take your time during installation to avoid mistakes.\\n- Allow the film to settle for at least 24 hours before exposing the vehicle to extreme temperatures or weather conditions.\\n\\n Revitalizing Car Decals: Creative Decoration Sticker Film\\n\\n Choosing the Right Design for Your Tesla Model 3\\n\\nWhen selecting a creative decoration sticker film for your Tesla Model 3, consider factors such as:\\n\\n- **Personal Style:** Choose designs that reflect your personality and preferences.\\n- **Vehicle Compatibility:** Ensure the chosen design is compatible with your Tesla Model 3 charging port.\\n- **Durability:** Opt for high-quality materials that offer superior durability and resistance to wear and tear.\\n\\n How to Apply Creative Decoration Sticker Film\\n\\nFollow these steps to apply creative decoration sticker film on your Tesla Model 3 charging port:\\n\\n1. Clean the charging port surface using a cleaning solution and microfiber cloth.\\n2. Carefully peel off the backing paper from the sticker film.\\n3. Position the film over the charging port, aligning it with the edges.\\n4. Use a squeegee to remove any air bubbles and ensure proper adhesion.\\n\\n Maintaining Your New Sticker Film\\n\\nTo keep your new sticker film looking its best, follow these maintenance tips:\\n\\n- Clean the film regularly using a gentle cleaning solution and microfiber cloth.\\n- Avoid exposing the film to extreme temperatures or weather conditions.\\n- Inspect the film periodically for signs of wear and tear, and replace it if necessary.\\n\\n Conclusion: Enhancing Your Tesla Model 3 with Sticker Protection & Decals\\n\\nBy using sticker protection films and creative decoration sticker films, you can enhance the functionality and aesthetic appeal of your Tesla Model 3 charging port. With proper installation and maintenance, these accessories will provide long-lasting protection and a stylish touch to your electric vehicle.\n}
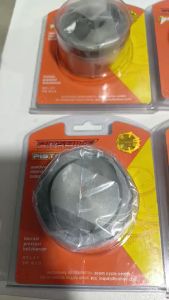
PITSBIKE CASTING PISTON KIT: A Comprehensive Guide
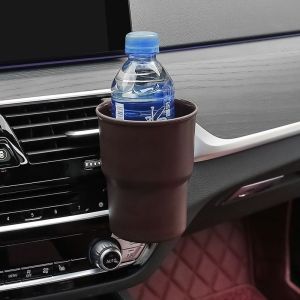
Cup Holder Portable Car Hanging Organizer Car Motorcycle Beverage Bracket Storage Rack Organizer
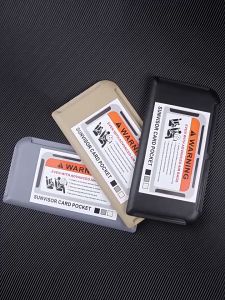
Car Sun Visor Card Storage Card Clip Stowing Tidying Car-Styling Ic Card Holder Sunshade
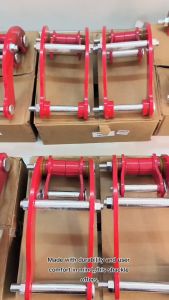
CPA FORD RANGER T6/T7 COMFORT SHACKLE 2.5INCH LIFT KIT SET RED (11731)