KOORFLY KF01 Live Sound Card: A Comprehensive Guide
KOORFLY KF01 Live Sound Card: A Comprehensive Guide
What is KOORFLY KF01 Live Sound Card?
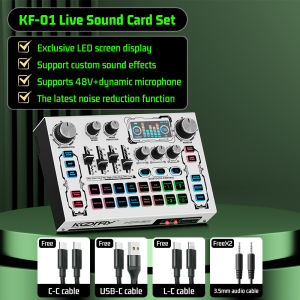
The KOORFLY KF01 Live Sound Card is a versatile audio mixing device designed specifically for live streaming, karaoke, and singing performances. It offers high-quality sound output, easy-to-use controls, and a built-in LED light display for enhanced visual effects. This sound card supports 48V microphone inputs, making it ideal for professional-grade microphones and audio devices.
Key Features & Specifications
- 48V Microphone Input: Supports professional-grade microphones with phantom power
- Built-in LED Light Display: Provides customizable lighting effects for live performances
- High-Quality Sound Output: Ensures crystal-clear audio for streaming and recording
- Easy-to-Use Controls: Simple interface for adjusting audio settings and volume levels
- Compatibility: Works with various operating systems, including Windows, Mac, and mobile devices
Benefits of Using KOORFLY KF01
- Improved Sound Quality: Enhances audio clarity and reduces background noise
- Customizable LED Lighting: Adds a dynamic visual element to live performances
- User-Friendly Interface: Makes it easy for beginners and professionals alike to achieve professional-grade audio mixing
How to Use KOORFLY KF01 Live Sound Card
Setting up and using the KOORFLY KF01 Live Sound Card is simple and straightforward. Follow these steps to get started:
Setting Up Your KOORFLY KF01
- Connect the KOORFLY KF01 to your computer or mobile device using the provided USB cable.
- Install the KOORFLY KF01 software (if required) and follow the on-screen instructions.
- Power on the sound card and adjust the settings according to your preferences.
Connecting Your Microphone & Audio Devices
- Connect your microphone to the 48V input port on the KOORFLY KF01.
- Connect any additional audio devices, such as speakers or headphones, to the appropriate ports.
- Ensure all connections are secure and properly seated.
Adjusting Audio Settings for Optimal Performance
- Open the KOORFLY KF01 software and navigate to the audio settings menu.
- Adjust the volume levels, equalizer settings, and other parameters to achieve the desired sound quality.
- Test the audio output by speaking into the microphone or playing back a sample audio file.
Audio Mixing for Live Streaming with KOORFLY KF01
Audio mixing is crucial for creating a professional-grade live streaming experience. The KOORFLY KF01 offers a range of features to help you achieve the best possible sound quality.
Understanding Audio Mixing Basics
Audio mixing involves adjusting various parameters, such as volume levels, equalizer settings, and effects, to create a balanced and cohesive audio output. By mastering the basics of audio mixing, you can significantly improve the overall quality of your live stream.
Using KOORFLY KF01 for Live Sound Card Karaoke
The KOORFLY KF01 is an excellent choice for karaoke enthusiasts, thanks to its built-in LED light display and customizable audio settings. Simply connect your microphone and speakers, adjust the settings according to your preferences, and start singing!
Tips for Live Sound Card Audio Mixing
- Monitor Your Levels: Keep an eye on your input and output levels to avoid distortion or clipping.
- Use EQ Wisely: Experiment with different equalizer settings to find the perfect balance for your voice and instruments.
- Add Effects: Enhance your audio with reverb, delay, or other effects to create a more immersive listening experience.
LED Light for Sing Live Streaming
The built-in LED light display on the KOORFLY KF01 adds a dynamic visual element to your live performances. Follow these tips to maximize the impact of your LED lighting:
Enhancing Your Live Performance with LED Lights
- Sync with Music: Use the KOORFLY KF01 software to sync the LED lights with your music, creating a synchronized light show.
- Customize Colors: Experiment with different color combinations to match your performance theme or mood.
- Adjust Brightness: Fine-tune the LED light brightness to achieve the desired visual effect.
Customizing LED Display for Personalized Singing Experience
- Create Unique Patterns: Use the KOORFLY KF01 software to design custom LED light patterns that reflect your personal style.
- Save Presets: Save your favorite LED light settings as presets for quick access during live performances.
- Combine with Effects: Combine LED lighting with audio effects to create a truly immersive live streaming experience.
Maximizing LED Light for Singing & Live Streaming
- Use LED Lights as Visual Cues: Incorporate LED lighting into your performance to signal transitions, build anticipation, or highlight key moments.
- Coordinate with Other Visual Elements: Combine LED lighting with other visual elements, such as video backgrounds or special effects, to create a cohesive and engaging live streaming experience.
Conclusion & Final Thoughts
The KOORFLY KF01 Live Sound Card is a powerful tool for anyone looking to enhance their live streaming, karaoke, or singing performances. Its built-in LED light display, customizable audio settings, and easy-to-use interface make it an excellent choice for both beginners and professionals alike. By following the tips and guidelines outlined in this guide, you can unlock the full potential of the KOORFLY KF01 and take your live streaming experience to the next level.

KOORFLY AUDIO SHOP
Review
You May Also Like
Comprehensive Guide: UPS Power Supply & DC Backup Power for WiFi Router Modem & Security Camera
GD-3 Thermal Grease Processor Thermal Paste 7g 7.5W/M-k For CPU GPU PS5 Printer Heat Sink Cooling Cooler Compound Silicone
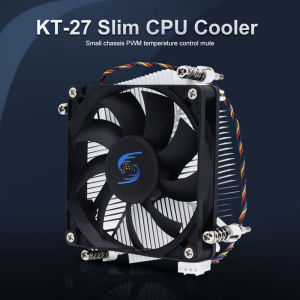
CPU Radiator Cooling 8MM Ultra Quiet High Cooling 1U Server Cooling Fan Suitable For Intel LGA 1150 1151 1155 1156CPU Air Cooler

120mm USB Quiet Cabinets Cooling Fan System with 0-60℃ Adjustable Thermostat Control for Home Theater AV Cabinets
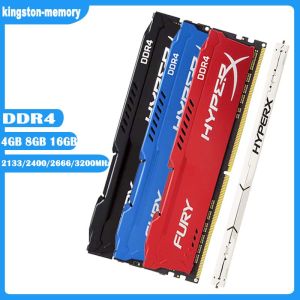
HyperX FURY 16GB 8GB 4GB DDR4 3200MHz 2666MHz 2400MHz 2133MHz Desktop RAM Memory 1.2V DIMM 288-pin Desktop Inter&AMD Memory\\n\\nIn this comprehensive guide, we will explore the world of HyperX FURY DDR4 RAM, including its specifications, benefits, compatibility, installation, optimization, and troubleshooting. We will cover various aspects of the HyperX FURY RAM, including its 3200MHz & 2666MHz speeds, 288-pin DIMM desktop design, and 1.2V low voltage operation. This guide aims to help you make an informed decision about which HyperX FURY RAM configuration best suits your needs.\\n\\n Understanding HyperX FURY RAM Specifications\\n\\n What is 3200MHz & 2666MHz RAM?\\n\\nHyperX FURY DDR4 RAM is available in various speeds, including 3200MHz and 2666MHz. These speeds refer to the clock frequency of the RAM, which determines how quickly it can transfer data to and from the system. Higher clock frequencies generally result in faster performance. However, it's important to note that the actual performance improvement depends on other factors, such as the CPU, motherboard, and storage devices used in the system.\\n\\n How Does 288-pin DIMM Desktop RAM Work?\\n\\nHyperX FURY DDR4 RAM is designed as a 288-pin DIMM module, which is a standard form factor for desktop computers. This type of RAM is installed in the memory slots on the motherboard and communicates with the CPU via the memory controller. The 288-pin design allows for a high-speed data transfer rate, ensuring that the RAM can keep up with the demands of modern applications and games.\\n\\n What Are the Benefits of 1.2V Low Voltage RAM?\\n\\nHyperX FURY DDR4 RAM operates at a low voltage of 1.2V, which offers several benefits. Lower voltage requirements result in reduced power consumption, leading to lower operating temperatures and improved energy efficiency. Additionally, low voltage RAM can help extend the lifespan of the memory module by reducing the stress on its components.\\n\\n Choosing the Right HyperX FURY RAM\\n\\n How to Select Between 16GB, 8GB, & 4GB RAM?\\n\\nHyperX FURY DDR4 RAM is available in various capacities, including 16GB, 8GB, and 4GB. When choosing the right configuration, consider the demands of your applications and games. More RAM allows for better multitasking and improved performance in memory-intensive tasks. However, it's essential to balance capacity with cost and system requirements.\\n\\n How Does HyperX FURY RAM Compare to Other Brands?\\n\\nHyperX FURY DDR4 RAM competes with other popular brands like Corsair, G.Skill, and Crucial. While all these brands offer high-quality RAM, HyperX FURY stands out due to its low voltage operation, compatibility with both Intel and AMD platforms, and excellent performance at various clock speeds.\\n\\n What Are the Compatibility Requirements for Inter&AMD Memory?\\n\\nHyperX FURY DDR4 RAM is designed to work with both Intel and AMD platforms, ensuring broad compatibility. However, it's important to check the specifications of your motherboard and CPU to ensure they support the desired RAM configuration. Additionally, some systems may require specific BIOS updates or settings adjustments to achieve optimal performance.\\n\\n Installing & Optimizing HyperX FURY RAM\\n\\n How to Install 1x RAM Memory Module?\\n\\nInstalling HyperX FURY DDR4 RAM is relatively straightforward. First, power off your computer and unplug all cables. Next, open the case and locate the memory slots on the motherboard. Insert the RAM module at a 45-degree angle, then press down until it clicks into place. Finally, close the case, reconnect the cables, and power on the system.\\n\\n How to Optimize Performance with HyperX FURY RAM?\\n\\nTo optimize performance with HyperX FURY DDR4 RAM, consider the following tips:\\n\\n- Ensure that your motherboard and CPU support the desired RAM configuration.\\n- Install the RAM modules in pairs for dual-channel operation, if possible.\\n- Adjust the BIOS settings to enable XMP (Extreme Memory Profile) or manually configure the RAM timings and voltage.\\n- Keep the system clean and well-ventilated to maintain optimal operating temperatures.\\n\\n Troubleshooting Common Issues with HyperX FURY RAM\\n\\nIf you encounter issues with HyperX FURY DDR4 RAM, consider the following troubleshooting steps:\\n\\n- Verify that the RAM is properly seated in the memory slots.\\n- Check the system BIOS for any updates or settings adjustments.\\n- Ensure that the RAM configuration is supported by the motherboard and CPU.\\n- Try installing the RAM in a different slot or removing other RAM modules to isolate the issue.\\n\\nBy following this comprehensive guide, you'll be well-equipped to choose, install, optimize, and troubleshoot HyperX FURY DDR4 RAM for your desktop computer. Remember to consider your system requirements, compatibility, and performance goals when making your decision.\n}

【Dell Laptop】Dell Latitude E7490、14 inch、Intel Core processor、Intel HD Graphics,HDMI,USB 3.0
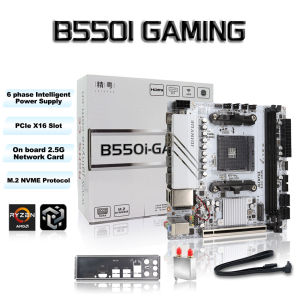
Jingyue B550i GAMING Mini ITX Motherboard DDR4 Memory Support AM4 Ryzen 5600GT/5600/5700X PCIe 4.0 Dual M.2 WiFi 6 Gaming PC

Glorimemo DDR4 RAM 16GB: High Performance RAM for Your Desktop
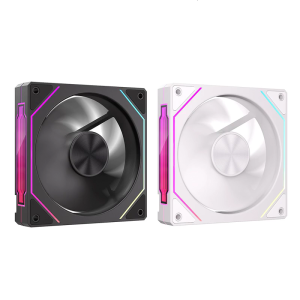
120mm PC Case Fan ARGB Illuminatiing Computer Cooling Fan With Side Lighting Enhances Visual Dynamics
Hall Switches Pneumatic Connectors For 3D Printer Enhanceds Materials Flows Precisions Feed Monitorings ABS Construction
GMKtec NucBox M3 Mini PC - Intel i5-12450H / 32GB DDR4 / 1TB M.2 / WiFi 6 / 2.5G / Win 11 Pro / Black