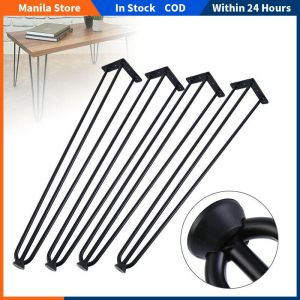
16\" Hairpin Legs: A DIY Guide for Bench & Coffee Table Legs
16" Hairpin Legs: A DIY Guide for Bench & Coffee Table Legs
Introduction to 16" Hairpin Legs
Hairpin legs have become increasingly popular among furniture enthusiasts, offering a sleek and minimalist design that perfectly complements modern decor. This guide will walk you through the process of replacing your side table legs with 16" hairpin legs, giving your furniture a fresh new look. Whether you're looking to update a bench, coffee table, or side table, this DIY project is perfect for anyone looking to breathe new life into their existing furniture.
Key Features & Benefits
- Sturdy and Durable: Made from high-quality materials, these hairpin legs provide a strong foundation for your furniture.
- Easy Installation: With simple tools, you can easily install these legs on your existing bench, coffee table, or side table.
- Versatile Design: Available in both 2-rod and 3-rod sets, these legs offer a variety of styles to suit your furniture needs.
Where to Purchase
You can find 16" hairpin legs at various online retailers, including Amazon, Etsy, and Home Depot. Be sure to check product reviews and ratings before making your purchase to ensure you're getting a quality product.
How to Replace Your Side Table Legs
Replacing your side table legs with 16" hairpin legs is a straightforward process that requires only basic tools and some patience. Follow these steps to transform your furniture:
Preparing Your Workspace
Before you begin, gather the necessary tools and materials:
- Screwdriver
- Drill
- Level
- Hairpin legs
- Bench, coffee table, or side table
Clear a workspace and lay down a protective covering to avoid damaging your floors during the installation process.
Removing Old Legs
To remove the old legs, use a screwdriver or drill to loosen and remove the screws holding the legs in place. Be sure to keep track of all screws and hardware, as you may need them for future repairs.
Installing New Legs
With the old legs removed, it's time to install the new hairpin legs. Follow these steps:
- Align the hairpin leg with the mounting holes on your furniture.
- Secure the leg in place using screws or bolts.
- Repeat for all four corners of your furniture.
- Use a level to ensure your furniture is stable and level.
Tips for Choosing the Right Legs
When selecting hairpin legs for your bench, coffee table, or side table, consider the following factors:
Material Considerations
Choose a material that complements your furniture and provides the desired level of durability. Common materials include steel, iron, and brass.
Style & Design
Select a style that matches your furniture's overall aesthetic. Options include straight, curved, and tapered designs.
Compatibility with Your Furniture
Ensure the legs you choose are compatible with your furniture's size and weight capacity. Measure your furniture and consult the product specifications before making your purchase.
Troubleshooting Common Issues
While installing hairpin legs, you may encounter some common issues. Here's how to address them:
Loose Legs
If your legs feel loose after installation, check that all screws and bolts are securely tightened. If the problem persists, consider using wood glue or epoxy to reinforce the connection.
Uneven Tabletop
If your tabletop is uneven after installation, use a level to identify the issue. Adjust the legs as needed to ensure your furniture sits level and stable.
Warped Legs
If your legs appear warped or bent, contact the manufacturer for a replacement. Be sure to inspect the legs before installation to avoid this issue.
Conclusion
Replacing your side table legs with 16" hairpin legs is a simple and rewarding DIY project that can transform the look and feel of your furniture. By following the steps outlined in this guide, you'll be able to easily update your bench, coffee table, or side table with a fresh, modern design. Remember to choose the right material, style, and compatibility for your furniture, and troubleshoot any issues that may arise during the installation process. Happy DIY-ing!

wCX9xha2
You May Also Like

Supermarket Shelves & Display Racks: A Comprehensive Guide
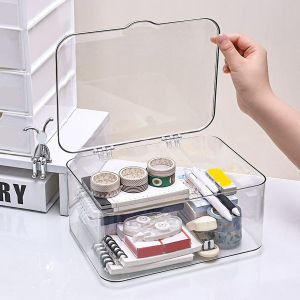
Plastic storage box covered storage box flip top desktop storage container office supplies stationery cosmetics storage
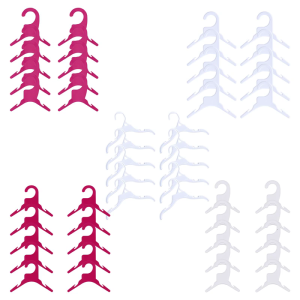
Pack Of 10 Plastic Pet Clothes Hangers For Organizing Dog Clothes And Accessories Home and Pet Store Pet Outfit Racks
Ultimate Guide to Portable Folding Beds & Heavy-Duty Reclining Chairs
Dining Chair Leather Backrest Chair Nordic Chair With Cushion High Back Restaurant Chair

Foldable Storage Box Organizer: A Comprehensive Guide

Heavy Furniture Casters: Moving Furniture Tools & Techniques
【Alloet】 4 Pcs Stackable Wire Baskets Muti-Purpose Fruit Basket Vegetable Fruit Basket for Pantry Organizers and Storage
Black Sunshade Net: A Comprehensive Guide
5-Layers Shoe Rack & Dustproof Multifunctional Coat Rack: Save Space with Simple Floor Coat Racks
2 pcs Acrylic Bookends L-shaped Clear Bookends Desktop Organizer Bookshelf for Bedroom Library Office School Stationery Supplies 1217.5cm *12*