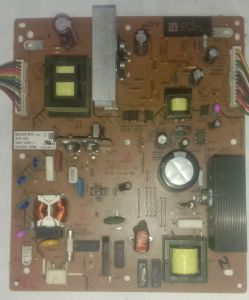
Sony KLV-32BX311 POWER SUPPLY PCB APS-283
Sony KLV-32BX311 POWER SUPPLY PCB# APS-283
Understanding the Basics of Sony TV Motherboard Repair
When it comes to repairing Sony TVs, one common issue that many users face is the malfunction of the motherboard. In this article, we will focus on the repair process of the Sony KLV-32BX311 Power Supply PCB and the APS-283 replacement parts.
Identifying Common Issues in Sony TV Motherboards
Before we dive into the repair process, it's essential to understand some common issues that may arise in Sony TV motherboards. These include:
- Power supply board failure
- Faulty components like capacitors, resistors, or diodes
- Loose connections or solder joints
Locating and Replacing APS-283 Replacement Parts
The APS-283 is a crucial component in the Sony KLV-32BX311 Power Supply PCB. If this part fails, it can cause your TV to malfunction. To locate and replace the APS-283, follow these steps:
- Identify the faulty APS-283 component by checking for physical damage or using a multimeter to test its resistance.
- Purchase a replacement APS-283 component from a reputable supplier.
- Carefully remove the faulty APS-283 using a soldering iron and desoldering pump.
- Install the new APS-283 component in its place, ensuring proper alignment and secure connections.
Steps to Repair Sony KLV-32BX311 Power Supply PCB
Now that we've covered the basics of identifying common issues and replacing APS-283 components, let's move on to the repair process of the Sony KLV-32BX311 Power Supply PCB.
Preparing for the Repair Process
Before beginning the repair process, make sure you have the necessary tools and equipment, such as:
- Soldering iron and solder
- Desoldering pump
- Multimeter
- Replacement components
Additionally, ensure you have a clean, well-lit workspace and take necessary safety precautions, such as wearing protective eyewear and grounding yourself to avoid static electricity damage.
Disassembling the TV and Identifying Faulty Components
To access the power supply PCB, you'll need to disassemble your Sony TV. Follow these steps:
- Unplug the TV from the power source.
- Remove the back panel of the TV using a screwdriver.
- Locate the power supply PCB and gently disconnect any cables or connectors attached to it.
- Remove the PCB from the TV housing by unscrewing any mounting screws.
Once you have access to the power supply PCB, use a multimeter to test the resistance of various components, such as capacitors, resistors, and diodes. Identify any faulty components that need to be replaced.
Replacing Faulty PCB Components and Reassembling the TV
After identifying the faulty components, carefully remove them using a soldering iron and desoldering pump. Install the new components in their place, ensuring proper alignment and secure connections. Once all replacements have been made, reassemble the TV by reversing the disassembly process.
Tips for Maintaining Your Sony TV Motherboard
To prolong the life of your Sony TV motherboard and prevent future malfunctions, follow these maintenance tips:
Regularly Cleaning the TV Components
Dust and debris can accumulate inside your TV, causing overheating and potentially damaging the motherboard. Regularly clean the internal components using compressed air or a soft brush to keep them free from dust.
Monitoring the TV’s Performance and Addressing Issues Early On
Keep an eye on your TV's performance and address any issues early on. If you notice any unusual behavior, such as flickering images or audio problems, it may be a sign of a malfunctioning motherboard. Address these issues promptly to prevent further damage.

2nd hand LED TV parts
Review

You May Also Like
![[COD] KOQZM KITCHEN 3W 7W 12W 18W 24W power supply driver adapter transformer switch for LED lights](https://img.lazcdn.com/g/p/f3b2d08d1fe87142f04656a7b0d87eea.jpg_300x300q80.jpg)
[COD] KOQZM KITCHEN 3W 7W 12W 18W 24W power supply driver adapter transformer switch for LED lights
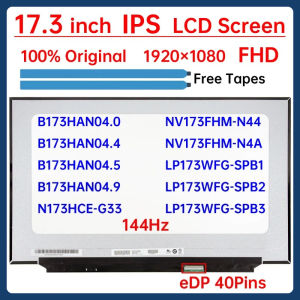
17.3" 144Hz Laptop LCD Screen N173HCE G33 N173HCE-G33 B173HAN04.4 For Lenovo Legion 5-17ACH6H 5-17ITH6H Display Matrix Panel FHD
TP-Link Archer T2E AC600 Wireless Dual Band PCI Express Adapter

Power Switch Volume Switch Suitable For GP340 GP344 GP380 P040 CP040 P140 EP450 PR400 DP1400 DEP450 CP200D PRO5150 PRO55
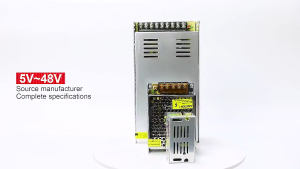
220V input DC 12V 30A output 360W Power Supply Centralize Switching Power Supply for Security Camera CCTV Fan Automatically Universal Led Module Regulated Switching Power Supply

2X Ultra Clear / Anti-Glare / Anti Blue-Ray Screen Protector Guard Cover for 14" Lenovo ThinkVision M14 Portable Monitor
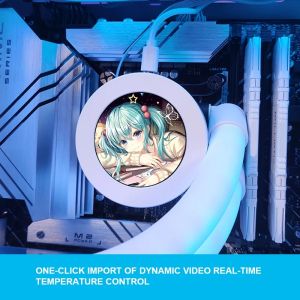
2.1 Inch IPS MINI PC CPU AIO Water Cooling Monitor 240/360DIY Dynamic Temperature DisplayMOD USB Cabinet Gamer Screen Aida64
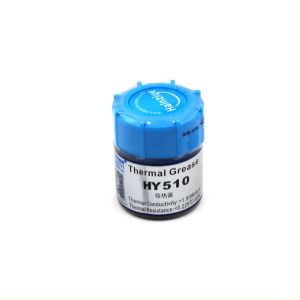
Thermal Paste Conductive Grease For CPU GPU Chipset 15G HY510 Silicone Heatsink Compound

1PC AC220/380V DC12/24V Axial cooling fan Distribution Cabinet cooling fan with copper coil Exhaust Cooling Fan
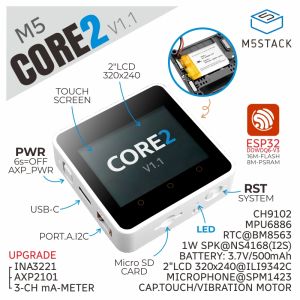
M5Stack Official Core2 ESP32 IoT Development Kit V1.1
Panther PVT-15000 Variable Transformer 15000W