
Crochet starts with one hook, one strand of yarn, and a handful of movements that repeat. The first few minutes can feel awkward because your hands have different jobs: one hand guides the hook, while the other feeds the yarn and holds the work steady. Give yourself time to learn those jobs separately. Speed comes later.
This guide takes you from your first slip knot to a finished square coaster. You will learn how to:
- choose beginner-friendly yarn and a matching hook;
- hold the hook and control the working yarn;
- make a slip knot and an even foundation chain;
- work single crochet in flat rows;
- make a double crochet stitch;
- recognize and count your stitches;
- fasten off and weave in the yarn ends; and
- fix the problems that catch most beginners.
The instructions are written for a right-handed crocheter. If you are left-handed, reverse the hands: hold the hook in your left hand, tension the yarn with your right, and work across the row in the opposite direction. The stitch mechanics stay the same.
A Note About Crochet Terms
This tutorial uses US crochet terminology. That matters because US and UK patterns sometimes use the same name for different stitches. In this guide:
- ch means chain;
- sc means single crochet;
- dc means double crochet;
- st or sts means stitch or stitches; and
- yo means yarn over.
A US single crochet is called a double crochet in UK terminology. A US double crochet is called a treble crochet in UK terminology. Check the terminology line before following any pattern you find online.
What You Need
You do not need a large kit. Start with a few basic tools:
- One 5 mm crochet hook (US H-8). An ergonomic hook with a rubber or silicone handle is comfortable, but a plain aluminum hook works just as well.
- One ball of smooth, medium-weight yarn (category 4 or worsted weight). A light-colored yarn makes the loops easier to see. For a coaster, cotton or a cotton blend absorbs moisture and suits a warm climate. Acrylic is inexpensive and perfectly good for practice, although it is less absorbent.
- Small scissors. Use them only to cut yarn, not to trim an uneven edge.
- A blunt tapestry needle. The eye must be large enough for your yarn. You will use it to hide the yarn tails.
- Two stitch markers. Locking markers are easiest, but small safety pins can do the same job.
- A ruler or measuring tape. This helps you check the coaster size and notice changes in tension.
Avoid fluffy, eyelash, chenille, or very dark yarn for your first practice piece. Those yarns hide the top of each stitch. Smooth yarn with a firm twist lets you see exactly where the hook should go.
The yarn label usually suggests a hook-size range. A 5 mm hook is a comfortable starting point for medium-weight yarn. If your fabric feels stiff and you struggle to insert the hook, move up to 5.5 mm. If the stitches look very loose and open, try 4.5 mm. There is no prize for using a particular size; the useful hook is the one that lets you make relaxed, visible stitches.
Shopping note for readers in the Philippines: Some yarn listings use ply counts instead of standardized weight categories. A label such as “4-ply” describes how the yarn is constructed, but it does not reliably tell you how thick the strand will be. Check the seller’s recommended hook size and, if available, the meterage per gram. For this tutorial, look for smooth yarn that recommends a hook close to 5 mm.
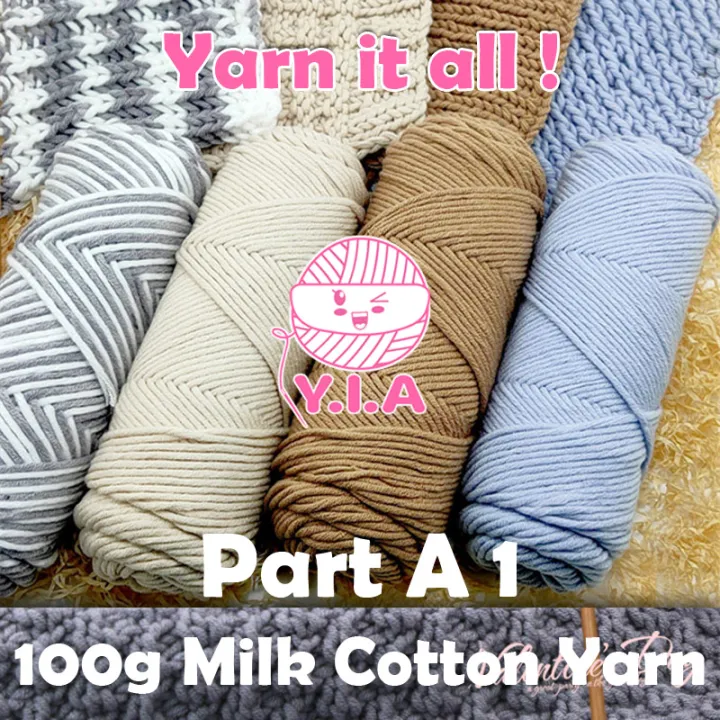
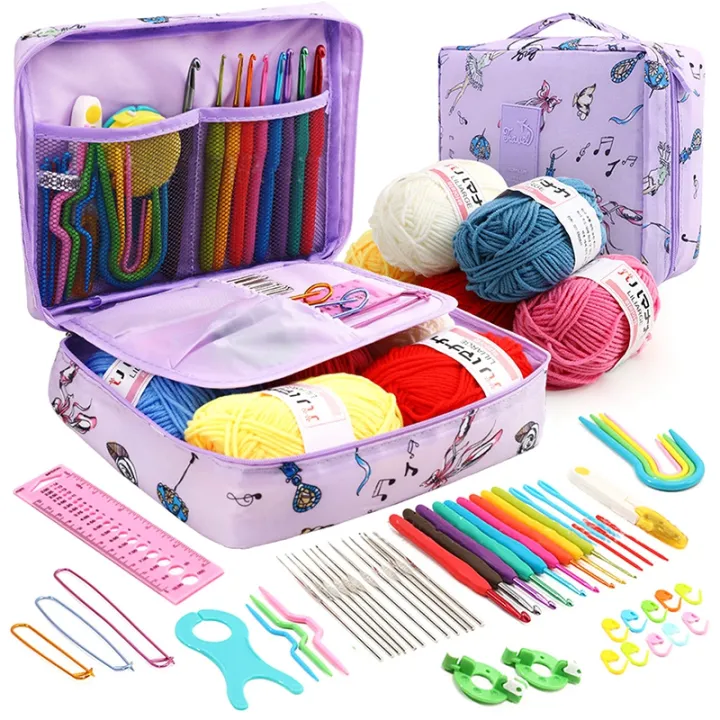
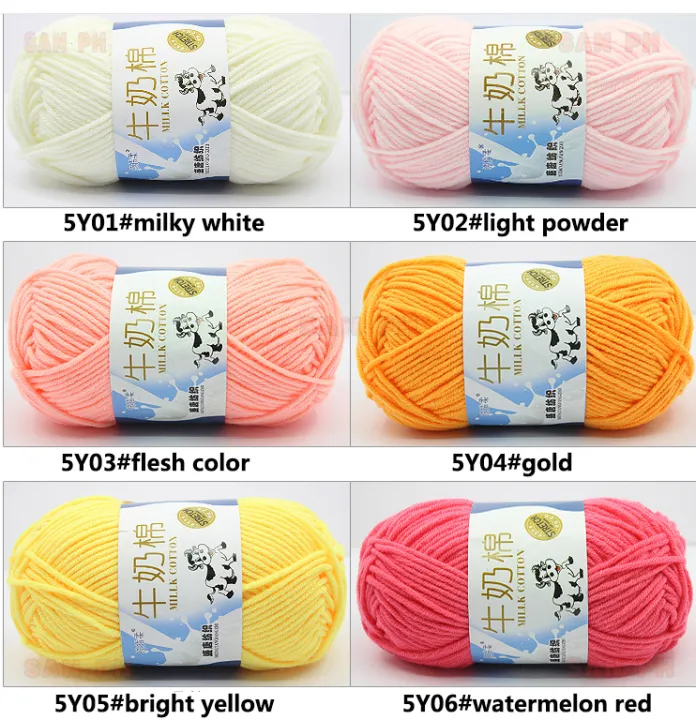

What to look for: a smooth, light-colored yarn; a hook that matches the yarn; scissors; a tapestry needle; stitch markers; and a ruler. You can add more tools later, but these are enough for the whole lesson.
Learn the Parts Before You Begin
A few terms will make the instructions much easier to follow:
- The working yarn is the strand that runs from your hook to the ball.
- The tail is the short loose end left after you make the slip knot or cut the yarn.
- The loop on the hook is the active loop. Unless a pattern tells you otherwise, it does not count as a completed stitch.
- A chain is a series of linked loops made by pulling yarn through the loop on your hook.
- A stitch is a completed unit of crochet. In flat work, the top of a stitch usually looks like a small letter V.
- The front loop is the side of that V closest to you. The back loop is the side farther away.
- A row is a line of stitches worked from one side of the fabric to the other.
- A turning chain raises the hook to the height needed for the next row. In this tutorial, the turning chain does not count as a stitch.
Keep one rule in mind from the start: the loop already sitting on your hook is not the stitch you are about to work into. Look below the hook for the next chain or V-shaped stitch.
Step 1: Hold the Hook and Tension the Yarn
There are two common hook grips. With the pencil grip, you hold the hook much like a pencil, resting it near the base of your thumb and index finger. With the knife grip, your hand rests above the handle as if you were holding a table knife. Try both. Choose the grip that keeps your wrist straight and your fingers relaxed.
For the yarn hand, begin with a simple tension path:
- Let the working yarn come from the ball across your left palm.
- Pass it around your little finger once.
- Bring it under your ring and middle fingers.
- Lift it over your index finger.
- Hold the knot or fabric lightly between your left thumb and middle finger.
Your left index finger acts like a small guidepost. Raise it slightly to create room for the hook. The little finger and the fingers across your palm add gentle resistance so the yarn does not spill freely from the ball.
Do not clamp the yarn. It should slide when the hook pulls. If the yarn leaves a deep line across your finger or your hand begins to ache, unwrap it and try again with less resistance. Many experienced crocheters use a different tension path; the right method is simply one you can repeat without strain.

Action check: the hook rests comfortably in the right hand, the working yarn travels over the left index finger, and the left thumb and middle finger are free to pinch the knot or fabric just below the hook.
Step 2: Make a Slip Knot
The slip knot attaches the yarn to the hook and lets the active loop change size.
- Pull about 15 cm (6 in) of yarn from the ball. This short section becomes the tail.
- Lay the yarn across your fingers and form a loop, crossing the working yarn over the tail.
- Hold the crossing point with your thumb and index finger.
- Reach through the loop with the hook and catch a small bend of the working yarn—not the tail.
- Pull that bend through the original loop. A new adjustable loop will form.
- Place the new loop on the shaft of the hook.
- Pull the tail gently to close the knot, then pull the working yarn until the loop fits around the hook shaft.
The loop should slide when you tug the working yarn. If it locks in place, you probably pulled the tail through the first loop. Undo it and try again.
Keep the active loop large enough to move along the straight shaft of the hook. Do not tighten it around the narrow throat below the hook head. A strangled first loop makes the first chain unnecessarily difficult.

Action check: one loop sits on the hook, the knot rests immediately below it, the working yarn leads to the ball, and the 15 cm tail hangs free.
Step 3: Make a Foundation Chain
The foundation chain is the base of your first row. Each chain comes from the same two-part motion: yarn over, then pull through.
- Pinch the slip knot between your left thumb and middle finger. Hold it close to the hook without squeezing the active loop.
- Move the hook under the working yarn so the yarn comes over the hook from back to front. This is a yarn over.
- Turn the hook head slightly downward. The groove of the hook should face the loop you are about to pass through.
- Draw the yarn-over strand through the loop already on the hook.
- Stop when one new loop remains on the hook. You have made one chain.
- Slide your left-hand pinch upward so it stays near the hook, then repeat.
The loop that remains on the hook is active; do not count it. Count the V-shaped links below it. Make 21 chains for the coaster.
Aim for rhythm, not speed. The hook catches the yarn on its wider shaft, rotates slightly downward, and glides through the loop. If you make each chain on the narrow throat of the hook, the chain will become too tight. Let every new loop settle briefly on the straight shaft so the chains stay close to the same size.

Action check: after every pull-through, only one loop remains on the hook. The completed chain hangs below it as a row of even V shapes.
If the Chain Is Too Tight
Make a short practice chain and bend it gently. It should move like a soft cord. If it feels rigid or you cannot insert the hook into its links, loosen the active loop before each yarn over. You can also make the foundation chain with a hook 0.5 mm larger, then return to the 5 mm hook for the first row.
If the Chain Twists
A loose chain may curl, which is harmless. Before starting the first row, run your fingers from the hook to the beginning of the chain and let all the V shapes face the same direction. Do not pull the chain straight so firmly that you tighten it.
Step 4: Find the Correct Chain and Insertion Point
Look at the front of the chain. Each chain has two strands that form a V. Turn the chain over and you will see a line of small horizontal bars along the back. These are the back bumps.
For the coaster, work into the back bumps. This takes a little patience on the first row, but it leaves a clean, V-shaped lower edge.
- Keep the active loop on the hook.
- Find the first completed chain directly below the hook. Do not work into it.
- Count down to the second chain from the hook.
- Turn the chain just enough to see its back bump.
- Insert the hook under that one bump from front to back.
The skipped first chain gives the new row enough height for single crochet. It does not count as a stitch. If the back bump is too tight to enter, use the tip of the hook to open it gently; do not split the yarn fibers.

Action check: the hook passes under the back bump of the second chain from the hook. One active loop is still on the hook before you pull up any yarn.
Step 5: Make the First Half of a Single Crochet
Single crochet creates a compact, sturdy fabric. The stitch has two pull-through stages.
Begin with the hook inserted into the second chain from the hook:
- Hold the foundation chain close to the insertion point with your left thumb and middle finger.
- Yarn over: move the hook under the working yarn so the yarn lies in the hook groove.
- Turn the hook head slightly downward.
- Pull the yarn back through the chain bump only.
- Stop and look at the hook. You should now have two loops on it.
The first loop was your active loop. The second loop is the one you just pulled through the chain. If you see only one loop, you may have pulled the new loop through the old one by mistake. Undo the motion and try again more slowly.

Action check: the hook has two clearly separated loops. The foundation chain stays below the hook, and the working yarn still runs over the left index finger to the ball.
Step 6: Complete the Single Crochet
With two loops on the hook:
- Yarn over once more.
- Rotate the hook head slightly toward the two loops.
- Pull the yarn-over strand through both loops in one motion.
- Stop when one loop remains on the hook.
You have completed one single crochet. The top of the new stitch looks like a small V just below the active loop.
To make the rest of Row 1:
- Insert the hook under the back bump of the next chain.
- Yarn over and pull up a loop: two loops on the hook.
- Yarn over and pull through both loops: one loop on the hook.
- Repeat in every chain across.
Because you started with 21 chains and skipped one, Row 1 should contain 20 single crochet stitches. When you reach the beginning of the foundation chain, stop and count the V shapes along the top edge. Do not count the active loop on the hook.
Place a stitch marker through the top of the first stitch and another through the top of the twentieth stitch. These markers show where the row begins and ends—two spots beginners often miss.

Action check: one loop remains on the hook after each completed stitch. Row 1 has 20 top V shapes, and the lower edge shows the unused front V shapes of the foundation chain.
Step 7: Turn the Work and Begin Row 2
Crochet worked flat grows one row at a time. At the end of Row 1, the hook is on the left side of the work.
- Chain one: yarn over and pull through the active loop. This is the turning chain.
- Keep the hook in the new active loop.
- Turn the fabric like a page so the back of Row 1 faces you. The working yarn should remain behind the hook, not wrapped around the front edge.
- Find the first V-shaped stitch directly below the turning chain. This is the first stitch of Row 2.
- Insert the hook under both strands of that V—the front loop and back loop.
- Yarn over and pull up a loop: two loops on the hook.
- Yarn over and pull through both loops: one loop on the hook.
In this tutorial, the chain-one turning chain does not count as a stitch. Work the first single crochet into the very first stitch. Continue across, placing one single crochet under both loops of every stitch.
The last stitch can lean toward the edge and hide beside the turning chain from the previous row. Use the end marker to find it. Work into the marked V, then move the marker to the first and last stitches of the new row.
Count again: Row 2 should also have 20 stitches.

Action check: the turning chain sits at the edge and is not counted. The first single crochet goes into the first top V directly below it; the last single crochet goes into the marked last V at the opposite edge.
Step 8: Learn Double Crochet
Double crochet is taller and more open than single crochet. It adds one yarn over before insertion and pulls through the loops in pairs.
Use a separate practice chain if you want to keep the coaster entirely in single crochet. Chain 12 loosely. For this exercise, the first two chains provide height and do not count as a stitch.
- Yarn over once. Keep that wrap on the hook.
- Insert the hook into the third chain from the hook.
- Yarn over and pull through the chain. You now have three loops on the hook.
- Yarn over and pull through the first two loops. Two loops remain.
- Yarn over again and pull through the final two loops. One loop remains.
That is one double crochet. Work one double crochet into each remaining chain. You will finish with 10 stitches.
To make another row, chain two and turn. In this lesson, the chain two does not count as a stitch, so work the first double crochet into the first V directly below it. Some patterns treat a chain three as the first double crochet; always follow the turning-chain rule stated in the pattern you are using.
A useful spoken rhythm is: yarn over, insert, pull up a loop; pull through two, pull through two.

Action check: double crochet begins with three loops on the hook, drops to two loops after the first pull-through, and ends with one loop after the second pull-through.
Step 9: Read Your Stitches and Keep the Edges Straight
Stop after every row and look at the fabric before continuing.
Find the Top of a Stitch
Each completed single crochet has a V on top. When a pattern says to work “under both loops,” insert the hook under both strands of that V. The vertical post below the V belongs to the same stitch but is not the usual insertion point.
Count Stitches
Lay the row flat and count the top V shapes from one edge to the other. Do not count the active loop or the chain-one turning chain. For the coaster, every row must contain 20 stitches.
If you have 19 stitches, you probably skipped the last V. If you have 21, you may have worked into the turning chain or placed two stitches into the first stitch.
Count Rows
Single crochet forms compact horizontal ridges. The easiest method is to place a marker in Row 1 and count upward from that reference point. You can also count the edge stitches: each stacked edge V represents one completed row.
Watch the Last Stitch
The final stitch is the most common place to lose width. Before working it, spread the fabric slightly and look for the marker. Insert under both loops of the marked V. Move the marker to the new last stitch after the row is complete.

Action check: the image should make the top V, front loop, back loop, first stitch, and last stitch visually distinct. On your own work, use markers until you can recognize those points without hesitation.
Step 10: Make a Square Crochet Coaster
Now repeat the single crochet you have learned. Cotton is the best choice for a drink coaster because it absorbs condensation and tolerates regular washing.
Finished Size
Approximately 10–11 cm (4–4¼ in) square. Your result may be slightly larger or smaller because every crocheter holds yarn differently.
Materials
- about 20–25 g of medium-weight cotton or cotton-blend yarn;
- 5 mm (US H-8) hook;
- two stitch markers;
- scissors;
- tapestry needle; and
- ruler.
Coaster Pattern
Foundation: Chain 21.
Row 1: Starting in the second chain from the hook, work one single crochet into the back bump of each chain. You should have 20 sc. Chain 1, then turn.
Row 2: Work one sc under both loops of each stitch across. You should have 20 sc. Chain 1, then turn.
Rows 3–19: Repeat Row 2. Count 20 stitches at the end of every row. Move the markers to the first and last stitches as you go.
Row 20: Work one sc in each stitch across. You should have 20 sc. Do not make a turning chain after the final stitch.
Lay the piece flat without stretching it. It should be close to square. If it measures 10 cm wide but is not yet 10 cm tall, add rows until the height matches the width. If it reaches the same height before Row 20, you can stop at that point. A square matters more than the exact row number.

Action check: the working row has 20 visible top V shapes, the first and last stitches are marked, and the sides rise in straight stacks rather than stepping inward or flaring outward.
A Simple Practice Routine
Work in short sessions if your hands are new to the movement. After each row:
- set the hook down while keeping the active loop large enough not to unravel;
- relax your shoulders and open both hands;
- count the stitches;
- compare the two side edges; and
- measure the width every five rows.
This pause takes less than a minute and catches mistakes before you build several rows on top of them.
Step 11: Fasten Off
Fastening off secures the active loop so the fabric cannot unravel.
- Finish the last single crochet and leave one active loop on the hook.
- Cut the working yarn about 15 cm (6 in) from the hook.
- Yarn over with the cut end and pull it all the way through the active loop. Alternatively, enlarge the active loop and draw the cut tail through it.
- Remove the hook.
- Pull the new tail gently until the final loop closes into a small knot at the edge.
Do not cut the tail close to that knot. The tail still needs to be woven through the fabric; the knot alone is not a secure finish.
Step 12: Weave In the Ends and Shape the Coaster
Thread one yarn tail through the eye of the tapestry needle.
- Turn the coaster to the wrong side. For a simple square, choose one side as the back and keep all finishing paths there.
- Slide the needle horizontally through the dense backs of five or six stitches. Do not push it through to the front.
- Pull the yarn through until the tail lies flat, but stop before the edge puckers.
- Change direction and weave back through four or five nearby stitches. Passing back through the fabric helps the tail resist movement during washing.
- For cotton, change direction once more if the yarn is slippery.
- Stretch the fabric gently so the woven section settles, then trim the remaining tail close to the surface.
- Repeat with the starting tail along the lower edge.
If the coaster needs shaping, dampen it with clean water and press out the excess in a towel. Do not wring it. Smooth it into a square on a dry towel or foam mat, check the corners with a ruler, and leave it flat until completely dry. This is called blocking.
Avoid high heat, especially with acrylic yarn. Heat can flatten or melt synthetic fibers. The yarn label remains the best guide for washing and drying.

Action check: the fastening tail passes fully through the final loop, the woven tail changes direction inside the backs of the stitches, and the finished coaster lies flat with four even sides.
Troubleshooting: What Went Wrong?
“I Cannot Insert the Hook”
Your foundation chain or active loop is probably too tight. Make each chain on the straight shaft of the hook, not at the narrow throat. If needed, remake only the foundation chain with a 5.5 mm hook.
“The Yarn Splits”
The hook tip is passing between the yarn fibers instead of under the whole strand. Slow down, aim for the center of the opening, and rotate the hook rather than forcing the tip forward. Smooth, tightly twisted yarn also helps.
“My Hook Keeps Losing the Yarn”
After a yarn over, rotate the hook head slightly downward before pulling through. Keep the working yarn taut enough to sit in the hook groove, but not so tight that it cannot move.
“The Piece Is Getting Narrower”
You are losing stitches, usually at the last stitch of a row. Count the top V shapes and keep markers in both edge stitches. If the count has already dropped, unravel to the row where you still had 20 stitches and work forward again.
“The Piece Is Getting Wider”
You are adding stitches. Check that you are not working into the chain-one turning chain. Make only one stitch in the first V and one in the last V.
“The Fabric Curls”
A small amount of curling in the first few rows is common. Strong curling usually means the foundation chain is tighter than the later stitches or your working tension is very tight. Loosen your grip and continue for a few rows. If the lower edge still pulls inward, restart with a looser or larger-hook foundation chain.
“The Rows Look Uneven”
Uneven tension is normal at first. Try to keep the active loop at the same height on the hook shaft and let the working yarn slide through your left hand. Do not tug each stitch tight after finishing it. Ten calm rows teach your hands more than two rows worked under pressure.
“I Made a Mistake Several Stitches Back”
Remove the hook and pull the working yarn slowly. The stitches will undo one at a time. Stop when the loop from the last correct stitch remains, place the hook back into that loop, and continue. Crocheters call this frogging. It is a normal part of the craft, not a failed attempt.
How to Care for Your First Coaster
Follow the care symbols on the yarn label. Cotton coasters can often be hand-washed or machine-washed on a gentle cycle, but dyes and blends vary. Reshape the coaster while damp and dry it flat. Keep the yarn label until the first wash so you do not have to guess.
What to Learn Next
Once you can keep 20 stitches in every row, make the same square again in double crochet. Then practice changing colors at the end of a row, joining squares, and reading a short written pattern. Those skills open the door to scarves, dishcloths, tote bags, cushion covers, and simple blankets.
Do not wait for perfectly even tension before making something useful. Your second square will look different from your first because your hands have already learned where the hook belongs. That visible improvement is part of the pleasure of crochet.
This article was produced with AI assistance and has been reviewed by humans.


