


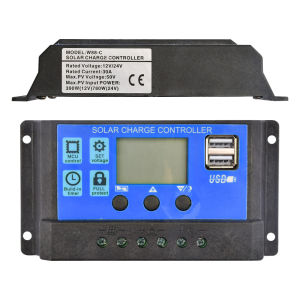
12V/24V Solar Panel Controller 10A to 60A LCD Display Dual USB Output 3-phase PWM Charge for Solar Panel Battery System Charging
Product feature:1. Features an industrial-grade main control chip2. Large LCD display with adjustable charging and discharging parameters3. Comprehensive 3-stage PWM charging management4. Built-in overcurrent, short-circuit, open-circuit, and reverse-connection protection—all self-recovering and designed not to damage the controller5. Dual MOSFET backflow prevention circuit with ultra-low heat generationProduct SpecificationsMaximum PV Voltage: Up to 23V for 12V batteries; up to 46V for 24V batteriesFull Charge Cut-off Voltage: 14.4V (default, adjustable)Discharge Cut-off Voltage: 10.7V (default, adjustable)Discharge Recovery Voltage: 12.6V (default, adjustable)Charge Resumption Voltage: 13.2VLight-Controlled On Threshold: 8V for solar panels (light-controlled on has a delay)Light-Controlled Off Threshold: Light-controlled off thresholdUSB Output: 2 USB outputs, 5V/2.5A (max)Standby Current: <10mAOperating Temperature: -35 to +60°CDimensions: 133.5 × 70 × 35 mmUser Manual1. This controller automatically adapts to 12V or 24V. During initial installation, ensure the battery has sufficient voltage so that the controller can correctly identify the battery type.2. Install the controller as close to the battery as possible to avoid voltage drops caused by excessively long wires, which could affect accurate voltage detection.3. This controller is only suitable for various types of lead-acid batteries (including open-type, sealed, and gel batteries). Do not use it with other battery types (including lithium-ion and nickel-metal hydride batteries).4. This controller can only be powered by solar panels; do not use DC or other power sources as the charging source.6. This controller generates heat during operation; be sure to install it on a flat, well-ventilated surface.Menu Button: Used to switch between parameter screens; press and hold for 5 seconds to enter or exit parameter settings.Up Arrow: In the parameter settings screen, press once to increase the parameter value by one step.Down Arrow: In the parameter settings screen, press once to decrease the parameter value by one step.System Connection1. Connect the positive and negative terminals of the battery to the controller as shown in the diagram; the controller will automatically detect the battery voltage.2. Connect the positive and negative terminals of the load to the controller as shown in the diagram; be careful not to reverse the polarity.3. Connect the solar panel to the controller as shown in the diagram.Note: Pair a 12V battery with an 18V solar panel, and a 24V battery with a 36V solar panel. This product is only compatible with various types of lead-acid batteries (including open-type, sealed, and gel batteries); do not use it with other types of batteries (including lithium-ion and nickel-metal hydride batteries).Contents:Solar Controller x1

GlobalLifestyle
Review

You May Also Like
Jiaxun | Universal Toilet Tank Inlet Valve Ball Valve

Gloves Rubber Construction Cotton Knitted GlovesGardening

PRIDE P307D wild card elbow circlip pliers

BUTTERY & CO.Waterproof for 50 years Aluminum Foil Butyl Tape Super Fix Repair Wall Crack Waterproof

Reusable Latex Yellow Rubber Gloves Latex Kitchen Long Dish Washing Cleaning
BLINGOO Hose 304 Stainless heavyduty Flexible Hose High Quality Hose Bathroom Hose Toilet Hose cold and hot water
Brifit 3.66 Inch Key Lock Box 4 Digit Combination Key Storage Lock Box Wall Mounted Key Safe Box 5 Keys Capacity Weatherproof for Indoor Outdoor
Creative Plastic Bottle Cutter Outdoor Portable Smart Bottles Rope Tools DIY Craft Bottle Rope Cutter Plastic Bottles Rope Tools
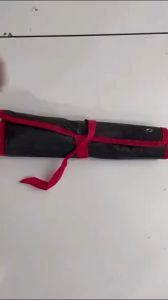
Professional 8 12 14pcs Combination Wrench Spanner Car Repair Box Set Tools Set 8-24mm SATA Tools Set Hardware Storage Box Heavy Duty Car Workshop Repair Socket Wrench Alat Pembaikan Kereta Pemutar Skru Sepana

10Pcs Sanitary Reusable Food Mask Transparent Food Sanitary Mouth Mask Catering Anti Fog Mask

CKS Wooden Wall Shelf with 4 Metal Hooks | Rustic Key Holder & Organizer Fine Wood Key Holder