DIY 18650 Charger Case: A Detachable Power Case with LED Light USB C Quick Charging
DIY 18650 Charger Case: A Detachable Power Case with LED Light USB C Quick Charging
Welcome to our comprehensive guide on DIY 18650 charger cases, specifically designed for those who enjoy building their own projects. This article will cover everything you need to know about these versatile power cases, including their features, advantages, how to choose the right one, assembly instructions, and troubleshooting tips.
What is a DIY 18650 Charger Case?
A DIY 18650 charger case is a detachable power case that allows you to charge your 18650 batteries quickly and efficiently using a USB C port. These cases often come with LED lights to indicate charging status and can be easily assembled to fit various battery configurations.
Key Features of DIY 18650 Charger Case
- LED Light USB C Charging: The LED light provides visual feedback on the charging status, while the USB C port ensures fast charging speeds.
- Quick Charging Case Type C: With its USB C port, this charger case supports quick charging, making it ideal for users who want to minimize downtime.
- Detachable Power Case: The detachable design allows for easy access to batteries and customization to fit various battery configurations.
- USB Port for DIY Projects: The USB port can be used to power other devices or projects, making it a versatile addition to any maker's toolkit.
Advantages of Detachable Power Case
- Customizable Battery Configuration: The detachable design allows you to easily adjust the number of batteries in your charger case, depending on your project's power requirements.
- Quick Charging: With USB C port support, these charger cases offer fast charging speeds, reducing downtime and increasing productivity.
- Portability: These charger cases are lightweight and compact, making them easy to carry around for on-the-go projects.
How to Choose the Right DIY 18650 Charger Case
When selecting a DIY 18650 charger case, consider the following factors:
Key Considerations When Selecting a DIY 18650 Charger Case
- Battery Configuration: Determine how many batteries you need to charge and choose a charger case that can accommodate this configuration.
- Charging Speed: Look for a charger case with USB C port support for faster charging speeds.
- Portability: Choose a charger case that is lightweight and compact for easy transportation.
Comparison of Different Models of DIY 18650 Charger Case
| Model | Battery Configuration | Charging Speed | Portability | | --- | --- | --- | --- | | Model A | 2-4 batteries | Fast (USB C) | Lightweight and compact | | Model B | 1-3 batteries | Medium (USB C) | Compact | | Model C | 1-2 batteries | Slow (Micro USB) | Large |
How to Assemble and Use Your DIY 18650 Charger Case
Follow these steps to assemble and use your DIY 18650 charger case:
Step-by-Step Guide to Assembling Your DIY 18650 Charger Case
- Prepare Your Tools: Gather all necessary tools, including screwdrivers and pliers.
- Insert Batteries: Insert your 18650 batteries into the charger case according to the manufacturer's instructions.
- Connect USB C Cable: Connect the USB C cable to the charger case and plug it into a power source.
- Monitor LED Light: Watch the LED light to monitor the charging status.
Tips for Using Your DIY 18650 Charger Case Effectively
- Charge Batteries Separately: Charge batteries individually to prevent overcharging and ensure optimal performance.
- Monitor Charging Time: Monitor the charging time to avoid overcharging and extend battery life.
- Store Batteries Properly: Store batteries in a cool, dry place to maintain their performance.
Common Issues and Troubleshooting
Despite their benefits, DIY 18650 charger cases can encounter some issues. Here are some common problems and troubleshooting tips:
Common Problems Encountered with DIY 18650 Charger Cases
- Slow Charging: This may occur if the USB C port is damaged or if the power source is weak.
- LED Light Not Working: This may be due to a faulty LED light or a loose connection.
- Battery Not Charging: This may occur if the battery is damaged or if the charger case is not properly assembled.
Troubleshooting Tips for DIY 18650 Charger Cases
- Check USB C Port: Inspect the USB C port for any visible damage and replace the cable if necessary.
- Inspect LED Light: Check the LED light for any signs of damage and replace it if needed.
- Verify Battery Connection: Ensure that the battery is properly connected and seated in the charger case.
- Check Battery Condition: Test the battery using a multimeter to determine if it is functioning properly.
In conclusion, DIY 18650 charger cases offer a versatile and customizable solution for charging your batteries quickly and efficiently. By following the guidelines outlined in this article, you can choose the right charger case for your project, assemble it correctly, and troubleshoot any issues that may arise. Happy building!

Armandg Judithw
Review

You May Also Like

Samsung Galaxy Z Flip 6 Case: Funny Cartoon Crayon Design & Drop-resistant Shockproof Protection

Adjustable Length Crossbody Phone Strap Embroidered Lanyard Neck Strap Universal Phone Case Anti-Loss Vintage Embroidery Pendant

Artistic Graffiti Magnetic Phone Case For iPhone 16 15 14 13 12 Pro Max Plus For MagSafe Soft TPU Bumper+Hard Back Cover For iPhone 16 Pro Max Cartoon Pattern Matte Translucent Protection Casing

Sup&LV | Apple 16 Womens Phone Case Autumn Winter New Style Cute Protective Cover Small Sheepskin Anti-fall Soft Shell Environmentally Friendly
BDM 030 Controller Conductive Film Professional PCB Material Restores Button Functionality Optimizes Gaming Experience

Case for Honor Magic6 Pro Magic 6 Pro RS Design Supercar Concept Phone Back Cover Precision Hole Lens Ring PU Leather Anti-Fingerprint Anti-Drop Anti-Shockproof Protective Case
Drum Washing Machine Cover: Waterproof and Sun Protection Cover, Cloth Cover, Fully Automatic Haier Little Swan Panasonic Midea Dustproof Neutral

Discover the Perfect Fit: Vivoy53t Phone Case & Cute Line Dog Cartoon
Ultra-Thin Foldable Screen Protector Case for Honor MagicV5 Mobile Phone Black Transparent Original Top Border Protective Cover
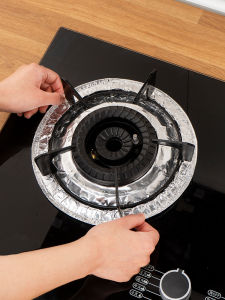
Kitchen Gas Stove Oil-Proof Pad Stickers Protective round Square Special Oil-Proof Pads for Stove Home Decor Pure Color
Alivo Oppo R15 Dream Edition Flip Cover: Full Protection & Eco-Friendly