


Adjustable Speed 12cm Duct Fan 3000RPM DC12V for Efficient Ventilation in DIY Welding Craft and 3D Printing Enclosures
Adjustable Speed 12cm Duct Fan 3000RPM DC12V for Efficient Ventilation in DIY Welding Craft and 3D Printing Enclosures
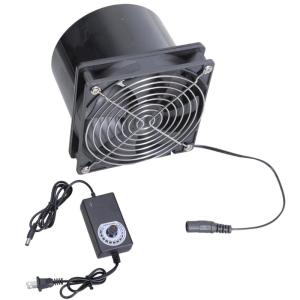
Experience powerful ventilation with our 12cm exhaust fan, featuring a robust 3000RPM motor and double ball bearing for efficient smoke and air extraction in various environments. This ventilation fan kit includes a DC12V variable speed control, a metal mesh, and a 12cm duct adapter, ensuring great performance and easy installation for your craft projects. Ideal for hobbyists, DIY enthusiasts, and homeowners seeking effective ventilation solutions for their workshops, kitchens, bathrooms, and more.
What is the Adjustable Speed Duct Fan?
Our Adjustable Speed Duct Fan is a versatile ventilation solution designed for efficient smoke and air extraction in different environments. With its robust 3000RPM motor and double ball bearing, it ensures reliable performance and long-lasting durability. The fan kit includes a DC12V variable speed control, allowing you to adjust the fan speed according to your specific needs. Additionally, the metal mesh and 12cm duct adapter provide easy installation and compatibility with various applications.
Key Features
- Robust 3000RPM motor
- Double ball bearing for durability
- DC12V variable speed control
- Metal mesh and 12cm duct adapter included
Applications
- Workshops
- Kitchens
- Bathrooms
- DIY projects
- 3D printing enclosures
- Welding craft setups
How to Use the 3D Printing Enclosure Fan
To install and operate the 3D printing enclosure fan, follow these steps:
- Connect the fan to a 12V power source using the included DC12V variable speed control.
- Position the fan within your 3D printing enclosure, ensuring proper airflow and adequate ventilation.
- Adjust the fan speed using the variable speed control according to your specific needs.
Tips for Optimal Performance
- Ensure the fan is securely mounted and properly positioned within the enclosure.
- Regularly clean the metal mesh to maintain optimal airflow.
- Consider using additional fans or exhaust systems for larger enclosures or higher heat output.
DIY Welding Craft Fan Setup
To set up the welding craft fan for efficient smoke extraction, follow these steps:
- Connect the fan to a 12V power source using the included DC12V variable speed control.
- Position the fan near the welding area, ensuring proper airflow and smoke extraction.
- Adjust the fan speed using the variable speed control according to your specific needs.
Ventilation Solutions for Welding Projects
- Use multiple fans or exhaust systems for larger welding areas or higher smoke output.
- Consider using a dedicated exhaust system for welding projects to maintain a safe and healthy work environment.
Best Practices for Efficient Smoke Extraction
- Regularly clean the metal mesh to maintain optimal airflow.
- Position the fan to capture smoke and fumes at their source.
- Consider using additional ventilation solutions, such as exhaust fans or air purifiers, to improve overall air quality.
Frequently Asked Questions
Product Specifications
- Fan size: 12cm
- Motor speed: 3000RPM
- Power supply: DC12V
- Included accessories: Variable speed control, metal mesh, and 12cm duct adapter
Troubleshooting Common Issues
- If the fan does not start, check the power connection and ensure the fan is properly installed.
- If the fan runs at a lower speed than expected, adjust the variable speed control or check the power supply voltage.
- If the fan produces excessive noise, inspect the metal mesh and clean or replace it if necessary.

Car PJ-Shop
Review

You May Also Like

3/8Inch Quick Response Engine Cooling Fan Temperature Sensor for Optimally Driving Conditions Efficient Heat Management

HP 14-ep1144TU | Intel i5-120U | 16GB | 512GB SSD | W11 | Office 2024 + M365 | Silver

N8400GS-D1GD3H/LP MSI PRELOVED

Lanrui G4 Explosion-proof Delaminator Rotate 340° Strong Magneticad Sorption for Assist in Removingthe Cover Layered Motherboard
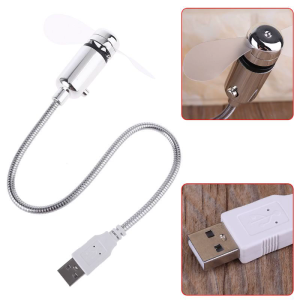
USB-Powered Portable Mobile USB Fan Mini Gooseneck Fan for Laptop Office Home Travel (1 PACK)

100Pcs Resealable ESD Electronic Device Storage Anti-Static Shielding Ziplock Bags For Motherboard

CROWMSTAR 12V 1.5A UPS Battery Backup for WiFi Router Modem and CCTV Camera Power Supply
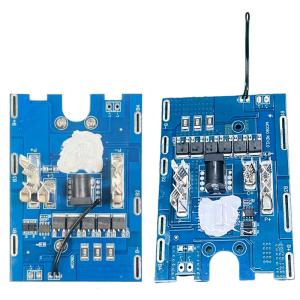
21V 5 String Safety Module 30A 25A Overloads Protections Thermals Management Coppers Alloy Board

Eyoyo Portable Digital Magnifier Reading Aid: 3.5 Inch LCD Screen for Low Vision 2x-25x Zoom Foldable Handle

CORSAIR iCUE AF120 RGB SLIM 120mm PWM Fluid Dynamic Bearing Fan Twin Pack: White & Black Options
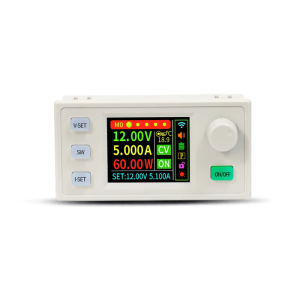
0~40V 60W Step-Down Stabilized Voltages Current Regulator Constant Voltages Current Step Down Module Converter Easy to Use


