WHEEL SPACER for EON 2011-2019: A Comprehensive Guide
WHEEL SPACER for EON 2011-2019: A Comprehensive Guide
Introduction to WHEEL SPACER for EON 2011-2019
What is a Wheel Spacer?
A wheel spacer, also known as a hub spacer, is a device that increases the distance between the wheel hub and the tire. This allows for a wider track width, which can improve handling, stability, and overall vehicle appearance. Wheel spacers are commonly used by car enthusiasts and professionals alike to customize their vehicles.
Understanding the EON 2011-2019 Compatibility
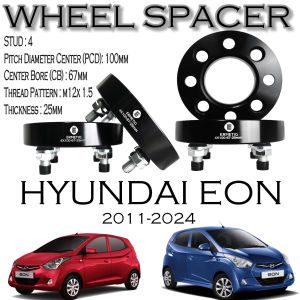
EON is a brand of vehicles produced by Hyundai, and the EON 2011-2019 models have specific compatibility requirements for wheel spacers. This article will focus on the 25mm thickness wheel spacer with a 4x100 M12x1.5 thread size, which is compatible with EON vehicles from 2011 to 2019.
Key Features & Specifications
25mm Thickness Wheel Spacer
The 25mm thickness wheel spacer is specifically designed for EON 2011-2019 models. This thickness provides a noticeable increase in track width, enhancing the vehicle's appearance and handling.
4x100 M12x1.5 Thread Size
The 4x100 M12x1.5 thread size is a standard measurement for wheel spacers compatible with EON vehicles. This ensures a secure fit and proper alignment with the existing wheel bolts.
Benefits of Using a Wheel Spacer
Using a wheel spacer can provide several benefits, including:
- Improved handling and stability
- Enhanced vehicle appearance
- Increased track width
- Customization options
How to Install a WHEEL SPACER for EON 2011-2019
Tools Required for Installation
Before installing the wheel spacer, gather the following tools:
- Jack and jack stands
- Lug wrench
- Torque wrench
- Measuring tape
Step-by-Step Installation Process
- Park the vehicle on a flat surface and engage the parking brake.
- Loosen the lug nuts while the vehicle is still on the ground.
- Lift the vehicle using a jack and place it on jack stands for safety.
- Remove the lug nuts and wheel.
- Install the wheel spacer onto the hub, ensuring proper alignment with the existing wheel bolts.
- Reinstall the wheel and tighten the lug nuts by hand.
- Lower the vehicle and use a torque wrench to tighten the lug nuts to the manufacturer's specifications.
- Repeat the process for the remaining wheels.
Tips for a Smooth Installation Experience
- Always follow the manufacturer's guidelines for torque specifications.
- Inspect the wheel spacers and hub for any damage before installation.
- Double-check the alignment of the wheel spacer during installation.
Common Issues & Troubleshooting
Identifying Problems with Your Wheel Spacer
Common issues with wheel spacers include:
- Loose fit or improper alignment
- Damage to the spacer or hub
- Incorrect torque specifications
Solutions to Common Issues
- Ensure proper alignment during installation.
- Replace damaged spacers or hubs.
- Follow the manufacturer's guidelines for torque specifications.
Preventive Measures for Future Problems
- Regularly inspect the wheel spacers and hub for damage.
- Follow proper installation procedures.
- Monitor the vehicle's handling and stability after installation.

Turbochill Online Store
Review

You May Also Like

【Buy 3 Get 2 Free】Car Glass Oil Film Remover Front Windshield Strong Decontamination Foam Cleaner to Remove Oil Film Cleaning Agent汽车玻璃油膜去除剂
Motorcycle CNC Front Footpegs Matting Footrest For Dayang FKM FEKON Venture 150 ADV150
Specialized Benelli 552X Motorcycle Rear License Plate Frame 502X/502C/752S Modification Accessories Number Plate Frame
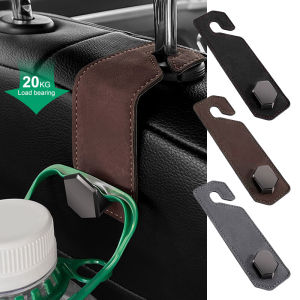
SEAMETAL Car Seat Headrest Hook: A Suede Metal Car Storage Hanger

5211JEW Portable Center Console Armrest Cushion PU Leather Multifunctional Armrest Pad Convenient Height Increasing Storage Box Car

Customizable Automotive Decoration: Reflective Electric Motorcycle Stickers & Anime Car Decals
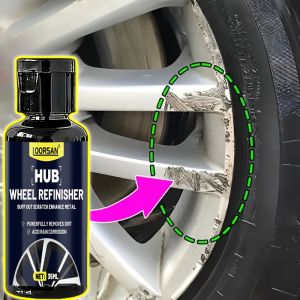
Car Wheel Hub Scratch Repair Kit - Wheel Hub Refurbishment And Polishing Car Wheel Hub Scratch And Fading Repair Agent High-Qu
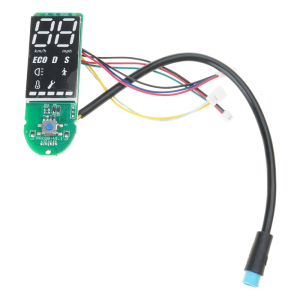
Intelligent Dashboard LCD Screen Instrument Meter with Fault Detection System Enhances Riding Safety
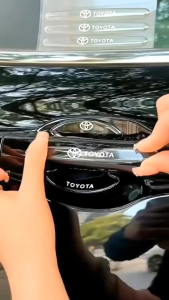
8pcs Car Door Handle Universal Hand Buckle Protection Cover Car Handle Door Bowl Anti-Scratch Protective Film Carbon Fiber Stickers For Toyota 8pcs/Set
4 in 1 Car jump Starter Jump 11000mAh Heavy Duty Starter For Car Battery Car Battery Multi-function Rechargeable Emergency Jump Starter With Air Pump Car Starter Car Jump Start Power Integrated With Inflation Pump
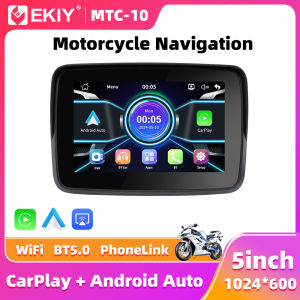
EKIY Wireless CarPlay Moto 5.0 inch Portable Digital Motorcycle Dashboard GPS Navigation Display Screen Android Auto Monitor