


How to Replace Pads for Painting: A Guide to Using Paint Edge Trimmers
How to Replace Pads for Painting: A Guide to Using Paint Edge Trimmers
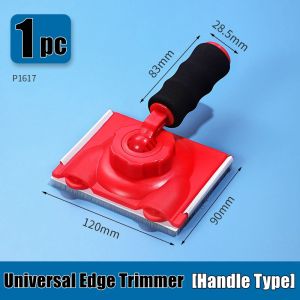
What is a Paint Edge Trimmer?
A paint edge trimmer, also known as a corner wall paint pad or ceiling paint applicator, is a specialized painting tool designed to help painters achieve clean, professional-looking edges on walls, corners, and ceilings. This edge painting tool features a replaceable foam or sponge pad attached to a handle, allowing users to easily apply paint along tight spaces and hard-to-reach areas.
Key Features of Paint Edge Trimmers
- Replaceable foam or sponge pads
- Comfortable ergonomic handle
- Lightweight design
- Suitable for both indoor and outdoor use
Benefits of Using Paint Edge Trimmers
- Achieve clean, professional-looking edges
- Save time and effort compared to traditional painting methods
- Reduce the risk of drips and smudges
- Easy to clean and maintain
Choosing the Right Paint Edge Trimmer
Selecting the right paint edge trimmer is essential to ensure optimal performance and satisfaction. Consider the following factors when selecting a paint edge trimmer:
Factors to Consider When Selecting a Paint Edge Trimmer
- Pad material (foam or sponge)
- Handle design and grip
- Size and weight
- Price
Top Brands for Paint Edge Trimmers
- Xylos
- Zinsser
- Porter-Cable
- DeWalt
How to Replace Pads for Painting with a Paint Edge Trimmer
Replacing the pads on your paint edge trimmer is a simple process that ensures optimal performance and prolongs the life of your tool.
Preparing Your Paint Edge Trimmer for Pad Replacement
Before replacing the pads, ensure your paint edge trimmer is clean and dry. Remove any old or worn-out pads by gently pulling them off the handle.
Step-by-Step Guide to Replacing Pads
- Purchase new replacement pads from a reputable supplier.
- Align the new pad with the handle and press firmly to secure it in place.
- Test the pad by applying pressure to ensure it is securely attached.
Tips for Maintaining Your Paint Edge Trimmer
- Clean the pads after each use with soap and water.
- Allow the pads to air dry completely before storing.
- Store the paint edge trimmer in a cool, dry place.
Using a Paint Edge Trimmer for Corner Walls & Ceilings
Paint edge trimmers are ideal for painting corners and ceilings, as they provide precise control and minimize the risk of drips and smudges.
Techniques for Painting Corners with a Paint Edge Trimmer
- Hold the paint edge trimmer at a 45-degree angle to the corner.
- Apply light pressure and move the tool along the corner, following the contours of the wall.
- Use a light touch to avoid excess paint buildup.
Painting Ceilings with a Paint Edge Trimmer
- Position the paint edge trimmer at the edge of the ceiling, parallel to the wall.
- Apply light pressure and move the tool along the edge, following the contours of the ceiling.
- Use a light touch to avoid excess paint buildup.
Conclusion
In summary, using a paint edge trimmer is an efficient and effective way to achieve clean, professional-looking edges on walls, corners, and ceilings. By following the steps outlined in this guide, you can easily replace pads, maintain your tool, and master the techniques for painting corners and ceilings. Remember to choose the right paint edge trimmer for your needs and follow the manufacturer's instructions for optimal results.

GlobalSuperBazaar
You May Also Like
Punch-free Power Strip Sticky Holder Multi-purpose Self Adhesive Socket Fixer

LED Red & Blue Caution Emergency Police Light Flashing Shoulder Lamp USB Rechargeable Shoulder Warning Safety Torch Bike Tail Lamp
4pcs Half Round Glass Clamps: A Comprehensive Guide
Hooks Smooth Stick Firmly Mothers Buckle Hangable Hanging Method Multi-variable Long-lasting Load-bearing
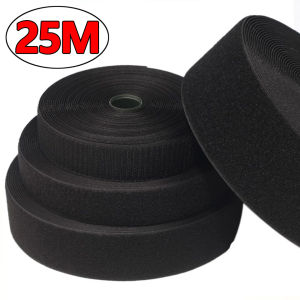
2Rolls/ 25meter sew on Hook and Loop fastening tape for clothing White or Black hook loop fabric sewing accessories
30Pcs Decorative Flower Pushpins Pins for Office Home School Push Pins Thumb Tacks Rose Flower Shaped Thumbtacks
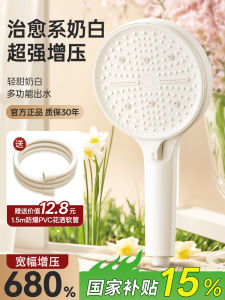
Boomen Supercharge Shower Head Set Powerful White Home Use Bath Spray Nozzle with Hose Integrated Modern Style Water Saving

Talea 50mm PP Rigid Pipe – Durable and High-Quality Plumbing Solution (W0136C004)
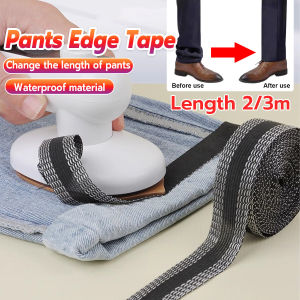
HB 2m/3m Trousers Hemming Tape Pants Edge Shorten Length Adjust Self-Adhesive Tapes
![[Toplans]💖[HOT SALE]🎈🎈 IP68 Industrial Electrical Waterproof Wire cable Connector Outdoor Plug Socket](https://img.lazcdn.com/g/p/cfb726cfb6150fbe80394e60be57adba.jpg_300x300q80.jpg)
[Toplans]💖[HOT SALE]🎈🎈 IP68 Industrial Electrical Waterproof Wire cable Connector Outdoor Plug Socket
![[Dale Dephne] 1PCS Strong Hook Viscose Non-marking Wall Hook Multiple Specifications Can Choose To Hang The Wall Buckle](https://img.lazcdn.com/g/p/4f2fc14901d4c7e7f061fe0c84509f01.jpg_300x300q80.jpg)
[Dale Dephne] 1PCS Strong Hook Viscose Non-marking Wall Hook Multiple Specifications Can Choose To Hang The Wall Buckle


