HP Tri-color Printhead (M0H50AA/M0H50A) - A Comprehensive Guide
HP Tri-color Printhead (M0H50AA/M0H50A) - A Comprehensive Guide
Introduction to HP Tri-color Printhead (M0H50AA/M0H50A)
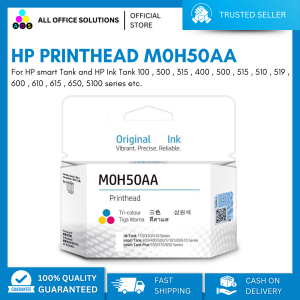
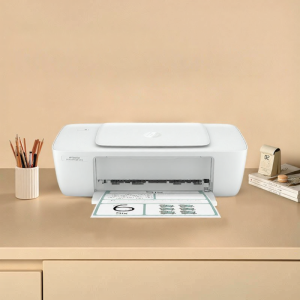
The HP Tri-color Printhead (M0H50AA/M0H50A) is a crucial component of your printer that helps produce high-quality prints. This printhead is specifically designed for HP printers and is responsible for delivering vibrant colors and sharp details in your prints. As a professional guide, we will walk you through the process of replacing your HP Tri-color Printhead, ensuring that you achieve the best possible results.
What is the HP Tri-color Printhead (M0H50AA/M0H50A)?
The HP Tri-color Printhead (M0H50AA/M0H50A) is a small, rectangular component located inside your printer. It consists of three ink cartridges - cyan, magenta, and yellow - which work together to produce a wide range of colors. This printhead is specifically designed for HP printers and is compatible with a variety of models.
Where Can I Find Compatible Printer Parts?
To ensure that you have the correct replacement parts, it is essential to purchase compatible printer components from reputable sources. HP offers a range of genuine replacement printheads, including the M0H50AA/M0H50A Tri-color Printhead. However, there are also third-party manufacturers that offer compatible printer parts at a lower cost. When purchasing replacement printheads, always verify the compatibility with your printer model before making a purchase.
How to Replace Your HP Tri-color Printhead
Replacing your HP Tri-color Printhead is a straightforward process that can be completed in just a few minutes. Follow these step-by-step instructions to ensure a successful replacement.
Step-by-Step Guide to Replacing Your HP Tri-color Printhead
- Turn off your printer and unplug it from the power source.
- Open the printer lid and locate the existing printhead.
- Gently remove the old printhead by pulling it straight out from its slot.
- Remove the new printhead from its packaging and carefully slide it into the slot.
- Close the printer lid and plug the printer back into the power source.
- Turn on the printer and allow it to perform its automatic printhead alignment.
Tips for High-Quality Inkjet Printhead Replacement
- Always handle the printhead with care to avoid damaging the delicate components.
- Clean the printhead slot with a lint-free cloth before inserting the new printhead.
- Follow the manufacturer's instructions carefully to ensure a successful replacement.
Troubleshooting Common Issues
While replacing your HP Tri-color Printhead is generally a simple process, there may be some common issues that arise. Here are some solutions to help you troubleshoot these problems.
Common Problems When Replacing HP Tri-color Printheads
- Printhead does not fit properly in the slot
- Printer does not recognize the new printhead
- Prints are not producing the expected quality
Solutions for Troubleshooting Common Issues
- Verify that the printhead is compatible with your printer model.
- Check that the printhead is inserted correctly and securely.
- Perform a printhead cleaning cycle to clear any clogs or blockages.
Conclusion
Replacing your HP Tri-color Printhead is a straightforward process that can help improve the quality of your prints. By following the step-by-step guide and tips provided in this article, you can ensure a successful replacement and enjoy vibrant colors and sharp details in your prints. Remember to always purchase compatible printer parts from reputable sources and handle the printhead with care to avoid damaging the delicate components.
Recap of Key Points
- The HP Tri-color Printhead (M0H50AA/M0H50A) is a crucial component of your printer responsible for producing vibrant colors and sharp details.
- Follow the step-by-step guide to replace your printhead successfully.
- Troubleshoot common issues by verifying compatibility, checking insertion, and performing a cleaning cycle.
Final Thoughts on Replacing Your HP Tri-color Printhead
Replacing your HP Tri-color Printhead is a simple process that can help improve the quality of your prints. By following the instructions provided in this article, you can ensure a successful replacement and enjoy vibrant colors and sharp details in your prints. Remember to always purchase compatible printer parts from reputable sources and handle the printhead with care to avoid damaging the delicate components.

AllOfficeSolutions Reference Number: 250923-161608
You May Also Like
RF Printing Supplies - 2in1 Dual-Purpose 3/4 inch ID Lace Phone String & Plastic Hook - 1pc-5pcs
Paper Pick up Feed Roller for Use and Compatible in MP1600 MP1900 MP2000 Series
HP | Color Copy Scan Phone Wireless Printer
100% Original Epson Refill Ink 003 FOR L3210 L1110 L3110 L3120 L3150 Pigment ink Epson ink
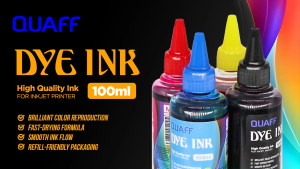
ProPRINTZ- QUAFF Dye Ink UV 100ML Universal for All Printer
Officom OC-330 Thermal Printer Waybill Printer A8 Size 80mm w/Bluetooth/USB for Wireless Portable Printer Barcode Label
Marklife D100 Bluetooth Thermal Label Printer Wireless Small Shipping Label Printer 4X6 Compatible with iOS Android Mac Window
CANON 445 446 ink cartridge refillable CISS MG2400 MG2440 MG2540 MG2940 TS3140 TS3440 TS3640 TS3940 Printers
Niimbot B1 Portable Thermal Label Printer Wireless Sticker Printer For Home Adhesive Label Maker Compatible With iOS & Android
Printing View - Refill Ink 003 for EP SON L3110 L3210 L1110 L1210 L1250 L3116 L3216 L3150 L3250 L3156 L5190 L5290
Epson Maintenance Box TO4D1