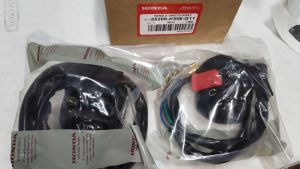
Honda Genuine Handle Switch Assembly for TMX125
Honda Genuine Handle Switch Assembly for TMX125
Introduction to Honda Genuine Handle Switch Assembly
When it comes to maintaining your Honda TMX125 motorcycle, choosing genuine parts is crucial for optimal performance and safety. One of these essential components is the Honda Genuine Handle Switch Assembly. This article will guide you through understanding the importance of genuine parts, the benefits of using the TMX125 handle switch assembly, and how to replace the motorcycle handle switch.
Understanding the Importance of Genuine Parts
Genuine Honda parts are manufactured specifically for your motorcycle model, ensuring compatibility and reliability. By using genuine parts, you can avoid potential issues that may arise from using non-genuine alternatives, such as incorrect fitment, reduced performance, or safety concerns. Moreover, using genuine parts helps maintain the warranty on your motorcycle.
Benefits of Honda TMX125 Handle Switch Assembly
The Honda TMX125 handle switch assembly offers several advantages, including:
- Compatibility: Designed specifically for the TMX125, ensuring a perfect fit and seamless integration with your motorcycle's electrical system.
- Durability: Built to withstand the rigors of daily riding, offering long-lasting performance and reliability.
- Safety: Ensures proper functioning of essential motorcycle functions, such as the turn signals, horn, and lights, contributing to a safer riding experience.
How to Replace Motorcycle Handle Switch
Replacing the TMX125 handle switch assembly is a straightforward process that can be completed with the right tools and knowledge. This section will guide you through the necessary steps.
Tools Needed for the Replacement Process
Before starting the replacement process, ensure you have the following tools:
- Screwdrivers: Both Phillips and flathead screwdrivers are required for removing screws and bolts.
- Wrenches: A set of wrenches will help you remove any nuts or bolts that may be holding the handle switch assembly in place.
- Replacement Handle Switch Assembly: Make sure you have the Honda Genuine Handle Switch Assembly for TMX125.
Steps to Replace TMX125 Handle Switch
Follow these steps to replace your TMX125 handle switch assembly:
- Prepare the Motorcycle: Park the motorcycle on a flat surface and turn off the engine. Disconnect the battery to prevent any accidental activation of electrical components during the replacement process.
- Remove the Handlebars: Using the appropriate wrenches and screwdrivers, remove the handlebars from the motorcycle. This will expose the handle switch assembly.
- Disconnect Electrical Connections: Carefully disconnect any electrical connections attached to the old handle switch assembly.
- Remove Old Handle Switch Assembly: Unscrew and remove the old handle switch assembly from the motorcycle.
- Install New Handle Switch Assembly: Install the new Honda Genuine Handle Switch Assembly for TMX125, ensuring it is securely fastened.
- Reconnect Electrical Connections: Reconnect any electrical connections to the new handle switch assembly.
- Reattach Handlebars: Securely reattach the handlebars to the motorcycle.
- Test Handle Switch Assembly: Turn on the motorcycle and test the handle switch assembly to ensure proper functionality.
Choosing the Right Replacement Motorcycle Switch
Selecting the right replacement motorcycle switch is crucial for maintaining the performance and safety of your TMX125. This section will provide guidance on factors to consider when selecting a replacement switch and long-term maintenance tips for the TMX125 handle switch assembly.
Factors to Consider When Selecting a Replacement Switch
When choosing a replacement motorcycle switch, consider the following factors:
- Compatibility: Ensure the replacement switch is compatible with your TMX125 model.
- Quality: Opt for a high-quality switch to ensure long-lasting performance and reliability.
- Safety: Select a switch that meets safety standards and regulations.
Long-Term Maintenance Tips for TMX125 Handle Switch Assembly
To ensure the longevity of your TMX125 handle switch assembly, follow these maintenance tips:
- Regular Inspection: Periodically inspect the handle switch assembly for any signs of wear or damage.
- Clean Connections: Keep electrical connections clean and free from debris to ensure proper functionality.
- Replace When Necessary: If the handle switch assembly shows signs of wear or damage, replace it promptly to maintain optimal performance and safety.

Jazz 17 online shop
You May Also Like

Luminous Valve Caps Car Fluorescent Tire Valves Cap Glow In The Dark Car Motorcycle Bike Wheel Plugs Tyre Hub Cover Decor Luminous Car Tire Valve Cap Fluorescent Night Glowing Decor Motorcycle Bike Wheel Nozzle Dustproof Tyre Valve Stem Caps

SGP MUFFLER COVER / GUARD RAIDER J 115 FI / CROSSOVER / SHOOTER FI 14781-22J10

2pcs Mini Driving Light White+Yellow Pair of Universal High Quality Mini Driving Lights Full Set LED Light with Switch

WINKER EYE TINT STICKER FOR MIO SPORTY SOULTY

Car Anti-Collision Stickers Wheel Arch Protection Decals Wheel Rim Guard Scratch Avoidance Bumper Guard Decorative Accessories
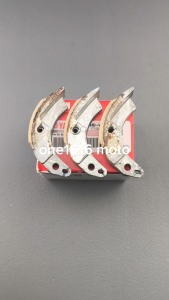
YAMAHA GENUINE CLUTCH SHOE SET 14D-WE662-00 FOR MIO SPORTY/SOUL/FINO/NOUVO ALL VERSIONS
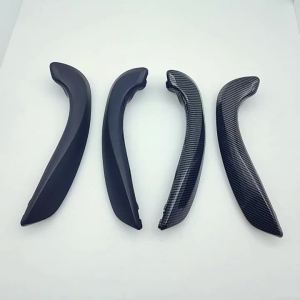
Carbon Fiber Black Interior Car Front Left Right Door Handle For Renault Megane 3 MK3 Fluence 2008-2016 809540001R 809600007R

1/4PCS Anti Slip Car Roof Armrest Car Suede Handle Covers 1/4PCS For ISUZU Car Roof Pull Gloves Door Handle Protector Anti Slip Suede Car Armrest Auto Interior Supply For ISUZU

Torque Drive Nut ClickBeat F.I v2 (Genuine HONDA)

Universal Motorcycle Windshield Extension Air Heighten Windscreen Deflector For BMW Honda Yamaha Kawasaki Suzuki KTM Accessories
12-22 Inch Yellow LED Light Bar 3000K 4x4 Offroad Spot Beam: Ultimate Guide