Tecno Pova 6 LCD Replacement: A Comprehensive Guide
Tecno Pova 6 LCD Replacement: A Comprehensive Guide
Understanding the Tecno Pova 6 & Its Display Components
What is the Tecno Pova 6?
The Tecno Pova 6 is a smartphone designed by Tecno Mobile International, a leading manufacturer of mobile devices. It is known for its high-quality features, including a large display and a powerful processor. This guide will help you understand how to replace the LCD screen on your Tecno Pova 6, ensuring you have a seamless experience.
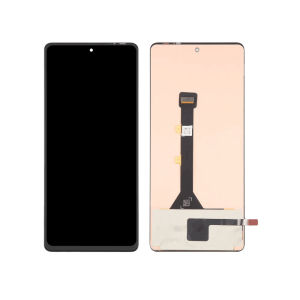
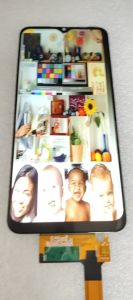
What is the LI7 LI9 LCD screen?
The LI7 LI9 LCD screen is a digital touch screen display specifically designed for the Tecno Pova 6 and Tecno Pova 6 Pro models. It provides a clear and responsive display, making it ideal for everyday use. The LI7 LI9 LCD screen is compatible with the LCD assembly for Tecno Pova 6, allowing for easy replacement.
What is the LCD assembly for Tecno Pova 6?
The LCD assembly for Tecno Pova 6 consists of the LI7 LI9 LCD screen, the digitizer, and other components necessary for the display to function properly. It is essential to ensure that the LCD assembly is compatible with your Tecno Pova 6 model before proceeding with the replacement process.
Steps to Replace Your Tecno Pova 6 LCD Screen
How to Prepare for LCD Replacement
Before replacing the LCD screen on your Tecno Pova 6, it is crucial to gather all necessary tools and materials. These include a replacement LCD assembly, a Phillips #00 screwdriver, a plastic pry tool, and a small container to store screws and other components. Additionally, make sure your Tecno Pova 6 is powered off and disconnected from any power sources.
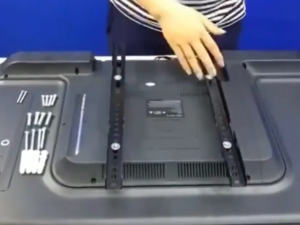
How to Remove the Old LCD Screen
To remove the old LCD screen, follow these steps:
- Turn off your Tecno Pova 6 and disconnect it from any power sources.
- Remove the back cover and battery.
- Unscrew the screws holding the LCD assembly in place.
- Carefully lift the old LCD assembly using a plastic pry tool.
- Disconnect any cables connected to the LCD assembly.
How to Install the New LCD Screen
Once the old LCD screen is removed, follow these steps to install the new one:
- Connect the cables to the new LCD assembly.
- Align the new LCD assembly with the phone's frame and gently press it into place.
- Reattach the screws that hold the LCD assembly in place.
- Replace the battery and back cover.
- Power on your Tecno Pova 6 to ensure the new LCD screen is functioning correctly.
Troubleshooting Common Issues During LCD Replacement
What to Do if the Screen Doesn't Work After Installation
If the screen doesn't work after installation, double-check that all cables are securely connected and that the LCD assembly is properly aligned. If the issue persists, consult the manufacturer's support or a professional technician.
What to Do if the Touchscreen Isn't Responding
If the touchscreen isn't responding after installation, try restarting your Tecno Pova 6. If the issue persists, check that the digitizer is properly connected and aligned with the LCD assembly. If the problem continues, consult the manufacturer's support or a professional technician.
What to Do if the Display Has Distortion or Glitches
If the display has distortion or glitches after installation, check that the LCD assembly is securely attached and that there are no air bubbles or debris on the screen. If the issue persists, consult the manufacturer's support or a professional technician.

JMax.PH LCD Touch Screen Store
Review

You May Also Like
Hexna Paperlike Screen Protector for Samsung Tab S7 & S7+: A Comprehensive Guide
Phone Case Tecno Spark Go 2 POP 10 SparkGo2 POP10 Transparent Mirror Bear Crystal Bracelet Casing All-inclusive Shockproof Silicone Soft Cover 2025

HTT With Lanyard Phone Cover Case For Iphone15 14 13 12 11 Pro Max 7 8PLUS XXS XSMAX Soft Coque Fundas 3d Embossed Diamond Pattern Wrist Strap Mianyang
iPad Apple Pencil 1/2 Case Leather Sticky Adhesive Holder Sleeve Carrying Pouch Protective Cover
Oppo Reno6 pro 10 Phone Case Penmoo Protective Silicone Cover for OPPO Reno6 pro plus 5G New Model Full Package Anti-Fall for Men And Women
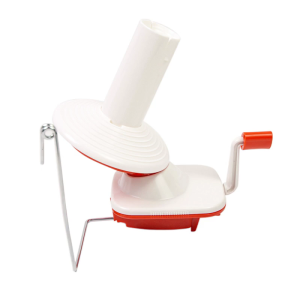
Hand Operated Yarn Winder Large Capacity Needlecraft Yarn Winder Easy to Set Up Manual Yarn/Wools/String/Fiber Winder
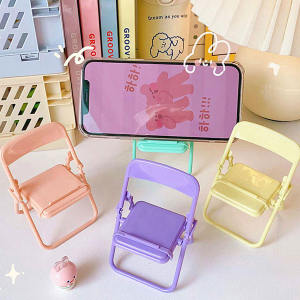
Foldable Universal Portable Ins Fashionable and Trendy Phone Holder For All Brands Mobile Phone
Steering Plug Turning Socket Converter Flat Plug Wall-Mounted Two-Jack Ultra-Thin Conversion

GGUU | Magnetic Absorption Liquid Silicone Phone Case For OnePlus 13 New Model Full Lens Protection Mens Style Durable Anti-Fall Series
TYH Fashion Glitter Pattern Phone Case For OPPO A57 2022/A77S/A96/A36/A76/A16K/A16E/A55/A94/A95/A77/A9/A93/A15/A72/A53/A33/A32/A74 Anti-vibration Shell Drop-proof Casing
LCD For Realme C25 / Realme C25S /OPPO A16 /A16S Original Digital Touch Screen Display /For Realme C25S LCD