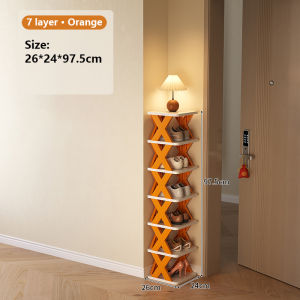
9 Layer Plastic Shoes Rack Simple Folding Multi-tier Shoe Rack DIY Foldable Shoes Storage Space Saving Stackable Shoe Shelf Sturdy & Durable Shoe Organizer Sneaker Containers Household Sturdy Shoes Shelf for Entryway Closet Hallway
9 Layer Plastic Shoes Rack Simple Folding Multi-tier Shoe Rack DIY Foldable Shoes Storage Space Saving Stackable Shoe Shelf Sturdy & Durable Shoe Organizer Sneaker Containers Household Sturdy Shoes Shelf for Entryway Closet Hallway
Introduction to 9 Layer Plastic Shoe Organizer
The 9 Layer Plastic Shoe Organizer is a versatile and space-saving solution for storing shoes in entryways, closets, hallways, and more. This durable stackable shoe shelf offers a sturdy design that ensures your footwear stays organized and protected. With its folding multi-tier shoe rack feature, it's easy to store and transport, making it perfect for anyone looking to maximize their shoe storage space.
Key Features and Benefits
- 9 Layers: With nine separate tiers, this shoe organizer can accommodate a wide range of shoes, including sneakers, boots, sandals, and more.
- Durable Construction: Made from high-quality plastic, this shoe rack is built to last and can withstand the weight of multiple pairs of shoes.
- Space Saving: The compact design makes it easy to store shoes in small spaces, while the folding feature allows for easy storage when not in use.
- Easy Installation: This DIY shoe organizer comes with all necessary hardware and instructions, making installation quick and simple.
Where to Use It
This 9 Layer Plastic Shoe Organizer is perfect for use in entryways, closets, hallways, and any other space where you need to store shoes. Its compact size makes it ideal for small apartments, while its sturdy construction ensures it can hold up to heavy-duty use in larger homes.
How to Install Your 9 Layer Plastic Shoe Organizer
Installing your new shoe organizer is a breeze thanks to its easy-to-follow instructions and included hardware.
Step-by-Step Installation Process
- Unpack all components and lay them out on a flat surface.
- Assemble the base by attaching the legs to the bottom of the shoe rack using screws and a screwdriver.
- Attach the tiers to the base using the provided hardware.
- Once all tiers are attached, place the shoe organizer in your desired location.
Tips for Easy Installation
- Ensure all components are accounted for before beginning assembly.
- Use a screwdriver to tighten screws securely.
- Align tiers evenly to avoid uneven weight distribution.
How to Maximize Your Shoe Storage Space
With the right organization techniques, you can make the most of your new shoe organizer.
Best Practices for Organizing Shoes
- Sort shoes by type, such as sneakers, boots, and sandals.
- Store shoes in pairs to save space.
- Use the top tiers for lighter items, such as sandals and flip-flops.
- Consider using shoe bags or shoe boxes to further organize your collection.
Additional Storage Solutions
In addition to the 9 Layer Plastic Shoe Organizer, consider using shoe bags, shoe boxes, or even hanging shoe organizers to further maximize your storage space.
Maintaining Your Shoe Organizer
Regular cleaning and maintenance will help keep your shoe organizer looking its best.
Cleaning and Maintenance Tips
- Wipe down the shoe rack with a damp cloth and mild soap to remove dust and dirt.
- Allow the shoe rack to air dry before storing shoes.
- Check for loose screws or hardware periodically and tighten as needed.
Troubleshooting Common Issues
If you encounter any issues with your shoe organizer, such as wobbling or uneven weight distribution, try the following solutions:
- Tighten all screws and hardware securely.
- Align tiers evenly to ensure even weight distribution.
- Consider using a level to ensure the shoe rack is properly aligned.

Diamond Skin PH
You May Also Like
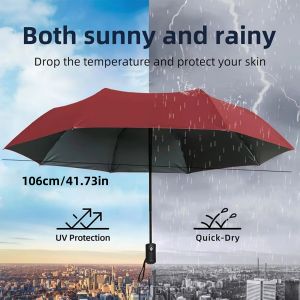
24 Bones Super Windproof Umbrella All Weather Umbrellas Large Size Fully Automatic Umbrella UV Protection Sunshade Travel
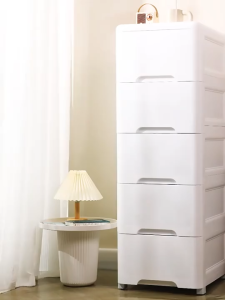
Hisoa 3-7 Layer Plastic Gap Storage Cabinet White Home Silm Drawer Cabinet With Wheels Space Savers
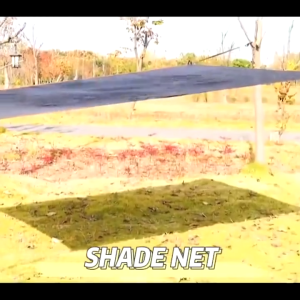
Anti-UV Sunshade Net: 90% Shading Rate & Outdoor Garden Net Solutions

Reusable Wall Door Buffer Heavy Type Magnetic Door Stoppers Without Punching Door Suction Door Holder Door Hardware Touch
![[Carton Transport Packaging] Multi functional storage box independent transparent plastic storage box for medicine and jewelry](https://img.lazcdn.com/g/ff/kf/S7f97b9a0f2e849ee9cf498125f2d6787I.jpg_300x300q80.jpg)
[Carton Transport Packaging] Multi functional storage box independent transparent plastic storage box for medicine and jewelry
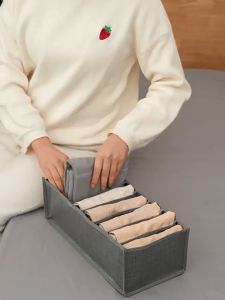
Jeans Compartment Storage Box Closet Organizer Clothes Separation Box Pants Drawer Divider Storage Underwear Bra Organizer
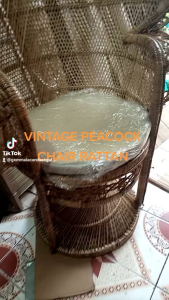
Colorful Peacock Rattan Chair & Vintage Classy Chair: A Guide to Stylish Furniture
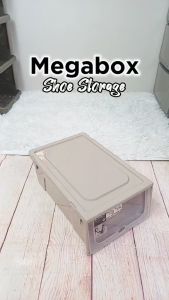
Megabox Shoe Box Small and BIG for Shoe Rack Organizer
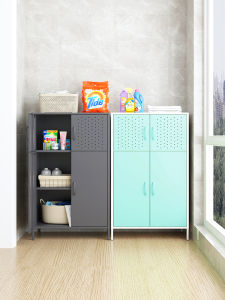
Large Capacity Balcony Storage Cabinet: A Modern Simple Style & Sun Protection Solution

Christmas Chair Cover With Decorative Bowknot Safe For Kids Family Silverware Hold Christmas Dining Chair
Antique Style Showcase Frame Flannel Cushion Resin Structure Necklace Earring Holder Decorative Display Organizers