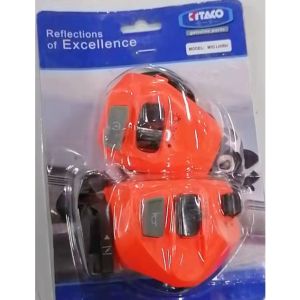
YAMAHA MIO Handle Switch For MIO/MIO SPORTY 1Set Assy Assembly
YAMAHA MIO Handle Switch For MIO/MIO SPORTY 1Set Assy Assembly
What is the MIO SPORTY Handle Assembly?
The MIO SPORTY Handle Assembly is a comprehensive assembly designed specifically for Yamaha MIO and MIO SPORTY motorcycles. This assembly includes the handle switch, which is crucial for the proper functioning of various motorcycle components such as lights, horn, and indicators. The MIO SPORTY Handle Assembly is engineered to provide enhanced performance, reliability, and ease of use.
Key Features
- High-Quality Construction: The MIO SPORTY Handle Assembly is built using premium materials, ensuring durability and longevity.
- Easy Installation: The assembly is designed to fit seamlessly onto your Yamaha MIO or MIO SPORTY motorcycle, making installation a breeze.
- Improved Functionality: The handle switch within the assembly enhances the overall functionality of your motorcycle, providing a smoother riding experience.
Benefits of Upgrading
Upgrading to the MIO SPORTY Handle Assembly offers numerous benefits:
- Enhanced Performance: The assembly improves the performance of your motorcycle's components, making it easier to operate.
- Reliability: With high-quality construction, the assembly ensures reliable operation, reducing the risk of malfunctions.
- Ease of Installation: The assembly is designed for easy installation, saving you time and effort.
How to Install Yamaha Motorcycle Parts: A Step-by-Step Guide
Installing Yamaha motorcycle parts, such as the MIO SPORTY Handle Assembly, is a straightforward process. Follow these steps to ensure a successful installation:
Tools Required
- Screwdrivers: Phillips head and flathead screwdrivers.
- Pliers: Needle-nose pliers.
- Torque Wrench: For tightening bolts to the specified torque.
Installation Process
- Remove the Old Handle Switch: First, remove the old handle switch by disconnecting the electrical connections and unscrewing the mounting bolts.
- Install the New Handle Switch: Carefully install the new handle switch, ensuring it is properly aligned and securely mounted.
- Connect Electrical Connections: Reconnect the electrical connections, making sure they are tight and secure.
- Test the Handle Switch: Once installed, test the handle switch to ensure it functions correctly.
YAMAHA MIO Handle Switch: Troubleshooting Common Issues
Despite proper installation, the YAMAHA MIO Handle Switch may encounter issues. Here are some common problems and their solutions:
Misalignment Problems
Misalignment can cause the handle switch to malfunction. To fix this issue, ensure the handle switch is properly aligned during installation.
Loose Connections
Loose electrical connections can cause the handle switch to fail. Tighten all connections to resolve this issue.
MIO Handle Switch Replacement: When to Replace Your Handle Switch
It's essential to replace your MIO Handle Switch when signs of wear and tear become evident. Here are some indicators that it's time for a replacement:
Signs of Wear and Tear
- Frayed Wires: Inspect the electrical connections for frayed wires, which can cause malfunctions.
- Loose Mounting Bolts: Check for loose mounting bolts, which can lead to misalignment and malfunction.
- Malfunctioning Components: If the handle switch is not operating correctly, it may be time for a replacement.
Long-Tail Keywords Usage
To optimize your search engine rankings, incorporate long-tail keywords such as 'MIO SPORTY Handle Assembly installation guide' and 'YAMAHA MIO Handle Switch troubleshooting' into your content.
Conclusion
The MIO SPORTY Handle Assembly is a valuable upgrade for Yamaha MIO and MIO SPORTY motorcycles, offering enhanced performance, reliability, and ease of use. By following the installation guide and troubleshooting common issues, you can ensure a successful upgrade and enjoy a smoother riding experience.

Yxone
Review

You May Also Like

30pcs Large Truck Accessories Curtain Beads Liberation J6 Curtain Roller With Ring J6 Pulley Car Int
Universal Car Mat New Logo Car Interior Foot Pedal Mat Wear-resistant Anti-slip Easy to Clean All Seasons Vehicle Floor Mat

JX Adult Safety Vest Visibility Reflective Vest With D-ring Safety Warning Site(Multiple Pockets)
![[LEAZEN]10Pcs T10 W5W LED Bulb SMD Car Interior Light 12V Super Bright Door Light 5SMD Car Interior Reading Light for Car Lights](https://img.lazcdn.com/g/ff/kf/S7908eb1630ee49d9ae9446256fa0bab9X.jpg_300x300q80.jpg)
[LEAZEN]10Pcs T10 W5W LED Bulb SMD Car Interior Light 12V Super Bright Door Light 5SMD Car Interior Reading Light for Car Lights

NGK Platinum Spark Plug (4pcs) for Toyota VIOS/YARIS/COROLLA/ALTIS/BB | BKR5E-GP
2PCS Ultra-Soft Microfiber Car Wash Towel High-End Thickened Strong Water-Absorbent Car Drying Cloth Interior Care Car Cleaning Accessories

Upgrade Anti-glare Lenses Helmet for Motorcycle
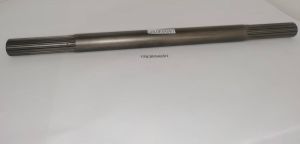
TC403-14630 SHAFTPROPELLER 14T fit for kubota tractor parts L5018
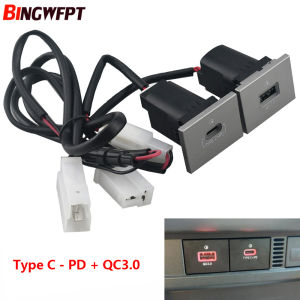
PD Type-C USB Charger Socket Fast Charge Adapter QC3.0 Power Outlet Switch for Ford Focus 2 Mk2 2009 2010 2011
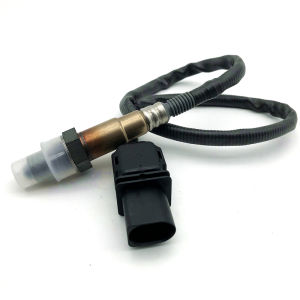
Lambda probe Oxygen O2 Sensor Fit For BMW 1 2 3 4 5 6 7 SERIES X1 X3 X4 X5 X6 No# 13627793825 1928404682 13627791592 13627791600
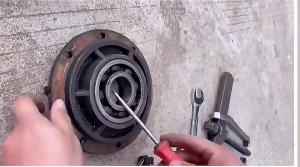
Heavy Duty 3 Jaw Gear Puller – Carbon Steel Universal Fit for Car & Motorcycle (3"-6")