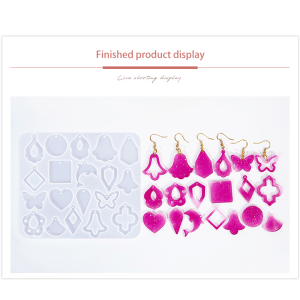
Resin DIY Silicone Mold Retro Earrings Pendant Crystal Glue Mold
Resin DIY Silicone Mold Retro Earrings Pendant Crystal Glue Mold
Introduction to DIY Jewelry Making
DIY jewelry making is a popular craft that allows you to create unique, personalized pieces using various materials and techniques. It's a fun and creative way to express yourself while learning new skills. In this article, we will focus on creating retro earrings pendants using resin DIY silicone molds and crystal glue molds.
Understanding the Basics of DIY Jewelry Making
Before diving into the process of making retro earrings pendants, it's essential to understand the basics of DIY jewelry making. This includes familiarizing yourself with different materials, techniques, and tools needed for crafting and molding.
Tools Needed for Crafting and Molding
To get started with DIY jewelry making, you'll need a few essential tools, such as:
- Resin DIY silicone molds
- Crystal glue molds
- Resin and hardener
- Crystal glue
- Mixing cups and sticks
- Safety gear (gloves, mask, etc.)
Choosing the Right Resin DIY Silicone Mold
Selecting the appropriate resin DIY silicone mold is crucial for creating retro earrings pendants that meet your desired aesthetic. Consider the following factors when choosing a mold:
- Mold size and shape
- Material compatibility
- Ease of demolding
Types of Resin DIY Silicone Mold Available
There are several types of resin DIY silicone molds available in the market, including:
- Single-cavity molds
- Multi-cavity molds
- Customizable molds
Crafting Retro Earrings Pendant Using Crystal Glue Mold
Now that you have chosen the right resin DIY silicone mold and gathered all necessary tools, it's time to create retro earrings pendants using crystal glue molds. Follow these steps:
- Prepare your workspace by covering it with newspaper or a plastic sheet.
- Mix resin and hardener according to the manufacturer's instructions.
- Pour the mixture into the resin DIY silicone mold.
- Let it cure according to the recommended time.
- Demold the cured resin piece carefully.
- Prepare the crystal glue mold by cleaning it thoroughly.
- Apply a thin layer of crystal glue to the back of the cured resin piece.
- Press the resin piece onto the crystal glue mold and let it dry completely.
- Once dry, remove the retro earrings pendant from the crystal glue mold.
Tips for Achieving the Desired Look
To achieve the perfect retro earrings pendant, keep the following tips in mind:
- Experiment with different colors and patterns to create unique designs.
- Use a heat gun or hair dryer to smooth out any imperfections.
- Add embellishments like beads or charms to enhance the overall look.
Troubleshooting Common Issues in DIY Jewelry Making
Like any craft, DIY jewelry making may come with its fair share of challenges. Here are some common issues and their solutions:
Addressing Problems with Resin DIY Silicone Mold
- Air bubbles: Mix the resin and hardener thoroughly before pouring it into the mold.
- Uneven curing: Ensure the mold is placed on a flat surface and avoid moving it during the curing process.
Handling Challenges with Crystal Glue Mold
- Weak adhesion: Clean both surfaces thoroughly before applying crystal glue.
- Excess glue: Apply a thin layer of glue and remove any excess with a toothpick or pin.
Conclusion: Mastering DIY Jewelry Making Techniques
Creating retro earrings pendants using resin DIY silicone molds and crystal glue molds is a fun and rewarding experience that allows you to showcase your creativity. By following the steps outlined in this article and troubleshooting any issues that may arise, you'll be well on your way to mastering DIY jewelry making techniques.

518 SHOP
Review

You May Also Like
A5 A4 Plastic File Folder Hospital Visit Checkup Report Maternity Examination Record Storage Booklet Portable for Adults And Babies
Deli HC188 Pencils 2H HB 2B for Elementary School Students Non-toxic Exam Filling Cards Sketching Childrens Pencils
🔥24Pcs Acrylic Paint Pens Markers Brush Tip Paint Markers for Rock Painting Wood Canvas Stone Christmas Gift DIY Crafts
Equipment Inspection Record Card Maintenance Card Firefighting Equipment Check Card Non-drying Adhesive Sticker Label
Sorting Bag Organize Students Work Durable and Transparent Storage Bag Tote Bag Portable

20Pcs Rhinestone Crystal Buttons Clear Upholstery Tufting With Metal Loop Sew Diamond Crystal Glass Round for Sofa Headboard DIY Crafts Bed Furniture Decor
Acrylic Marker Set 8Pcs Non Toxic Liquid Chalk Christmas DIY Graffiti Marker Pens Advertising Pen Blackboard Graffiti Pen(3/6/10mm)
30Sets First Communion Angel Keychain Zinc Alloy Keepsakes For Baptism Celebrations And Church Event With Accessories

Health Diary: 130 Weeks Blood Sugar & Blood Pressure Tracker Hardcover Notebook
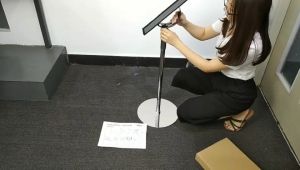
Deflecto Menu Stand Poster Display: Enhance Your Restaurant Signage
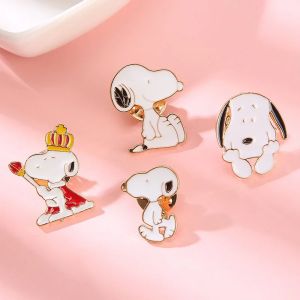
Christmas gifts Snoopy Cute Brooch Badge Clothes Accessories Knapsack Decorations Cartoon Anime Derivative Peripherals Pins Birthday Party Gifts