NanoVNA V2/SAA2 3G Version VNA: A Comprehensive Guide
NanoVNA V2/SAA2 3G Version VNA: A Comprehensive Guide
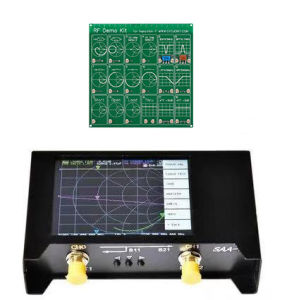
Introduction to NanoVNA V2 & SAA2 3G Version VNA
A Vector Network Analyzer (VNA) is a sophisticated instrument used for measuring the performance of RF (radio frequency) components, antennas, and transmission lines. The NanoVNA V2 and SAA2 3G Version VNAs are popular choices among RF enthusiasts due to their affordability and ease of use. In this guide, we will explore the key features, applications, and usage instructions for these VNAs.
What is a Vector Network Analyzer?
A Vector Network Analyzer (VNA) is a device used to measure the complex scattering parameters (S-parameters) of RF components and systems. These parameters describe how signals are transmitted, reflected, and coupled within a network. VNAs are widely used in RF engineering, antenna design, and testing of RF components.
Key Features of NanoVNA V2 & SAA2 3G Version VNA
- Frequency Range: 1 MHz to 3 GHz
- Measurement Types: S11, S21, S12, S22
- Display: 2.4-inch color LCD screen
- Interface: USB 2.0 for data transfer and firmware updates
- Compatibility: Windows, macOS, and Linux operating systems
Applications of NanoVNA V2 & SAA2 3G Version VNA
- Antenna design and testing
- RF component characterization
- Cable and connector testing
- Calibration and troubleshooting of RF systems
How to Use NanoVNA V2 & SAA2 3G Version VNA
In this section, we will guide you through the process of setting up and using your NanoVNA V2 or SAA2 3G Version VNA.
Setting Up Your NanoVNA V2 & SAA2 3G Version VNA
- Connect the USB cable to your computer and the VNA.
- Power on the VNA by pressing the power button.
- Install the necessary drivers and software for your operating system.
- Calibrate the VNA according to the manufacturer's instructions.
Measuring HF, VHF, UHF, UV Signals
To measure HF, VHF, UHF, and UV signals using your NanoVNA V2 or SAA2 3G Version VNA, follow these steps:
- Connect the appropriate RF probes or cables to the VNA.
- Set the desired frequency range using the VNA's software interface.
- Measure the S-parameters of the component or system under test.
- Analyze the results and make any necessary adjustments.
Interpreting Results from NanoVNA V2 & SAA2 3G Version VNA
The results obtained from your NanoVNA V2 or SAA2 3G Version VNA can be interpreted using various techniques:
- Smith Chart: A graphical representation of the S-parameters.
- Polar Plot: A plot of the magnitude and phase of the S-parameters.
- Magnitude Plot: A plot of the magnitude of the S-parameters.
- Phase Plot: A plot of the phase of the S-parameters.
Choosing the Right Storage Solution for Your NanoVNA V2 & SAA2 3G Version VNA
Proper storage of your NanoVNA V2 or SAA2 3G Version VNA is essential to ensure its longevity and performance. Here are some storage solutions to consider:
EVA Storage Bag: A Secure Option
An EVA storage bag is a durable and lightweight option for storing your VNA. It provides protection against dust, moisture, and minor impacts. Additionally, it is easy to carry and store.
Other Storage Solutions
Other storage solutions include padded cases, hard-shell cases, and custom-made enclosures. These options offer varying levels of protection and portability depending on your needs.
Maintaining Your NanoVNA V2 & SAA2 3G Version VNA
Regular maintenance is crucial to ensure the optimal performance of your NanoVNA V2 or SAA2 3G Version VNA. Here are some tips for maintaining your VNA:
- Keep the VNA clean and free from dust and debris.
- Store the VNA in a cool, dry place away from direct sunlight and extreme temperatures.
- Perform regular calibrations according to the manufacturer's instructions.
- Update the firmware regularly to ensure compatibility with the latest software versions.

Yisunder.sun
Review

You May Also Like

Samsung S25 Phone Case Mirror Floral Design Soft Silicone Protective Cover Womens Makeup Mirror Anti-Fall Compatible with S24 S23 S22 S21 S20 Ultra FE

Cartoon Snoopy Wireless Bluetooth Protective Case for Apple Airpods3 Pro2 Generation Soft Shell Earphone Cover Cute Style

ZEEMIN Halloween Christmas Stitch Holding Flowers Case for Sony Xperia XZ2 & XZ1
Same Day Delivery: 3.5/2.5MM USB Charging Cable & Universal USB to AUX Audio Mono Power Supply Charger
Wireds Keyboards And Mouse Set For Multiple Environment Use Fatigue Reducing Universal Compatibility Effortless Setups Process
Original Liquid Silicone Multicolor Phone Case For Xiaomi Redmi 9T 9 9A 10 10C 14C Redmi Note 14 13 12 12s 11 11s 10 10s 9 9s 8 7 Pro Max + 4G 5G Shockproof Back Cover Casing

Original OnePlus Ace3 pro Ultra-Thin Clear PET Plastic Film Compatible with Oppo Oneplus Ace3 Ace12 High Definition Soft Film
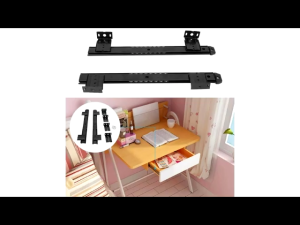
1 Pairs Computer Tray Keyboard Slider Laptop Keyboard Hardware 27/35mm Width

huawei xundd beetle magnetic stand case

Huawei Pura80/70Pro Note14 Mate70/60 Nova13pro Metal Frame Phone Case Simple Transparent Anti-Fall Soft Shell with Large Hole
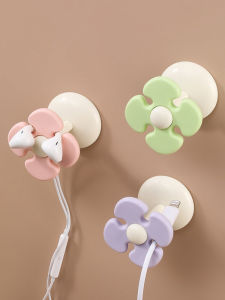
Flower Cord Manager: A Desktop Data Cable Storage Solution