20-50Pcs 8/10/12mm Mixed Colorful Acrylic Luminous Round Beads for Jewelry Making DIY Bracelet Necklace Earrings
20-50Pcs 8/10/12mm Mixed Colorful Acrylic Luminous Round Beads for Jewelry Making DIY Bracelet Necklace Earrings
Introduction to Mixed Colorful Acrylic Beads
What Are Mixed Colorful Acrylic Beads?
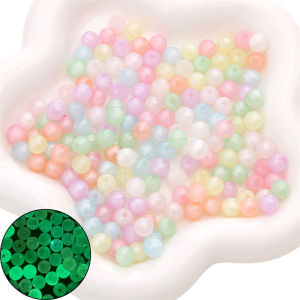
Mixed colorful acrylic beads are small, round-shaped beads made from acrylic material. They come in various sizes, such as 8mm, 10mm, and 12mm, and offer a wide range of colors to choose from. These beads are perfect for DIY jewelry making projects, such as bracelets, necklaces, and earrings. Their luminous quality adds a unique touch to your creations, making them stand out.
How to Choose the Right Size & Quantity
When selecting mixed colorful acrylic beads, consider the size and quantity that best suits your project. For bracelets, 8mm beads are ideal, while 10mm and 12mm beads work well for necklaces. Earrings can be made using any of these sizes, depending on the design you have in mind. A bag containing 20-50Pcs of acrylic beads is sufficient for most jewelry-making projects.
Where to Find Quality Acrylic Beads
You can find high-quality mixed colorful acrylic beads at craft stores, online marketplaces, and specialty bead shops. Look for reputable sellers who offer a variety of colors and sizes to choose from. Reading reviews and checking product ratings can help you make an informed decision.
How to Create DIY Jewelry with Acrylic Beads
Steps to Make a Bracelet with 8/10/12mm Acrylic Beads
- Gather your materials, including the acrylic beads, elastic cord, and clasp.
- Cut a piece of elastic cord, leaving enough space for the clasp.
- String the desired number of beads onto the cord, alternating colors and sizes as desired.
- Attach the clasp to the ends of the cord.
- Adjust the bracelet to fit your wrist and enjoy your new creation!
Techniques for Crafting a Necklace Using Luminous Round Beads
- Choose a necklace chain that complements the beads' colors and sizes.
- Thread the acrylic beads onto the chain, spacing them evenly apart.
- Add any additional embellishments, such as charms or pendants, if desired.
- Attach the clasp to the ends of the chain.
- Admire your beautiful necklace!
Tips for Making Earrings with 20-50Pcs Acrylic Beads
- Select earring hooks that match the style and color of your beads.
- String two beads onto each hook, using a jump ring to secure them in place.
- Add any additional embellishments, such as small charms or beads, if desired.
- Admire your new pair of earrings!
DIY Jewelry Making Tips & Tricks
Essential Tools for Crafting with Acrylic Beads
To make the most out of your DIY jewelry-making experience, invest in some essential tools, such as:
- Bead board
- Scissors
- Pliers
- Crimp beads
- Jump rings
Common Mistakes to Avoid While Working with Acrylic Beads
When working with acrylic beads, avoid these common mistakes:
- Not measuring the length of your project before stringing the beads.
- Not securing the clasp properly.
- Using the wrong type of cord or wire for your project.
How to Care for Your DIY Jewelry Made with Acrylic Beads
To ensure your DIY jewelry made with acrylic beads lasts a long time, follow these care tips:
- Store your jewelry in a dry place away from direct sunlight.
- Avoid exposing your jewelry to water, as it may cause the beads to fade or become discolored.
- Gently clean your jewelry with a soft cloth to remove any dirt or dust.

DIY Beads Store
Review

You May Also Like
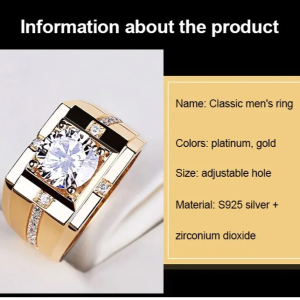
Classic Fashion Mens Ring for All Seasons Mature Men Business Professionals High Carbon Diamond Unique Design
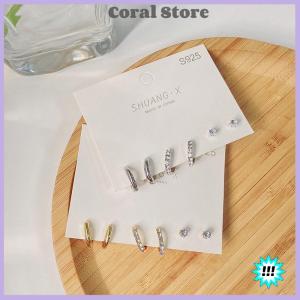
【Coral】💖【HOT SALE】🎈🎈 1 Set New Fashion Metal Circle Drop Small Earrings For Women Trend Pendant Earrings Set Jewelry Gifts
【Buy 1 Take 1】Pure 18K Saudi Gold Bracelet Pawnable For Women Lucky Bracelet Happiness Bracelet Gold Round Belly Bangle Retro Bracelet Thick Gold Solid Bead Bracelet Bring Good Luck Couple Bracelets Fashion Jewellery Legit Sale"
JBox# Jewellery Box Travel Organizer Mini PU Leather Storage for Rings Earrings Necklace Jewelry Box
Chinese Knot Button Cheongsam Buttons Knot Fastener Tang Suit Invitation Gift Box DIY Handmade Crafts Clothing Accessory
7pc Faux Pearl Decor Bracelet Bohemian Shell Beaded Woven Bracelet Beach Starfish Bracelet
GENTLE MOSCOT Rimless Leopard Head Metal Sunglasses: High-Quality Irregular Hiphop Shades for Women
![[COD] Home Fashion 40 mm Zinc Alloy Mens Casual Belt Buckle End Bar Heel Buckle Single Pin Buckles](https://img.lazcdn.com/g/p/4859f9e512d79544258fd00a16c36b98.jpg_300x300q80.jpg)
[COD] Home Fashion 40 mm Zinc Alloy Mens Casual Belt Buckle End Bar Heel Buckle Single Pin Buckles

LouisWill Mens Belt Fashion Belt Genuine Leather Belts Automatic Buckle Belts Brand Luxury High Quality Business Strap Male Waistband for Men
Watch Repair Demagnetizing Tool Mechanical Watch Demagnetizer 110/220V Watchmaker Tool Mechanical Wristwatch degausser
Elegant Simple Design Watch: A Comprehensive Guide