


10a Hydraulic Clutch Conversion Kit & Side Mirror Holder: A Comprehensive Guide
10a Hydraulic Clutch Conversion Kit & Side Mirror Holder: A Comprehensive Guide
In this article, we will delve into the world of automotive upgrades, specifically focusing on the 10a hydraulic clutch conversion kit and side mirror holder installation. This guide aims to provide a step-by-step overview of the installation process, essential tools and materials needed, and tips for brake light switch conversion.
What is a 10a Hydraulic Clutch Conversion Kit?
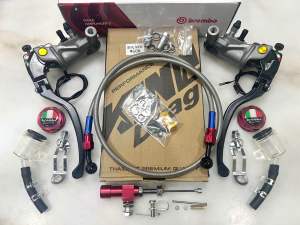
A 10a hydraulic clutch conversion kit is a popular upgrade for those looking to improve their vehicle's performance and driving experience. This kit replaces the traditional cable-operated clutch system with a hydraulic system, which offers smoother engagement and better overall control. The key components of a 10a hydraulic clutch conversion kit include a master cylinder, slave cylinder, hydraulic fluid reservoir, and associated hardware.
Key Components
The primary components of a 10a hydraulic clutch conversion kit are:
- Master cylinder
- Slave cylinder
- Hydraulic fluid reservoir
- Clutch lines
- Associated hardware (bolts, nuts, washers, etc.)
Installation Overview
Installing a 10a hydraulic clutch conversion kit involves removing the existing cable-operated system, installing the new master and slave cylinders, connecting the clutch lines, and filling the system with hydraulic fluid. The process requires some mechanical skills and patience, but the end result is well worth the effort.
Step-by-Step Guide to Installing a 10a Hydraulic Clutch Conversion Kit
To ensure a successful installation, follow these steps:
Tools & Materials Needed
- Socket set
- Wrenches
- Screwdrivers
- Pliers
- Jack stands
- Ratchet set
- Hydraulic fluid
- Brake cleaner
- New master and slave cylinders
- Clutch lines
- Associated hardware
Preparing Your Vehicle
- Park the vehicle on a level surface and engage the parking brake.
- Raise the vehicle using jack stands and remove the wheels.
- Disconnect the battery to avoid any electrical hazards.
Installing the Conversion Kit
- Remove the existing cable-operated clutch system.
- Install the new master cylinder on the firewall, securing it with bolts and nuts.
- Install the slave cylinder on the transmission bellhousing, ensuring proper alignment.
- Connect the clutch lines, making sure they are properly routed and secured.
- Fill the hydraulic fluid reservoir with the appropriate fluid.
- Bleed the system to remove any air bubbles.
- Reconnect the battery and test the clutch operation.
Brake Light Switch Conversion: Left & Right
Converting the brake light switch from cable to hydraulic is a crucial step in completing the 10a hydraulic clutch conversion kit installation. This process ensures proper brake light operation and enhances the vehicle's safety.
Why Convert?
Converting the brake light switch to hydraulic ensures better brake light operation and improved driving experience. A hydraulic system provides smoother engagement and better overall control compared to a cable-operated system.
Steps for Converting Brake Light Switches
- Remove the existing brake light switch from the firewall.
- Install the new hydraulic brake light switch, securing it with bolts and nuts.
- Connect the brake lines, making sure they are properly routed and secured.
- Fill the hydraulic fluid reservoir with the appropriate fluid.
- Bleed the system to remove any air bubbles.
- Test the brake light operation.
Side Mirror Holder Installation Tips
Installing a side mirror holder is a simple yet effective way to enhance your vehicle's appearance and functionality. Follow these steps for a successful installation:
Choosing the Right Side Mirror Holder
Select a side mirror holder that is compatible with your vehicle's make and model. Consider factors such as mounting location, size, and material.
Mounting the Side Mirror Holder
- Clean the mounting surface to ensure proper adhesion.
- Apply a small amount of adhesive to the back of the side mirror holder.
- Press the side mirror holder firmly onto the mounting surface.
- Allow the adhesive to cure according to the manufacturer's instructions.
In conclusion, upgrading your vehicle with a 10a hydraulic clutch conversion kit and side mirror holder can significantly improve its performance and appearance. By following this comprehensive guide, you'll be able to successfully install these upgrades and enjoy a smoother driving experience.

DuxBS
Review

You May Also Like
BEST SELLER 160ML AROMATHERAYP CAR PERFUME | Air Freshener For Car Home & Office | Odor Remover Car Perfume | Air Freshener Long Lasting | Multifuctional Natural Fragrance Plant Extract Odor Control Purifier Fragrance Deffuser

Super Bright LED Work Lights Rear View Hook Excavator Truck Spotlight Durable Anti-shock Universal 12V 24V Heavy Duty Off-Road Lights

Super Bright LED Rear View Mirror Lights for 10-14 Wuling Old Hongguang Modified Bandit Rear Light Bulb P21W 12V Single Pack

Marine Squash Car Scent Diffuser Fresh Bamboo Air Freshener Hanging Diffuser Posh Deodorizer Odor Remover Posh Spice
Pulsar Folding Brake Clutch Levers For Bajaj Pulsar 200 NS/200 RS/200 AS Motorcycle Accessories Adjustable Extendable
Motorcycle Rear Rocker Brake Arm CNC Trim Bracket Bolt Decoration Universal Modified Access

(BUY 1 TAKE 1)800°C High Temperature Spray Paint Automobile Motorcycle Exhaust Pipe High Temperature Resistance Corrosion Resistance Anti Fouling And Rust Prevention Hightemp High Temp Spray Paint Paints Primers Spray Paint For Motorcycle
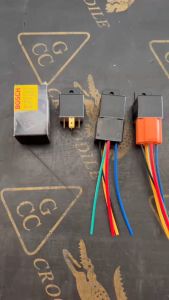
bosch relay 24v 1pc 10pcs 20pcs heavy duty
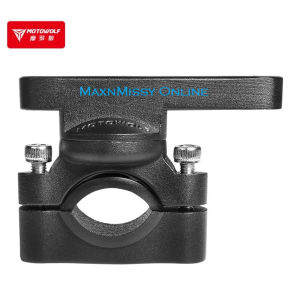
Original MOTOWOLF® Multi-Function Extension Bracket Aluminum Alloy (1pc per box) CLAMP TYPE

High Elasticity Motorcycle Pants & CE Certified Kneepads: A Comprehensive Guide
2PCS 6-Bulb Laser Shooting Lights: A Comprehensive Guide
![[Bside Tool Store] Vehicle Seat Cooling Fan Portable 3-Speed Adjustable Headrest Fan for Cars and Sedans](https://img.lazcdn.com/g/ff/kf/Scafed05dec20445db3d1c9613f7ba34af.jpg_300x300q80.jpg)


