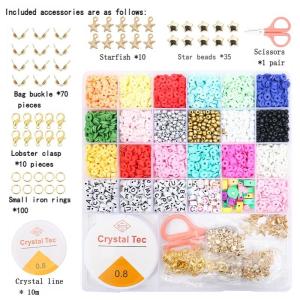
New 3mm Boxed Rice Beads Set Children's Handmade DIY Beaded Bracelet 25 Lattice Glass Beads
New 3mm Boxed Rice Beads Set Children's Handmade DIY Beaded Bracelet 25 Lattice Glass Beads
Introduction to DIY Beaded Jewelry for Kids
Crafting handmade jewelry is a fun and educational activity that kids can enjoy while developing their creativity and fine motor skills. This article will guide you through the process of creating a charming beaded bracelet using 3mm boxed rice beads and 25 lattice glass beads. These materials are ideal for children because they are easy to handle and provide endless possibilities for customization.
What Are 3mm Boxed Rice Beads?
3mm boxed rice beads are small, cylindrical beads that have a square-shaped hole running through their center. They come in a variety of colors and finishes, allowing children to mix and match to create unique patterns and designs. These beads are lightweight and easy to thread, making them perfect for young crafters.
Benefits of Making Beaded Bracelets for Kids
Making beaded bracelets is an excellent way for children to express themselves creatively, develop their fine motor skills, and build confidence in their abilities. It also provides an opportunity for parents and caregivers to bond with their children and spend quality time together. Plus, the finished product makes a great gift or keepsake!
Step-by-Step Guide to Crafting Beaded Bracelets
Now that you know the benefits of crafting beaded bracelets with kids, let's dive into the step-by-step process of creating these delightful accessories.
Gathering Materials & Tools
To get started, gather the following materials and tools:
- 3mm boxed rice beads
- 25 lattice glass beads
- Beading wire or elastic cord
- Beading needle (optional)
- Scissors
- Crimp beads (if using beading wire)
- Clasp (if using beading wire)
Assembling Beads & Creating Patterns
Once you have all the necessary materials, it's time to start assembling your beads. Begin by threading your chosen beads onto the beading wire or elastic cord. Experiment with different patterns and color combinations to find the perfect design for your bracelet. Some popular patterns include:
- Alternating colors
- Stripes
- Chevron
- Rainbow
Feel free to get creative and come up with your own unique patterns!
Finishing Touches & Adding Personalization
After you've assembled your beads, it's time to add the finishing touches to your bracelet. If using beading wire, attach a clasp using crimp beads. If using elastic cord, simply tie a knot at each end and trim any excess cord.
To personalize your bracelet, consider adding a charm or engraving a name or date onto the clasp. This will make your bracelet even more special and meaningful!
Tips for Success & Troubleshooting Common Issues
Creating beaded bracelets with kids can be a rewarding experience, but it's important to keep a few tips in mind to ensure success and avoid common issues.
Ensuring Proper Fit & Adjustability
When creating a bracelet for a child, make sure to measure their wrist to ensure a proper fit. For adjustable bracelets, leave some slack in the design so that it can be easily adjusted as needed.
Addressing Common Beading Challenges
Some common challenges when beading include beads falling off the wire or cord, knots coming undone, and difficulty threading small beads. To address these issues, use a beading needle to help guide beads onto the wire or cord, secure knots tightly, and practice patience when threading smaller beads.
Exploring Creative Variations & Customization Ideas
Once you've mastered the basics of creating beaded bracelets, there are endless possibilities for customization and creative variations. Try experimenting with different bead shapes, sizes, and colors, or incorporate other materials such as charms, feathers, or leather cords. The sky's the limit!

MOSTING.PH
Review

You May Also Like
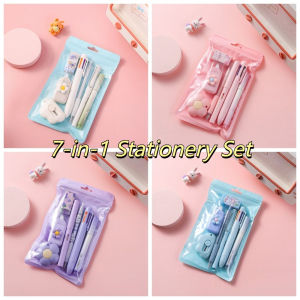
Giorgione school supplies correction tape Korean 7-in-1 Stationery Set Multifunction Useful Student Tools Set INS Marker Pen 7pcs/set Stationery Set School Office

HIMI Miya Paint Brushes Set for Acrylic Watercolor Gouache Painting Fireworm Design with LEDLight for Artist Kids s
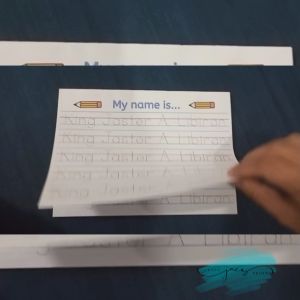
Customized Tracing Pad: A Comprehensive Guide
College Ruled Notebook 160 Pages 70gsm Wide Lined Coil Bound Journal Paper Note Book 7x10Inch for Writing Note Taking
Creative Mini Recorder Horn Keychain School Bag Decorative Hanging Toy Novelty Keychain Cartoon Series Plastic Material

Anti-Static Ballpoint Pen Plastic Business Style 0.5mm Writing Tip Black And Blue Ink Oil-Based Pen ESD Stationery
Shiny Glossy Silicone Resin Molds Flower Ornament Mold DIY Keychain Pendant Epoxy Resin Crafting Molds
GD Christmas 1pcs Adjustable Multifunction Teaching Stick Supplies Teacher Cute Whiteboard Pointer School Supplies
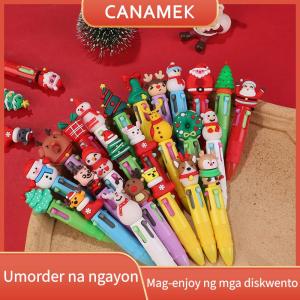
CANAMEK 10pcs New Christmas Four-Color Ballpoint Pen Cute Elk Santa Claus Mini Gel Pen Handbook Pen Student Prize Gift

HTVRONT 220V Mini Heat Press Machine: A Comprehensive Guide
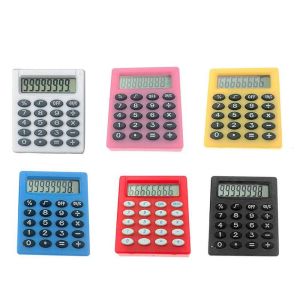
Giorgione schoolsupplies scientific calculator Creative Cute Personalized Student Office Electronics Office Supplies Mini Calculator Pocket Calculator Small Square Calculator Digit Calculator