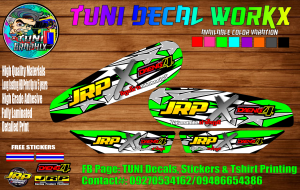
Yamaha RS 100 Stock JRP X DAENG Decals V1 W/ freebies
Yamaha RS 100 Stock JRP X DAENG Decals V1 W/ freebies
Are you looking for the perfect way to enhance your Yamaha RS 100's appearance? Look no further than the Yamaha RS 100 Stock JRP X DAENG Decals! In this article, we'll explore everything you need to know about these custom motorcycle stickers, including how they compare to other stock car graphics, where to find them, and how to apply them.
What Are Yamaha RS 100 Stock JRP X DAENG Decals?
The Yamaha RS 100 Stock JRP X DAENG Decals are a set of high-quality, professionally designed stickers that are specifically tailored to fit your Yamaha RS 100 motorcycle. These decals are crafted from durable materials, ensuring they withstand the elements and last for years. The JRP X DAENG design offers a unique and eye-catching look, making your bike stand out from the crowd.
How Do They Compare to Other Stock Car Graphics?
Compared to other stock car graphics, the Yamaha RS 100 Stock JRP X DAENG Decals offer several advantages. Firstly, their design is tailored specifically for the Yamaha RS 100, ensuring a perfect fit and seamless integration with your bike's existing aesthetics. Additionally, the high-quality materials used in these decals ensure they remain vibrant and resistant to fading, peeling, and cracking over time.
Where Can You Find Custom Motorcycle Stickers Like These?
You can find custom motorcycle stickers like the Yamaha RS 100 Stock JRP X DAENG Decals at various online retailers and motorcycle accessory shops. Make sure to choose a reputable supplier to ensure you receive high-quality products that will enhance your bike's appearance and last for years.
How to Apply Yamaha RS 100 Stock JRP X DAENG Decals
Applying the Yamaha RS 100 Stock JRP X DAENG Decals is a straightforward process that requires some preparation and attention to detail. Follow these steps to achieve the best results:
Preparing Your Bike for Decal Application
-
Clean the surface: Before applying the decals, make sure the surface of your Yamaha RS 100 is clean and free of dirt, oil, and grease. Use a degreaser and a microfiber cloth to thoroughly clean the area where you plan to apply the decals.
-
Dry the surface: Once the surface is clean, allow it to dry completely before proceeding with the decal application.
-
Remove any existing graphics: If your bike already has stock car graphics, carefully remove them using a heat gun or hair dryer to loosen the adhesive. Then, peel off the old graphics and clean the surface again.
Applying the Decals: Step-by-Step Guide
-
Position the decal: Carefully position the decal on the desired location, ensuring it aligns perfectly with the contours of your Yamaha RS 100.
-
Apply pressure: Once the decal is positioned correctly, apply gentle pressure using a squeegee or credit card to remove any air bubbles and ensure the decal adheres firmly to the surface.
-
Trim excess material: If necessary, trim any excess material around the edges of the decal using a sharp utility knife.
Freebies Included with Yamaha RS 100 Stock JRP X DAENG Decals
When you purchase the Yamaha RS 100 Stock JRP X DAENG Decals, you'll receive several freebies to enhance your bike's appearance even further. These freebies may include:
- Custom stickers: Additional stickers featuring the JRP X DAENG design that can be applied to various parts of your motorcycle.
- Protective film: A clear protective film to help preserve the decals and prevent damage from the elements.
- Installation guide: A step-by-step guide to help you apply the decals and get the most out of your purchase.
How to Get the Most Out of Your Freebies
To make the most of your freebies, follow these tips:
-
Read the installation guide: Before applying the decals, read the included installation guide to ensure you understand the process and achieve the best results.
-
Use the protective film: Apply the protective film over the decals to help prevent damage from dirt, water, and other elements.
-
Customize your bike: Experiment with different decal designs and placement options to create a truly unique look for your Yamaha RS 100.
Customizing Your Yamaha RS 100 with JRP X DAENG Design
The JRP X DAENG design offers a wide range of customization options to help you create a one-of-a-kind look for your Yamaha RS 100. Here are some tips to help you choose the right decal design and enhance your bike's appearance:
Choosing the Right Decal Design for Your Bike
When selecting a decal design, consider the following factors:
-
Personal style: Choose a design that reflects your personal taste and complements your overall riding style.
-
Compatibility: Make sure the design is compatible with your Yamaha RS 100 and won't interfere with any functional components.
-
Color scheme: Select a color scheme that complements your bike's existing paint job and enhances its overall appearance.
Enhancing Your Bike's Appearance with Custom Graphics
To enhance your Yamaha RS 100's appearance with custom graphics, consider the following tips:
-
Create a theme: Develop a cohesive theme for your bike using complementary colors, patterns, and designs.
-
Add personal touches: Incorporate personal elements, such as your name or initials, into the decal design to make your bike truly unique.
-
Experiment with placement: Try different placement options to find the perfect balance between aesthetics and functionality.
In conclusion, the Yamaha RS 100 Stock JRP X DAENG Decals offer a fantastic way to enhance your motorcycle's appearance and stand out from the crowd. With their high-quality materials, tailored design, and included freebies, these decals provide an excellent value for any Yamaha RS 100 owner looking to customize their ride.

Tuni Graphix
You May Also Like
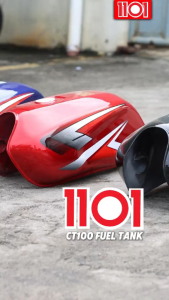
1101 Fuel Tank For CT100 Black Red Blue Gas Tank Made In Thailand High Quality
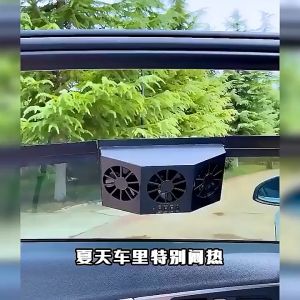
3 Head Car Fan USB Charge Big Wind Three Speed Control Back Seat Fan Auto Interior Accessories
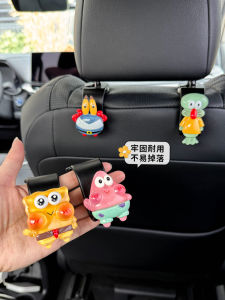
Cute Car Seat Back Hooks: Vehicle Interior Storage Solutions with Rotatable PVC Material for Front and Rear Seat Baggages and Accessories
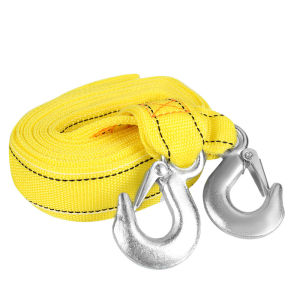
Car Tow Cable Heavy Duty 3Tons/5Tons 3M/4M Trailer Rope Towing Pull Rope with Hooks Emergency Rope Car Accessories

AUTOOL X60 OBD2 Display Speedmeter Tachometer Battery Voltage Water Oil Temperature Gauge Pressure Mileage Auto Scanner HUD
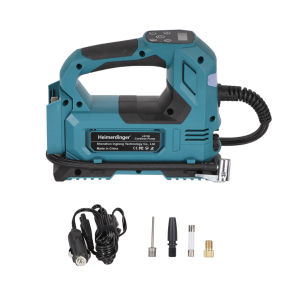
Cordless Air Pump For Car Bicycle Tires Balls Portable Car Tire Inflator Air Compressor For Makita 18V Battery No battery
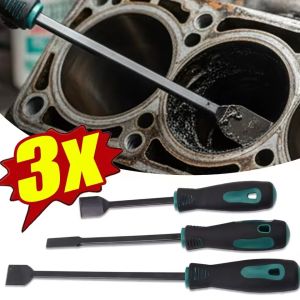
3PCS Motorcycle Engine Cylinder Oil Dirt Scraper Car Clean-up Rust Residue and Buildup Cleaning Supplies Motor Cleaning Tools

DEPO-221-1943-AE 2004 H100/PORTER TAIL LAMP ASSY ECE. HY.H100/POTER II..04.
Caravan Trailer Bracket with 15 Inch Turntable and Seals for 8000lbs Load Capacity
Kalynlun 2 Pieces LED Dynamic Turn Signal & Side Marker Light for Mazda 3, 5, 6, BT-50, & MPV
1.3L PS-08 60W Ultrasonic Cleaner with Heating Function for Diesel Common Rail Injector Plunger Nozzle Pump Parts