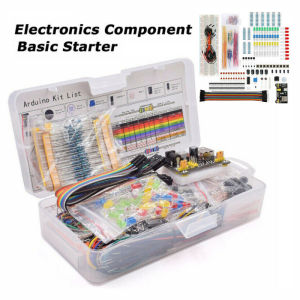
DIY Project Starter Kit For Arduino UNO R3 Kit Electronic DIY Kit Electronic Component Set With Box 830 Tie-points Breadboard
DIY Project Starter Kit For Arduino UNO R3 Kit Electronic DIY Kit Electronic Component Set With Box 830 Tie-points Breadboard
What is a DIY Project Starter Kit?
A DIY Project Starter Kit is a comprehensive set of tools and components designed to help beginners and hobbyists get started with electronic projects and prototyping using Arduino UNO R3. This kit includes everything needed to create basic circuits, learn programming skills, and explore various electronic components.
Understanding the Breadboard & Components
The breadboard is a crucial component of this kit, offering 830 tie-points for connecting electronic components. This allows users to easily assemble circuits without soldering, making it ideal for beginners and hobbyists alike. The included components, such as resistors, capacitors, LEDs, and potentiometers, enable users to experiment with various electronic functions and learn about basic circuit design.
Key Features of the Arduino UNO R3 Kit
The Arduino UNO R3 board is the heart of this DIY project starter kit. It provides a versatile platform for learning programming and electronics. Some key features include:
- Rugged and reliable design: The Arduino UNO R3 board is built to withstand the rigors of prototyping and experimentation.
- Multiple input/output pins: With 14 digital I/O pins, 6 analog inputs, and a USB connection, the Arduino UNO R3 offers ample connectivity options for various projects.
- Easy-to-use programming environment: The Arduino IDE provides a simple, intuitive interface for writing and uploading code to the board.
How to Use Your DIY Project Starter Kit
Now that you have an understanding of what a DIY project starter kit is and its key features, let's dive into how to use it effectively.
Setting Up Your Workstation
Before starting your first project, set up a clean, well-lit workspace with all necessary tools and components within reach. This includes the breadboard, wires, resistors, capacitors, LEDs, potentiometers, and the Arduino UNO R3 board.
Assembling Your First Circuit
To assemble your first circuit, follow these steps:
- Connect the Arduino UNO R3 board to your computer using a USB cable.
- Place the breadboard on your workspace and lay out the necessary components.
- Connect the components to the breadboard according to your project's requirements.
- Upload the appropriate code to the Arduino UNO R3 board using the Arduino IDE.
Programming Your Arduino UNO R3
Programming the Arduino UNO R3 board is simple and straightforward. Follow these steps to get started:
- Open the Arduino IDE on your computer.
- Select the correct board type and port from the Tools menu.
- Write or import your desired code into the IDE.
- Click the upload button to send the code to the Arduino UNO R3 board.
Tips & Tricks for Maximizing Your DIY Experience
To get the most out of your DIY project starter kit, here are some tips and tricks to keep in mind:
Troubleshooting Common Issues
If you encounter problems during your project, don't panic! Here are some common issues and their solutions:
- LEDs not lighting up: Check your connections and ensure that the LED is oriented correctly.
- Components not working: Double-check your connections and verify that the components are functioning properly.
- Code errors: Review your code for syntax errors and ensure that it matches your project's requirements.
Expanding Your Kit with Additional Components
As you become more comfortable with your DIY project starter kit, consider expanding your collection of electronic components. This will allow you to tackle more complex projects and further develop your skills.
Exploring Advanced Projects & Challenges
Once you've mastered the basics, challenge yourself by taking on more advanced projects. This will help you continue learning and growing as an electronics enthusiast.

WeLucky Shop
Review
You May Also Like

Beelink EQ14 MINI PC Intel Twin Lake N150 16G DDR4 3200MHz 500G/1TB PCIe 3.0 M.2 SSD Dual 2.5G LAN
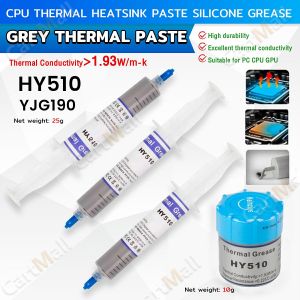
HY510 YJ-G190 Grey Thermal Paste for CPU GPU Cooler Cooling Heatsink Paste 25g 10g
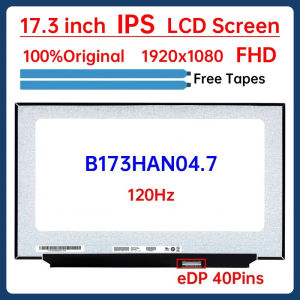
17.3 Inch 120Hz Laptop LCD Screen B173HAN04.7 For MSI MS-17F2 ASUS FX706LI FX706IU Display Matrix Panel 1920x1080 eDP 40 Pins
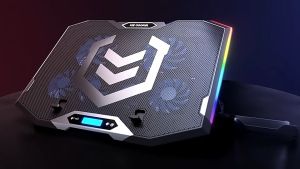
RGB Gaming Cooler: Laptop Cooling Pad with Adjustable Height & Quiet Fans
14 Inch 144Hz Laptop LCD Screen NE140QDM NX4 NE140QDM-NX4 Display Matrix Panel Replacement IPS 100% sRGB 2560x1600 eDP 40 Pins
Timers Relays Module Featuring Double Digital Display for Accurate Timing and Multipurpose Device Compatibility
【New Arrival】ESP8266 Breakout Board GPIO Breakout Expansion Board for ESP8266 ESP-12E NodeMCU Compatible with GPIO Expansion Board

ZEUSLAP 16" 60Hz Touch Screen Portable Monitors 1920*1200P 16:10 100%sRGB 300Nit Travel Gaming Display for Laptop Switch ps4 ps5 Xbox
MANMU Case Fans Air Cooling Fixed Color Rainbow Rgb Cooling Fan 120mm Computer Case Cooling Fans 2pin

Plextone EX2 Ultra EX2 Pro HeatSink Cooling Turbo Fan Mobile Phone Radiator RGB lights
![[COD] Yaokeqi 1Set 10 100 1000Mbps Gigabit Ethernet PCI Express PCI-E Network Card RJ-45 LAN Adapter Converter Network Controller](https://img.lazcdn.com/g/p/42fd21a2e827e2a88d0e4251e0acb863.jpg_300x300q80.jpg)
[COD] Yaokeqi 1Set 10 100 1000Mbps Gigabit Ethernet PCI Express PCI-E Network Card RJ-45 LAN Adapter Converter Network Controller