12V LED Module Indicator Light: A Comprehensive Guide
12V LED Module Indicator Light: A Comprehensive Guide
What is a 12V LED Module Indicator Light?
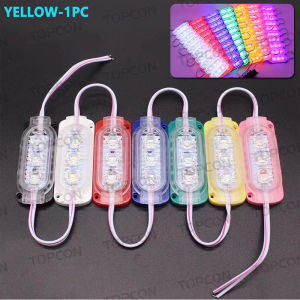
A 12V LED module indicator light is a compact, energy-efficient lighting solution designed for use in vehicles such as trucks, buses, lorries, and trailers. These lights serve as warning lamps and indicator lights, providing essential visual signals for drivers and pedestrians. They are known for their high brightness, low power consumption, and long lifespan.
Key Features
-
Compact design: These lights are small and easy to install, making them ideal for tight spaces within vehicles.
-
High brightness: With a high luminous flux, they provide excellent visibility even in low-light conditions.
-
Low power consumption: Compared to traditional incandescent bulbs, LED lights consume significantly less power, leading to reduced energy costs.
-
Long lifespan: LED lights have a longer operational life than conventional bulbs, reducing maintenance and replacement costs.
Benefits
-
Enhanced safety: LED indicator lights provide clear visual signals, improving safety for drivers and pedestrians.
-
Energy efficiency: They consume less power, leading to reduced energy costs and a smaller carbon footprint.
-
Cost-effective: With a longer lifespan, LED lights require fewer replacements, reducing maintenance costs.
How to Install a 12V LED Module Indicator Light
Installing a 12V LED module indicator light is a straightforward process that requires some basic tools and knowledge of electrical wiring. Here's a step-by-step guide to help you through the process.
Tools Needed
-
Screwdriver
-
Wire stripper
-
Electrical tape
-
Multimeter (optional)
Step-by-Step Installation Process
-
Turn off the vehicle's ignition and disconnect the battery to avoid any electrical hazards.
-
Locate the existing indicator light or warning lamp that needs to be replaced.
-
Remove the old light by unscrewing it from its housing or disconnecting it from the wiring harness.
-
Strip the wires if necessary and connect them to the new LED module indicator light according to the manufacturer's instructions.
-
Secure the new light in place using screws or clips, depending on the design.
-
Reconnect the battery and turn on the ignition to test the new light.
Troubleshooting Common Issues
If you encounter any problems with your 12V LED module indicator light, here are some common issues and their solutions.
Incorrect Wiring
If the light doesn't turn on or behaves erratically, it may be due to incorrect wiring. Double-check the connections and ensure they match the manufacturer's instructions. If necessary, consult a professional electrician.
Faulty Components
If the light still doesn't work after checking the wiring, there may be a faulty component. Inspect the LED module and other parts for any signs of damage or wear. Replace any faulty components as needed.
Maximizing the Performance of Your 12V LED Module Indicator Light
To ensure your LED module indicator light operates at its best, follow these tips for regular maintenance and cleaning.
Regular Maintenance
-
Check the wiring and connections periodically to ensure they remain secure and free from damage.
-
Replace any worn or damaged components as needed.
Cleaning and Care
-
Clean the light regularly using a soft cloth and mild detergent to remove dirt and debris.
-
Avoid using abrasive materials or harsh chemicals, as they may damage the LED module.
By following these guidelines, you can enjoy the benefits of a 12V LED module indicator light, including enhanced safety, energy efficiency, and cost-effectiveness.

topcon Tools
You May Also Like
MSM Motorcycle Spark plug C7HSA for Wave 100R / Mio Sporty / Soul
K-147 4pcs Car Back Seat Head Rest Double Hooks
Creative Cartoon Star Man Stickers for Car Window Electric Motorcycle Scratch Cover Stickers Adorable Sticker Decals
ALTIS 2019-2026 5D FULLY EXTENDED DEEP DISH MATTING

ToKerNew Vacuum Magnetic Suction Cup Car Phone Holder 360° Rotation Navigation Stand Bracket Car Magnetic Holder for Phone

KYMCO SCOOTER LIKE - Motorcycle SIDE MIRROR SMALL heavyduty Good Quality | STOCK TYPE | 1 PAIR

Fanttik Wireless Portable Car Vacuum Cleaner Slim V8 Mate V8 Apex Flexible Hose Pet Brush RobusClean 12000Pa 30AW
High Gloss & Moisturizing Tire Foam Cleaner: A Comprehensive Guide

Car ice silk cushion non-slip breathable lace-free memory foam car leather cushion office cushion suitable for all cars

For Volkswagen VW Phaeton Beetle BEC 2002~2019 Car Trash Bin Multipurpose Kit With Lid Leak-proof Portable Trash Can Accessories
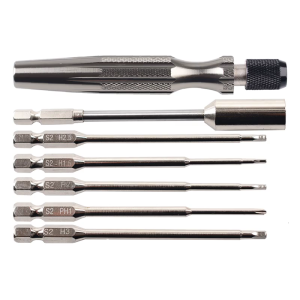
MultiPurpose Screwdriver and Socket Set for Remote Control Car Maintenance 6 in 1 Screwdriver Set