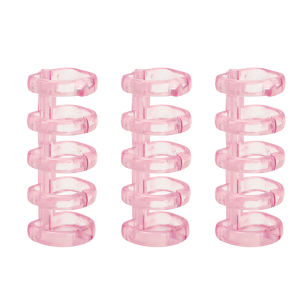
Plastic 5 Hole Binding Ring DIY Transparent Binder Loop A4 A5 A6 Loose-leaf Accessories Plastic Cover
Plastic 5 Hole Binding Ring DIY Transparent Binder Loop A4 A5 A6 Loose-leaf Accessories Plastic Cover
Introduction to Plastic Binding Rings
Plastic binding rings are a popular choice for organizing documents, notes, and other loose-leaf pages. These durable accessories are compatible with A4, A5, and A6 loose-leaf paper sizes, making them a versatile addition to any workspace. In this article, we will delve into the benefits of plastic binding rings and provide a step-by-step guide to creating your own DIY transparent binder loop.
Understanding the Benefits of Plastic Binding Rings
Plastic binding rings offer numerous advantages over traditional metal binding systems. They are lightweight, flexible, and resistant to rust and corrosion. Moreover, plastic binding rings are easy to use and maintain, making them a cost-effective solution for organizing documents.
Key Features of A4, A5, and A6 Loose-leaf Accessories
A4, A5, and A6 loose-leaf accessories are designed to accommodate standard paper sizes used in offices, schools, and homes. These accessories come in various forms, including plastic binding rings, transparent binder loops, and loose-leaf covers. Each accessory is tailored to meet specific organizational needs, ensuring that your documents remain neat, tidy, and easily accessible.
Step-by-Step Guide to Using DIY Transparent Binder Loops
Creating your own DIY transparent binder loop is a simple process that requires minimal tools and materials. Follow these steps to get started:
Preparing Your Materials
Before beginning, gather the following items:
- Transparent binder loops (compatible with A4, A5, and A6 paper sizes)
- Loose-leaf pages
- Scissors
- Hole puncher
Assembling the Transparent Binder Loop
- Punch holes in your loose-leaf pages using the hole puncher. Make sure the holes are aligned with the slots on the transparent binder loop.
- Insert the loose-leaf pages into the transparent binder loop, ensuring that the holes are securely fastened.
- Adjust the transparent binder loop to fit your desired document size.
Adding Loose-leaf Pages to Your Binder
Once your transparent binder loop is assembled, you can begin adding loose-leaf pages to your binder. Simply insert the pages into the transparent binder loop, ensuring that the holes are aligned with the slots on the loop. Repeat this process for each page you wish to add.
Tips for Maintaining Your Plastic Binding Ring DIY Transparent Binder
To ensure the longevity of your DIY transparent binder loop, follow these cleaning and storage tips:
- Wipe the transparent binder loop with a damp cloth to remove dust and debris.
- Store the transparent binder loop in a cool, dry place to prevent warping or damage.
Additionally, troubleshoot common issues by:
- Checking the alignment of the holes on your loose-leaf pages.
- Ensuring that the transparent binder loop is securely fastened around the pages.
Conclusion & Final Thoughts
In conclusion, plastic binding rings offer a practical and cost-effective solution for organizing documents, notes, and other loose-leaf pages. By creating your own DIY transparent binder loop, you can customize your organization system to meet your specific needs. Encourage readers to try this simple and effective method for keeping their documents neat, tidy, and easily accessible.

Anglebabylife
Review
You May Also Like
Self-Adhesive Cork Board Message Board Wall Sticker Combination Nursery Background Board Display Board No-Punching Required

Natural Stone Keychain Handmade With Green Chrysoprase Pink Moonstone And Rose Quartz Healing Energy Gift

Stackable Multifunctional Storage Box Organizer Stationary School Supplies Cosmetics Countertop Container Space Saver
1PC White Marker White Permanent Marker Office School Supplies Stationary Suitable for Many Surfaces
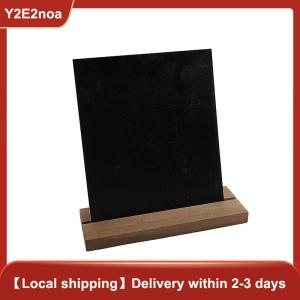
【Y2E2noa】 Message Board Display Sign Wooden Base Price Tag Black Chalkboards Memo Bar

DIY Large-Capacity Pen Container & Kids' Multifunctional Storage Box
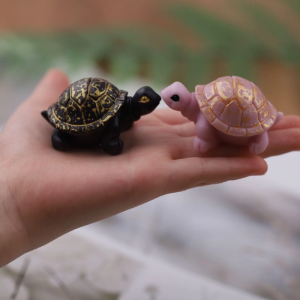
3D Little for Turtle Silicone Mold Soap Clay Making DIY Cake Tool Animal Art Craft Making Supplies

50PCS Shell Cartoon Sticker INS Style Cute Sea Creature Starfish Shell Graffiti PVC Vinyl Sticker Kid Toys
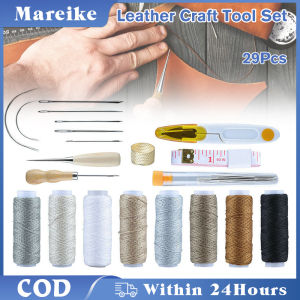
29Pcs/Set Leather Craft Tool Set: DIY Sewing Accessories & Leather Hand Sewing Needles
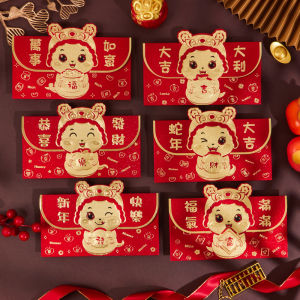
2025 Snake Year Horizontal 3D Cartoon Heat Gold Red Envelope Bag New Year Spring Festival Cute Festive Chinese Style Gift
Original Waterproof Marker Pen Steel Metal Color White Marker Paint Pens Permanent Paint Markers for Rock Wood Metal Plastic Glass Canvas Ceramic