


DIY Incubator Kit 220V W3001 Digital Temperature Controller Thermostat for Incubator+4.72x4.72inch Metal Blower Fan 220V
DIY Incubator Kit 220V W3001 Digital Temperature Controller Thermostat for Incubator+4.72x4.72inch Metal Blower Fan 220V
Introduction to DIY Incubator Kit & Components
Overview of DIY Incubator Kit
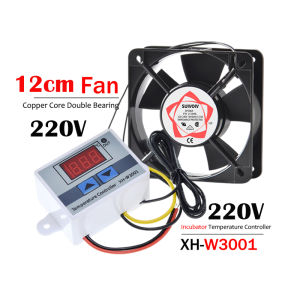
The DIY Incubator Kit 220V W3001 Digital Temperature Controller Thermostat is an excellent choice for those who wish to hatch eggs at home. This kit includes a digital temperature controller and a metal blower fan, both essential components for maintaining optimal incubation conditions.
Key Components: Metal Blower Fan & Thermostat
Metal Blower Fan 4.72x4.72inch
The metal blower fan included in this kit measures 4.72 inches by 4.72 inches and is powered by a 220V power supply. This fan ensures even air distribution throughout the incubator, preventing temperature fluctuations and promoting healthy embryo development.
Thermostat for Incubator
The digital temperature controller included in the DIY Incubator Kit allows for precise temperature control, ensuring that the incubator maintains optimal conditions for egg incubation. This thermostat is specifically designed for use with incubators and provides reliable temperature regulation.
Setting Up Your DIY Incubator Kit
Step-by-Step Guide to Assembling the Kit
Follow these simple steps to assemble your DIY Incubator Kit:
- Choose a suitable location for your incubator, away from direct sunlight and drafts.
- Assemble the incubator according to the manufacturer's instructions.
- Install the metal blower fan inside the incubator, ensuring that it is securely mounted and properly connected to the power supply.
- Connect the digital temperature controller to the incubator, following the manufacturer's instructions.
Connecting the 220V Digital Temperature Controller
To connect the digital temperature controller, follow these steps:
- Insert the probe into the incubator, ensuring that it is positioned correctly.
- Connect the power cord to the controller and plug it into a 220V outlet.
- Set the desired temperature using the controller's buttons.
Installing the Metal Blower Fan
To install the metal blower fan, follow these steps:
- Mount the fan inside the incubator, ensuring that it is securely attached.
- Connect the fan to the power supply, following the manufacturer's instructions.
Using the DIY Incubator Kit Effectively
Adjusting the Thermostat for Optimal Incubation
To ensure optimal incubation conditions, adjust the thermostat according to the specific requirements of the eggs you are hatching. For most bird species, a temperature range of 99°F to 102°F (37°C to 39°C) is ideal.
Monitoring Temperature & Humidity Levels
Regularly monitor the temperature and humidity levels within the incubator using a thermometer and hygrometer. Adjust the thermostat and humidity settings as needed to maintain optimal conditions.
Troubleshooting Common Issues
If you encounter any issues with your DIY Incubator Kit, refer to the manufacturer's troubleshooting guide. Common problems include temperature fluctuations, fan malfunctions, and controller errors. Address these issues promptly to prevent damage to the eggs and ensure successful hatching.

TREATS SHACK Brand
Review

You May Also Like
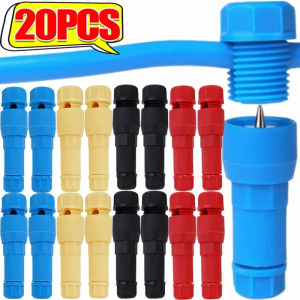
20Pcs Quick Electrical Cable Connector Low Voltage Wire Terminal Fastlock Piercing Connector Waterproof Crimp Wiring Terminals
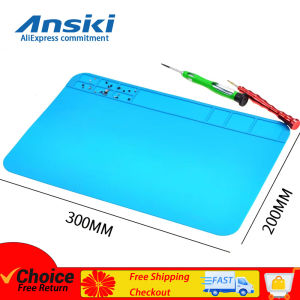
Ansiki 300x200mm Repair welding work pad High Temperature Resistant Silicone Pad ESD Anti-Static waterproof for Repair tool kit
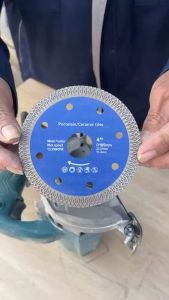
4 inch Tile Diamond Cutting Disc Wheel for Angle grinder Dry Wet Cutter Porcelain Granite Marble Ceramic 105/115mm
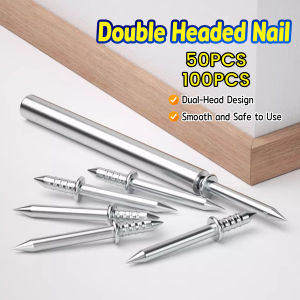
Seeko 50/100Pcs Double Headed Nail for Seamless Wood Paneling Non-marking Nails Skirting Line Fixator
Grease Coupler Kit 6PCS Carbon Steel Accessories Quick Connection Design Suitable For Industrial Maintenance
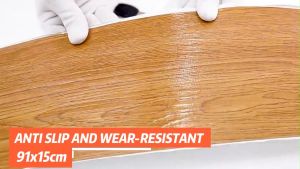
vinyl Floor Stickers Waterproof 3D Wood Grain Self-adhesive PVC 2mm thick 91X15cm modern vinyl tiles For Flooring Decoration
【1000G】10 in1 Resin washed stone Epoxy Colored Sand Floor Paint Self Leveling High Hardness Imitation Marble Cement Anti-skid Universal for indoor and outdoor use Imported from Germany
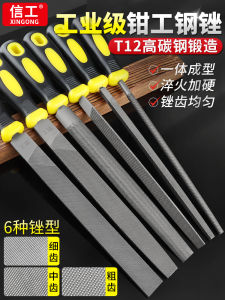
High Carbon Steel Bench File Metal Woodworking Tool Medium Fine Tooth Roughing Flat Head Barrel Handle Half round Triangular File
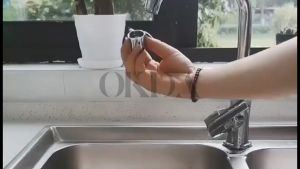
360 Degree Rotating Water Saving Tap With Filter 3rd Gear Can Adjust Faucet Extender Stainless Steel Kitchen Tap

1PC Elbow Pad Protector Brace Support Guard Arm Guard Gym Padded Sports Sleeve

KLIMO 260g Shoe Cleaner Eraser Leather Fabric Shoes Care Clean Brushes Rubber White Shoes Sneakers Boot Cleaner


