Understanding PCle IP KVM & Raspberry Pi V3 Hat: A Comprehensive Guide
Understanding PCle IP KVM & Raspberry Pi V3 Hat: A Comprehensive Guide
Introduction to PCle IP KVM & Raspberry Pi V3 Hat
In this article, we will explore the world of PCle IP KVM and Raspberry Pi V3 Hat, focusing on their integration and the benefits they offer.
What is PCle IP KVM?
PCle IP KVM (Keyboard, Video, Mouse) is a powerful technology that enables remote access and control of computers and servers over a network. With PCle IP KVM, users can manage multiple systems from a single location, reducing the need for physical access and minimizing downtime.
What is Raspberry Pi V3 Hat?
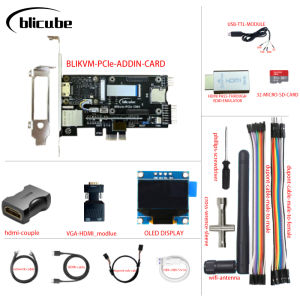
Raspberry Pi V3 Hat is an add-on board designed specifically for the Raspberry Pi 3 Model B/B+ single-board computer. It provides extended functionality, such as additional GPIO pins, power management, and connectivity options.
Setting Up Your PCle IP KVM & Raspberry Pi V3 Hat
In this section, we will guide you through the process of installing the Raspberry Pi V3 Hat and configuring PCle IP KVM.
Installing the Raspberry Pi V3 Hat
To install the Raspberry Pi V3 Hat, follow these steps:
- Power off your Raspberry Pi 3 Model B/B+.
- Carefully align the pins of the Raspberry Pi V3 Hat with the GPIO pins on the Raspberry Pi board.
- Press down gently until the hat is securely connected.
Configuring PCle IP KVM
Once the Raspberry Pi V3 Hat is installed, configure PCle IP KVM by following these steps:
- Connect the Raspberry Pi to a power source and a monitor via HDMI.
- Power on the Raspberry Pi and log in to the system.
- Install the necessary software packages and dependencies for PCle IP KVM.
- Configure the network settings and access control.
Exploring KVM Over IP Solution & HDMI CSI Interface
In this section, we will delve into the KVM Over IP solution and how to connect via the HDMI CSI interface.
Understanding KVM Over IP Solution
KVM Over IP solution allows users to remotely access and control multiple computers and servers through a network connection. This technology offers numerous benefits, including increased efficiency, reduced downtime, and enhanced security.
Connecting via HDMI CSI Interface
To connect your Raspberry Pi V3 Hat to a display using the HDMI CSI interface, follow these steps:
- Connect the HDMI cable to the Raspberry Pi V3 Hat and the display.
- Power on the Raspberry Pi and configure the necessary settings for the HDMI CSI interface.
Enhancing Your Setup with PiKVM Accessory
In this section, we will explore how to add a PiKVM accessory to your system and customize your setup.
Adding PiKVM Accessory to Your System
To enhance your PCle IP KVM setup, consider adding a PiKVM accessory. This accessory provides additional functionality, such as audio support, USB connectivity, and improved power management.
Customizing Your Setup
Customize your PCle IP KVM setup by configuring the necessary settings, such as network access, user permissions, and display resolution. This will help you optimize the performance and security of your system.
Conclusion & Next Steps
In conclusion, PCle IP KVM and Raspberry Pi V3 Hat offer a powerful combination for remote access and control of computers and servers. By following the steps outlined in this article, you can successfully integrate these technologies and enhance your setup with PiKVM accessories.
Wrapping Up
By now, you should have a solid understanding of PCle IP KVM, Raspberry Pi V3 Hat, and their integration. With this knowledge, you can confidently manage multiple systems remotely and improve your overall IT infrastructure.
Further Resources
For further information and resources on PCle IP KVM, Raspberry Pi V3 Hat, and PiKVM accessories, please refer to the official documentation and community forums.

Yisunder.sun
Review

You May Also Like
For X1C P1S P1P 4 in 1 Adapter Pipe Expansion Port Connector 4 Feeding Module 3D Printer Accessories Replacement
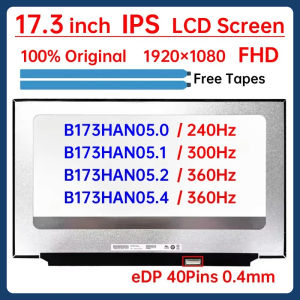
17.3" Laptop LCD Screen B173HAN05.0 B173HAN05.1 B173HAN05.2 B173HAN05.4 Display Matrix Panel Replacement 1920x1080 eDP 40 Pins
12V 2A 5A 10A 15A 20A Centralized Power Supply 12V 60W Power Adapt AC TO DC for Led Sign CCTV Camera
HP Notebook 250 InteL Core i5 6th gen 8GB 256GB ssd display windows 10 with freebies Preloved
High Current 80V 50A Diode Module Power Supply Industrial Ideal Diode Module Solar Controller Low Power
Multifuntional Fan Controller Manual Fan Controller Fan Speed Switch Cooling Fan Accessory for Electronic Devices
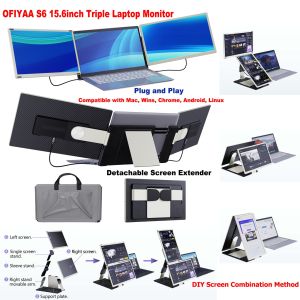
OFIYAA S6 15.6\" Laptop Screen Extender IPS FHD 1080P Portable Triple Laptop Monitor Extender with 80% NTSC Plug and Play Detachable Screen Extender Compatible with Mac Wins Chrome Android Linux
Laptop LCD Screen Middle Frame Rubber Bezel Trim Ring for Macbook Pro Air 13 A2159 A2179 A1932 Long Trim Line
Cooling Fan Control Unit Module OEM 499300-3400 89257-12010 4993003400 8925712010 L33L1515Y AJ51-15-15YA AJY2-15-SC0 AJ511515YA
YGT SLIM FHD Game Display Wide LED Monitor With AC Power Card and HDMI Cable included

Camera Cooling Fan for ZV-E1/A7M4/A7C/A7S3/ZV-E10/A6700/A7C2 Camera Live Streaming Video Recording Accessories