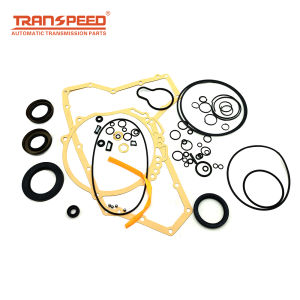
Transpeed JF010E RE0F09A CVT Auto Transmission Rebuild Master Kit for NISSAN Teana 3.5L Car Accessories
Transpeed JF010E RE0F09A CVT Auto Transmission Rebuild Master Kit for NISSAN Teana 3.5L Car Accessories
Introduction to Transpeed JF010E RE0F09A CVT Master Rebuild Kit & Overhaul Gasket Seal Kit
Transpeed, a leading manufacturer of automotive transmission parts, has introduced the JF010E RE0F09A CVT Master Rebuild Kit & Overhaul Gasket Seal Kit for NISSAN Teana 3.5L cars. This kit is specifically designed to help maintain the performance and longevity of your vehicle's automatic transmission system.
Key Features & Benefits
The Transpeed JF010E RE0F09A CVT Master Rebuild Kit & Overhaul Gasket Seal Kit offers several key features and benefits:
- Compatibility: This kit is compatible with NISSAN Teana 3.5L vehicles manufactured from 2002 onwards.
- Quality: All components in the kit are made from high-quality materials, ensuring reliable performance and long-lasting durability.
- Ease of installation: The kit includes clear instructions and all necessary components, making it easy for even novice mechanics to install.
- Cost-effective: By using this kit, you can save money on expensive transmission repairs or replacements.
Compatibility & Application
The Transpeed JF010E RE0F09A CVT Master Rebuild Kit & Overhaul Gasket Seal Kit is specifically designed for NISSAN Teana 3.5L vehicles with the OE number JF010E RE0F09A CVT. It is compatible with vehicles manufactured from 2002 onwards.
How to Install Transpeed JF010E RE0F09A CVT Master Rebuild Kit & Overhaul Gasket Seal Kit
Preparation & Tools Needed
Before installing the Transpeed JF010E RE0F09A CVT Master Rebuild Kit & Overhaul Gasket Seal Kit, make sure you have the following tools:
- Socket set
- Wrench set
- Screwdrivers
- Jack and jack stands
- Transmission fluid
Step-by-Step Installation Guide
- Jack up the vehicle: Use a jack and jack stands to safely lift the vehicle off the ground.
- Drain the transmission fluid: Remove the transmission pan and drain the old fluid.
- Remove the transmission pan: Carefully remove the transmission pan and inspect it for any damage or wear.
- Install the new gaskets and seals: Replace any worn or damaged gaskets and seals with the new ones included in the kit.
- Reinstall the transmission pan: Once the new gaskets and seals are installed, reinstall the transmission pan and tighten the bolts to the manufacturer's specifications.
- Refill the transmission fluid: Refill the transmission with fresh fluid according to the manufacturer's recommendations.
Maintaining Your NISSAN Teana 3.5L Transmission with Transpeed JF010E RE0F09E CVT Master Rebuild Kit & Overhaul Gasket Seal Kit
Regular Maintenance Tips
To ensure the longevity and performance of your NISSAN Teana 3.5L transmission, follow these regular maintenance tips:
- Check transmission fluid level: Check the transmission fluid level regularly and top it off if necessary.
- Replace transmission fluid: Follow the manufacturer's recommended schedule for replacing the transmission fluid.
- Inspect transmission components: Regularly inspect the transmission components for signs of wear or damage.
Troubleshooting Common Issues
If you experience any issues with your NISSAN Teana 3.5L transmission, try the following troubleshooting steps:
- Check transmission fluid level: Low transmission fluid can cause poor shifting and other transmission issues.
- Inspect transmission components: Inspect the transmission components for signs of wear or damage.
- Replace worn components: Replace any worn or damaged components with new ones.
Conclusion
In conclusion, the Transpeed JF010E RE0F09A CVT Master Rebuild Kit & Overhaul Gasket Seal Kit is an excellent choice for maintaining the performance and longevity of your NISSAN Teana 3.5L transmission. With its compatibility, quality, ease of installation, and cost-effectiveness, this kit is a must-have for any NISSAN Teana 3.5L owner.

TRANSPEED

Review

You May Also Like
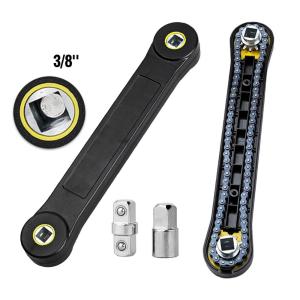
TEWUB Repair Tool Auto Replacement Parts Universal Automotive Adjustable 3/8" Spanner Extender Adaptor Extension Wrench Socket Ratchet
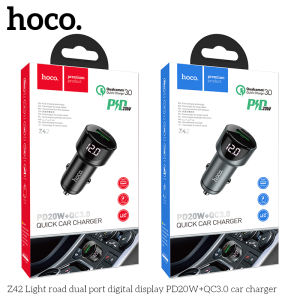
HOCO Z42 Original PD20W Fast Car Charger: A Comprehensive Guide
AIR LOCK TUBELESS FOR MOTOR TIRE INNERTUBE 2.50-17 2.75-17 2.50-18 2.15-18 3.00-17 3.00-18 90/90-18
TTGR Motorcycle Brake Pads Front:Honda RS125 FIRS150Wave DashXRM TrinityXRM 125 FIFIRaider-J 115Skydrive/FISZ-R

KYB KAYABA Front Shock Mounting Toyota Innova Hi-Lux (4X2) 2005 - 2022 w/out Bearing SM7159 1pc

For JAC Refine S2 S3 S5 S7 2013-2023 2014 2015 2016 2017 2018 2019 2020 2pcs Front Windshield Windscreen Wiper Blades Red Blue

AEROX 155 V1 GAUGE PROTECTOR - Buy 1 Get 1 Free
FOCAL K2 POWER Tweeter Car Audio Car Speaker ( Original )-2 year official warranty
THRASHER V2 Stickers for Motorcycle Sticker Waterproof Motor Helmet Sticker Hologram Vinyl Stikerss Motorcycle Decals

Steering Wheel Cover for Mazda 38cm Standard Size
MRP BEARING 6201-HIGH QUALITY MOTORCYCLE PARTS