3/4\" Right Angle Door Latch Hasp Barn Door Barrel Bolt 90 Degree Sliding Gate Safety Lock With Screws for Door Window Closet Barn Door
3/4" Right Angle Door Latch Hasp Barn Door Barrel Bolt 90 Degree Sliding Gate Safety Lock With Screws for Door Window Closet Barn Door
In this article, we will delve into the world of door hardware, specifically focusing on the 3/4" right angle door latch, safety locks, barrel bolts, and barn door safety hasps. We will explore their features, benefits, installation processes, and how they can enhance security for your doors, windows, and closets.
Understanding the 3/4" Right Angle Door Latch
Key Features & Benefits
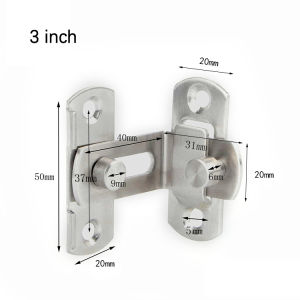
The 3/4" right angle door latch is a versatile piece of hardware designed to provide a secure locking mechanism for various types of doors, including closet doors, barn doors, and sliding gates. Some key features and benefits include:
- Compact Size: The compact design makes it easy to install and integrate into existing door frames.
- Durable Construction: Made from high-quality materials, this door latch is built to withstand daily wear and tear.
- Secure Locking Mechanism: The right angle design provides a robust locking system, keeping your doors and windows securely closed.
- Easy Installation: Simple installation process, requiring only basic tools and minimal effort.
How to Install the Right Angle Door Latch
To install the 3/4" right angle door latch, follow these steps:
- Measure and Mark: Measure the distance between the hinge and the desired position of the latch on the door frame. Mark the spot where the latch will be installed.
- Drill Holes: Using a drill, create holes at the marked spots for the latch and screws.
- Install Latch: Insert the latch into the hole on the door frame and secure it with the provided screws.
- Attach Latch Plate: Install the latch plate on the door itself, aligning it with the latch on the frame.
- Test Lock: Test the lock by closing the door and engaging the latch. Adjust if necessary.
Exploring the 90 Degree Sliding Gate Lock
Choosing the Right Sliding Gate Lock
When selecting a sliding gate lock, consider the following factors:
- Security Needs: Determine the level of security required for your gate, taking into account the size, weight, and material of the gate.
- Installation Requirements: Consider the existing hardware on your gate and whether the chosen lock will fit seamlessly.
- Ease of Use: Opt for a lock that is easy to operate, even for those with limited mobility or strength.
How to Install the Sliding Gate Lock
To install the 90 degree sliding gate lock, follow these steps:
- Prepare the Gate: Clean and dry the area where the lock will be installed, ensuring there is no debris or rust.
- Mark Installation Points: Measure and mark the points where the lock and screws will be installed.
- Drill Holes: Create holes at the marked points using a drill.
- Install Lock: Insert the lock into the holes and secure it with the provided screws.
- Test Lock: Test the lock by sliding the gate open and closed, engaging the lock mechanism.
Enhancing Security with Barrel Bolts & Screws
Types of Barrel Bolts & Screws
Barrel bolts come in various types, including:
- Standard Barrel Bolts: Basic design with a simple locking mechanism.
- Spring-Loaded Barrel Bolts: Incorporate a spring mechanism for added security.
- Deadbolt Barrel Bolts: Offer enhanced security through a deadlocking mechanism.
Screws used with barrel bolts can vary in size, material, and thread type, depending on the specific application.
How to Install Barrel Bolts & Screws
To install barrel bolts and screws, follow these steps:
- Measure and Mark: Measure the distance between the hinge and the desired position of the barrel bolt on the door frame. Mark the spot where the bolt will be installed.
- Drill Holes: Using a drill, create holes at the marked spots for the barrel bolt and screws.
- Install Barrel Bolt: Insert the barrel bolt into the hole on the door frame and secure it with the provided screws.
- Attach Bolt Plate: Install the bolt plate on the door itself, aligning it with the barrel bolt on the frame.
- Test Lock: Test the lock by closing the door and engaging the barrel bolt. Adjust if necessary.
Securing Your Closet, Barn Door & Windows
Door Window Closet Lock Solutions
For securing your closet doors, barn doors, and windows, consider the following lock solutions:
- Door Latches: Use the 3/4" right angle door latch for secure locking of closet and barn doors.
- Sliding Gate Locks: Opt for the 90 degree sliding gate lock for added security on sliding doors.
- Barrel Bolts: Enhance security with barrel bolts and screws for both doors and windows.
Barn Door Safety Hasp Installation
To install a barn door safety hasp, follow these steps:
- Measure and Mark: Measure the distance between the hinge and the desired position of the hasp on the door frame. Mark the spot where the hasp will be installed.
- Drill Holes: Using a drill, create holes at the marked spots for the hasp and screws.
- Install Hasp: Insert the hasp into the hole on the door frame and secure it with the provided screws.
- Attach Hasp Plate: Install the hasp plate on the door itself, aligning it with the hasp on the frame.
- Test Lock: Test the lock by closing the door and engaging the hasp mechanism. Adjust if necessary.
Conclusion & Final Thoughts
In conclusion, the 3/4" right angle door latch, safety locks, barrel bolts, and barn door safety hasps offer versatile and secure solutions for various types of doors, windows, and closets. By understanding their features, benefits, and installation processes, you can enhance the security of your home or business. Remember to consider factors such as security needs, installation requirements, and ease of use when selecting the appropriate hardware for your specific application.

MYDirect
Review
You May Also Like

Embedded Desktop Socket Side Sliding Hidden Multi-function Socket With Wireless And USB Charging

Roof Water Tank Float Switch | Double Float Level Controller | Heavy Duty Rustproof Automatic
![[Valitoo] 2Pcs rectangular cube spirit level bubble measuring level ruler detector tool](https://img.lazcdn.com/g/p/a0c7e93b696bf9fdf2c9577c496d4a08.jpg_300x300q80.jpg)
[Valitoo] 2Pcs rectangular cube spirit level bubble measuring level ruler detector tool

Wadfow Mini Ball Pein Hammer 8oz. with Fiberglass Handle
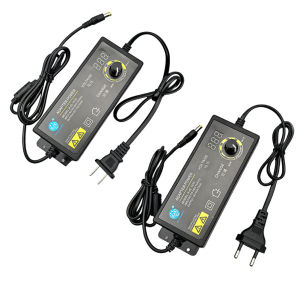
Winnereco 3-12V 8A Power Supply Adapter Variable Switching Power Adapter AC To DC Converter Transformer for Speed Regulation
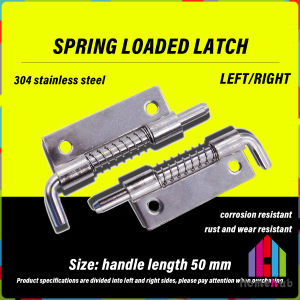
Homehub 304 Stainless Steel Loaded Hinge Spring Bolt Barrel Latch Hardware for Cabinet Door

Moketa Electric Sander 220V Orbital Sanding Polishing Machine Power Tools for Carpentry
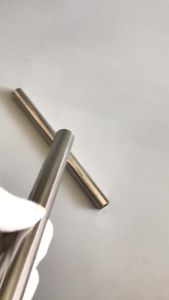
OD19x2mm Outer Diameter 19mm Wall Thickness 2mm Inner Diameter 15mm Tolerance 0.05mm 304 Stainless Steel Tube Precision

Aluminum Foil Butyl Rubber Tape: A High-Temperature Resistance Waterproof Solution
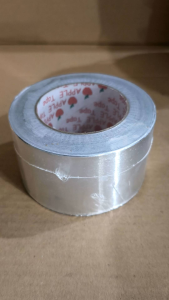
Aluminum Tape with Foil Assorted Size 1” 2” 3”
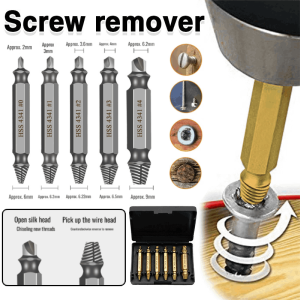
5 Pcs Damaged Screw Extractor Drill Universal Guillotine Bolt Screw Removal Tool Multifunctional Broken Wire Extractor